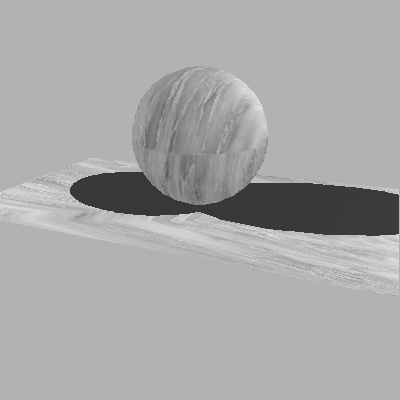
Fig 1.Sphere texture mapped with marble
by Chris Bentley
In texture mapping, an image is used essentially as a look up table: whenever a pixel in the projection of the model is about to be plotted, a lookup is performed into the image. Whatever color is in the image at the sampled position, becomes the color that is plotted for the model. The color discovered by checking in the image can be used without modification, or it can be blended with the color computed from lighting equations for the model. It is also common for the value from the image to be used to modulate one of the parameters of the ordinary lighting equations. For example the surface normal at a point in the model can be perturbed proportional to the value found in the image lookup.

Fig 1.Sphere texture mapped with marble
Assigning (u,v) to Vertices
There are numerous methods, described by Watt [WATT92], for associating (u,v) values to each vertex. One simple method can be termed "latitude/logitude mapping". Another method assigns (u,v) values at the stage of building the polgon model of an object. If this is done, knowledge of the shape of the object can be used to make intelligent assignments of parameter values.
In latitude/longitude mapping, the normal of the surface at each vertex is used to calculate (u,v) values for that vertex. The normal is a vector of three components: N = (x,y,z). The question is how to represent this triple as a vector of only two components. The answer is to convert the 3D cartesian coordinates into spherical coordinates, i.e to longitude and latitude. Spherical coordinates can express any point on a unit sphere by two angles. The longitude angle describes how far "around" the sphere the point is, and the latitude angle describes how far "up".
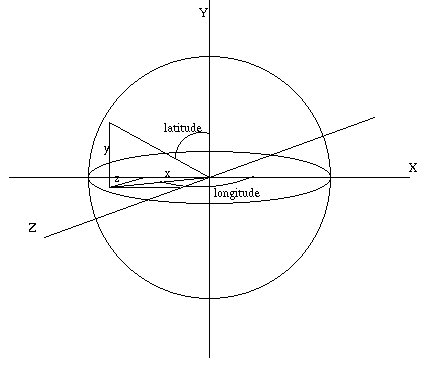
Fig 2.Latitude/Longitude mapping
Since, we can think of the vertex normal as specifying a point on a unit sphere, we can convert each vertex normal N = (x,y,z), to spherical coordinates, and then use the latutude/longitude tuple as (u,v) values for indexing into our texture image.
Each point, P on the unit sphere, can be expressed in spherical coordinates as:
          longitude = arctan( z/x );
          latitude = arccos( y );
The (u,v) values calculated in this manner can then be used to
index into the texture image. For example a u value of 0.3
would translate to an image pixel one third of the way across the image.
/****************************************************************/
/* norm_uv - convert normal vector to u, v coordinates          */
/****************************************************************/
static void norm_uv( norm, u, v )
VECT norm;
double *u;
double *v;
{
        *u = (FLT_ZERO(norm[0])) ? 0.5 : atan2pi(norm[2], norm[0]);
        *v = (asinpi(norm[1]) + 0.5);
}

/****************************************************************/
/* map - find image color for a given u, v pair                 */
/****************************************************************/
static unsigned char map( u, v, image )
double u;
double v;
IMAGE *image;
{
        unsigned int x, y, index;

        x = (unsigned int)(u * image->width);
        y = (unsigned int)(v * image->height);

        index = (y * image->width) + x;

        return( image->data[index] );

}
Once the vertices of a model have been assigned (u,v) texture coordinates, there still remains the task of interpolating these coordinates to derive (u,v) values for pixels in the interior of the polygon. This can be done using bilinear interpolation, much like the interpolation of intensity values done in Gouraud shading. This method suffers from the same problem as scan line shading algorithms in general: the (u,v) are interpolated uniformly in screen space. However, because of perspective distortion, the point half way between two vertices in screen space is not half way between the vertices in world space! So uniform interpolation is not in fact correct in this setting.
In Gouraud shading, when rendering a scan line, only z and intensity values are interpolated because along the scan line y is constant. In texture mapping, as a scan line is rendered, both u and v need to be incremented for each pixel, because in general a horizontal line across the projected polygon will translate to a diagonal path taken through the texture space. As can be seen in Fig 3. below, as the indicated scan line is rendered pixel by pixel, both the u and v will need to be interpolated.
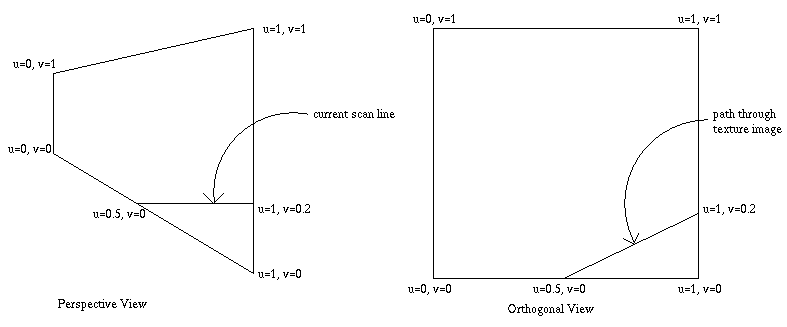
Fig 3.Texture scan line rendering
Fig 4. Blending texture color and lighting
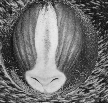
Fig 5. Texture color weighted more heavily
There are many areas of advanced texture mapping that are not explored here: mip-mapping and area sampling to reduce anti-aliasing; perspective correction; other mapping techniques. Texture mapping is a very powerful method for adding photographically realistic effects to computer generated images, without the expense of creating excessively complex polygonal models.
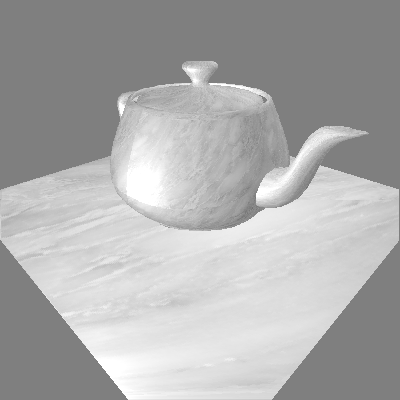
Fig 6.Teapot texture mapped with marble