v2.16
Last updated: January 19, 2022
Alternate document formats: [md] [pdf] [docx]
Short introduction: [video][slides]
Longer introduction: [slides]
If you built your own lightboard - using this blog or something else - please send me (claypool@cs.wpi.edu) a picture! I've been collecting pics of DIY lightboard setups.
overview | build | studio | software | other | links | gallery
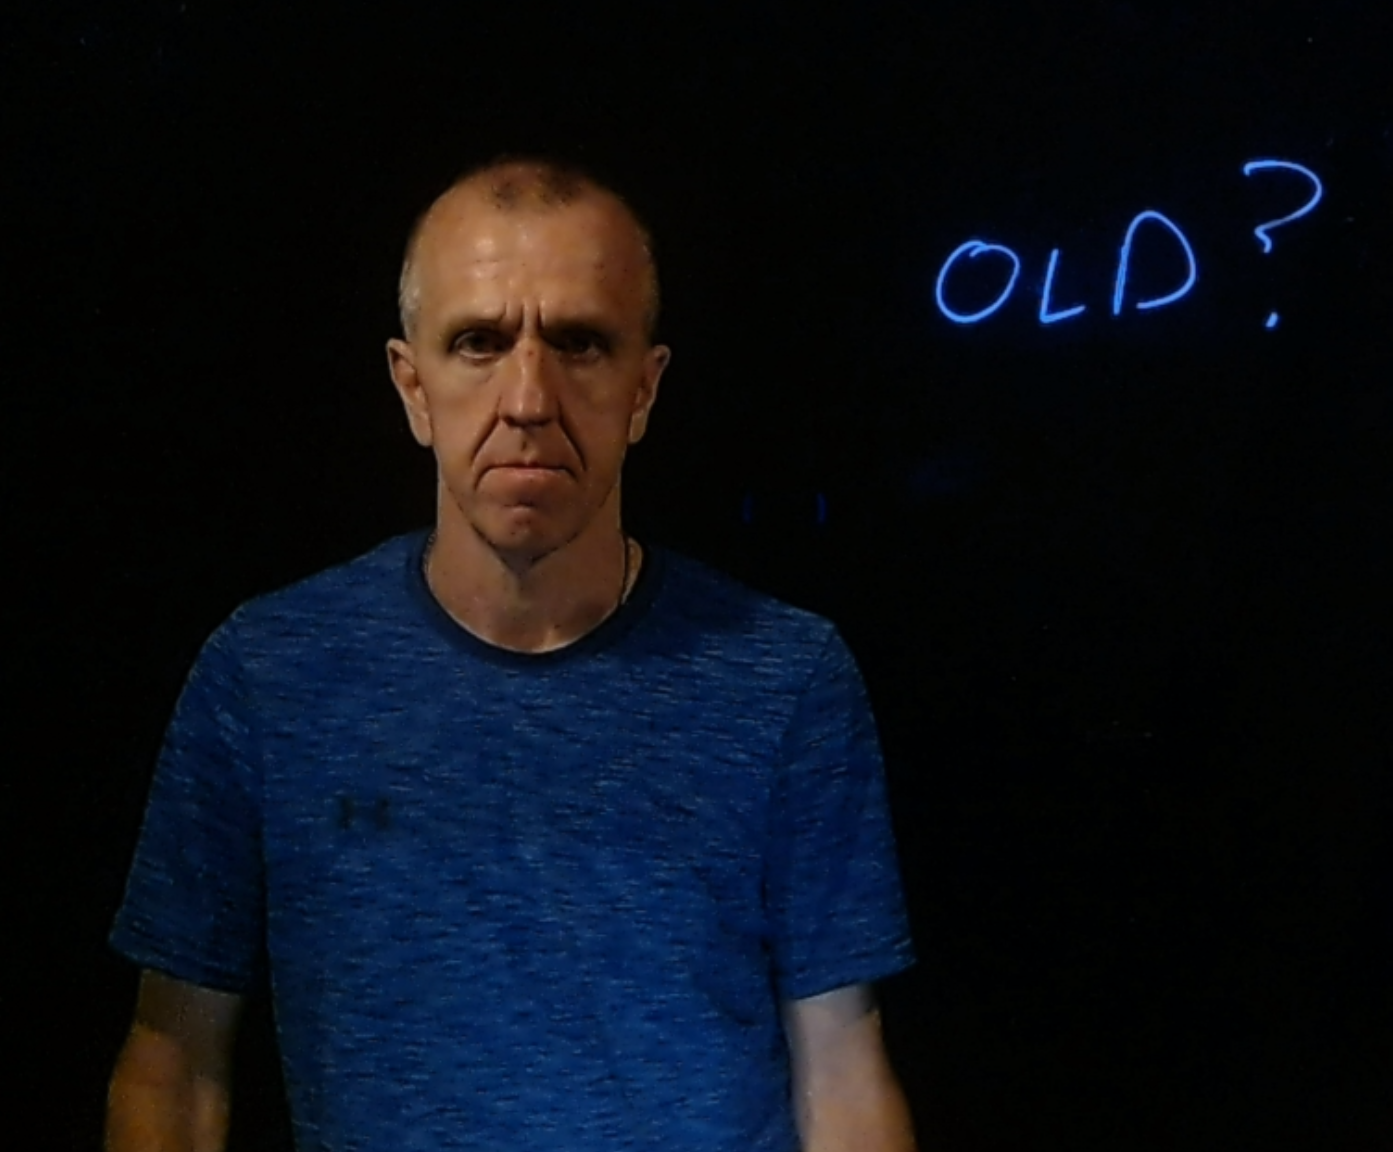
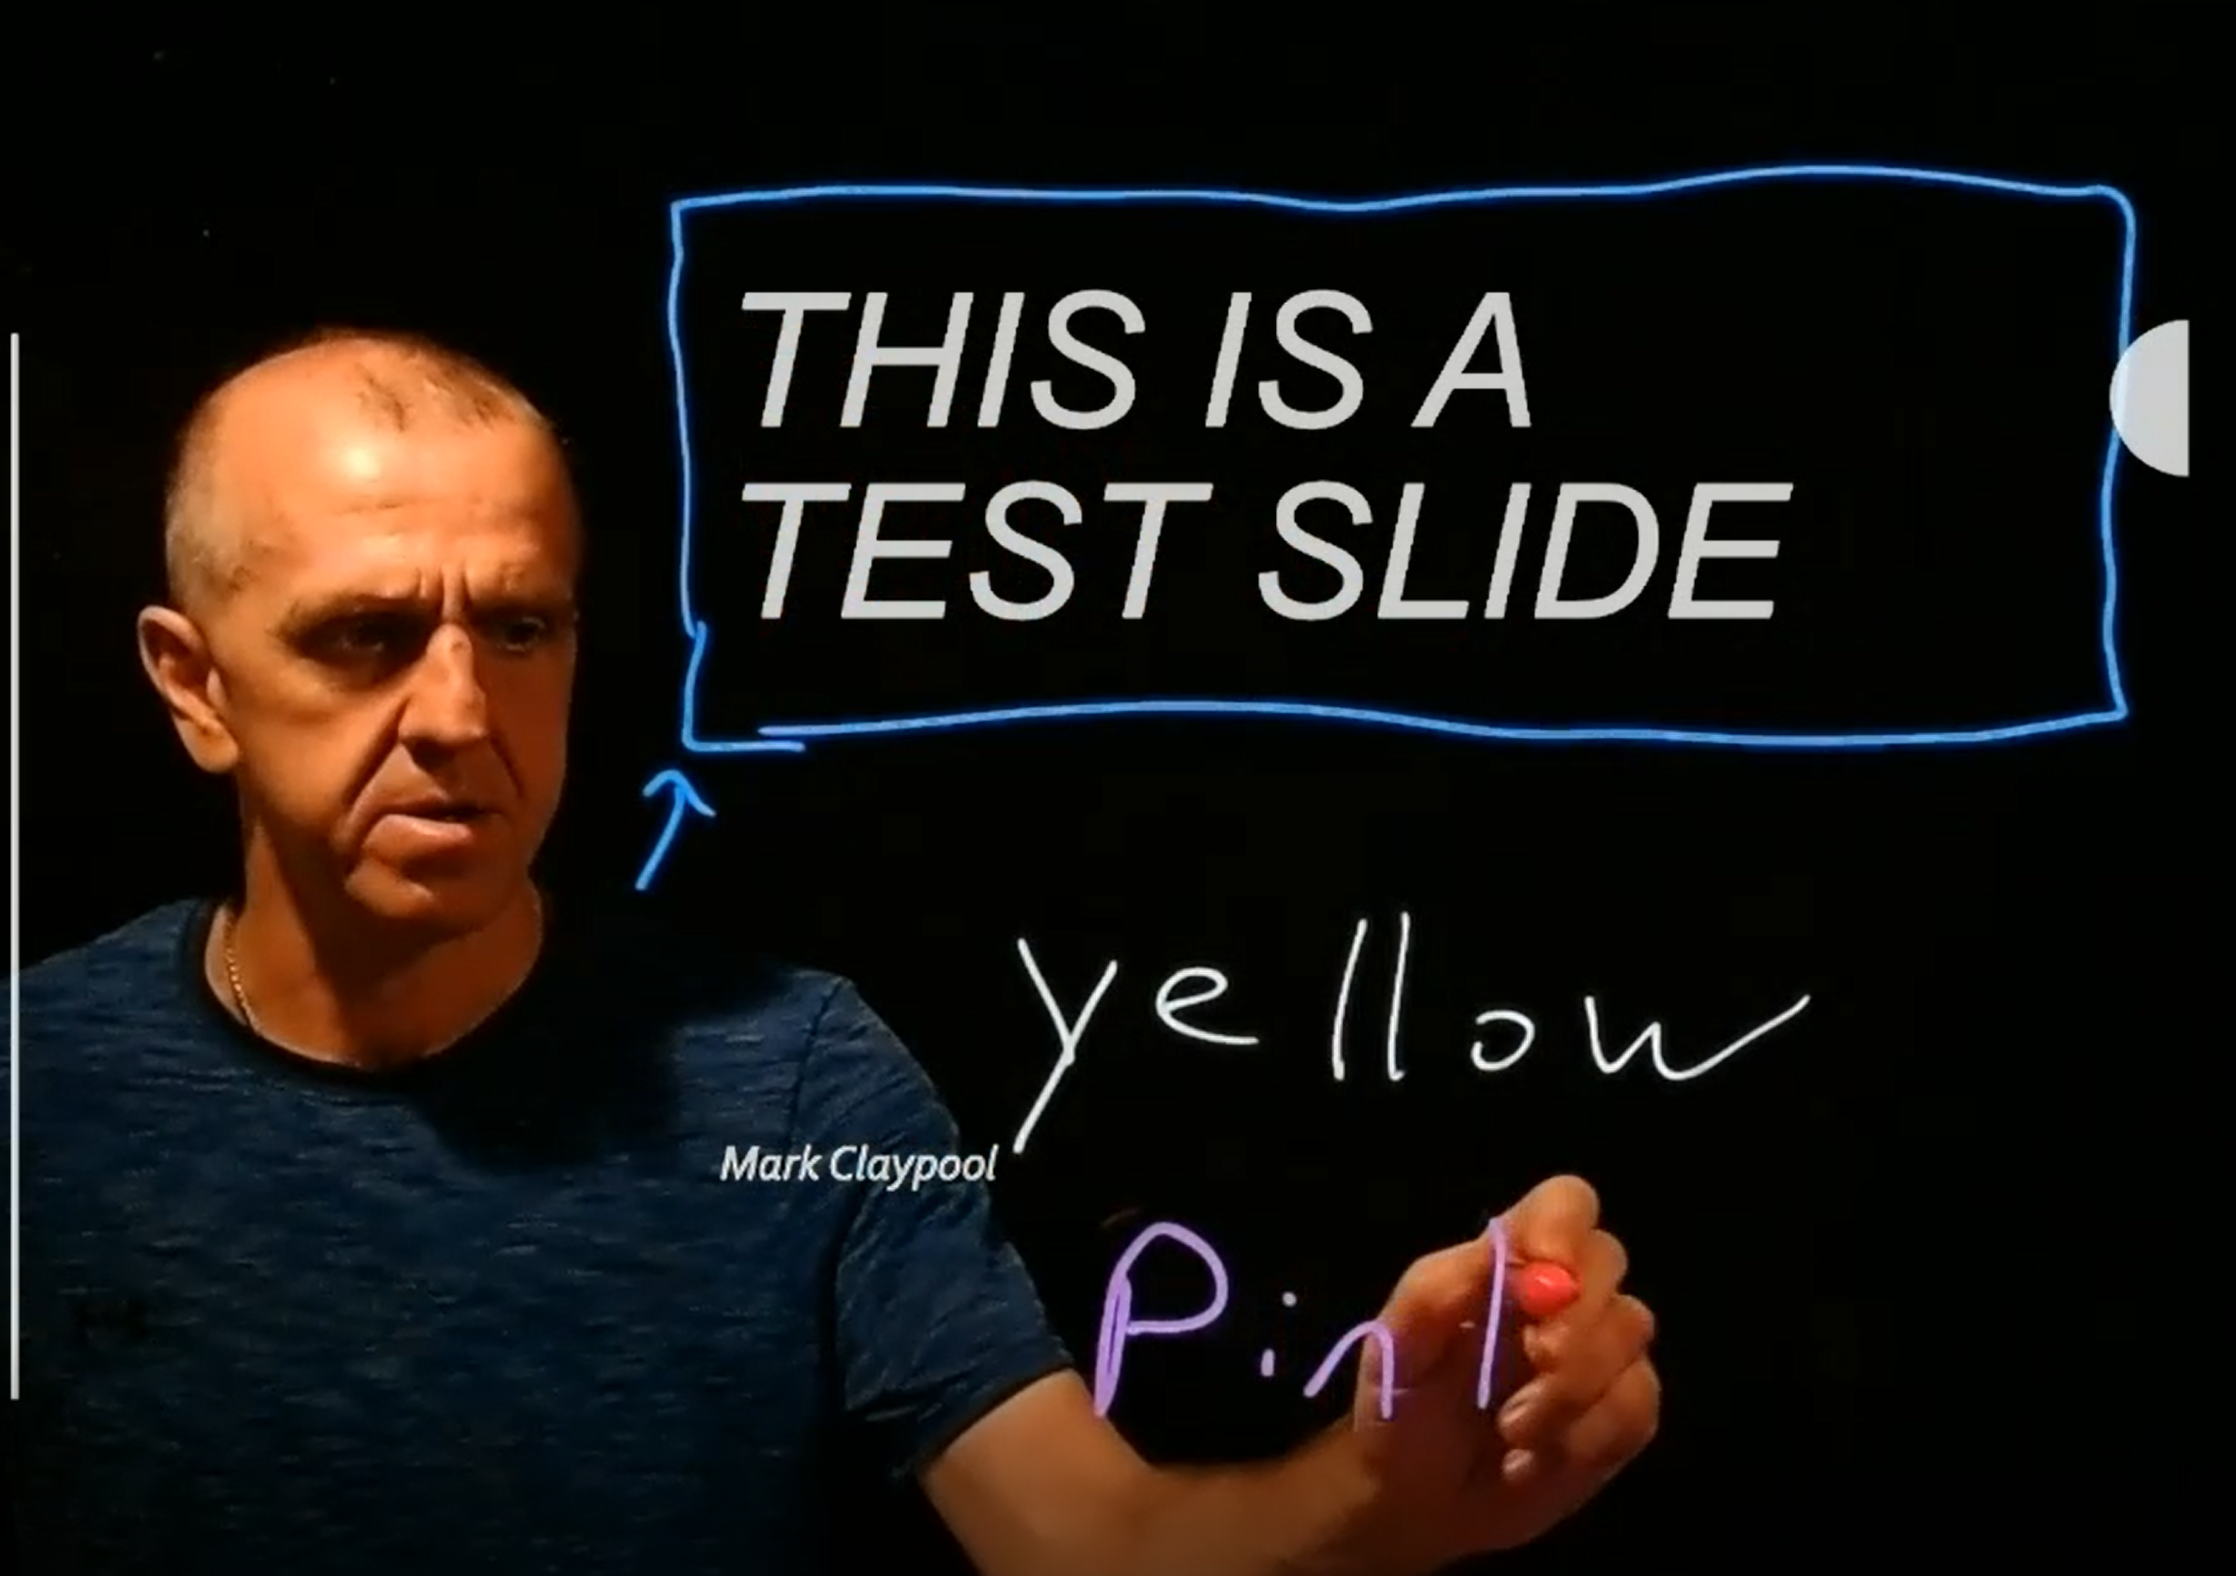
![]()
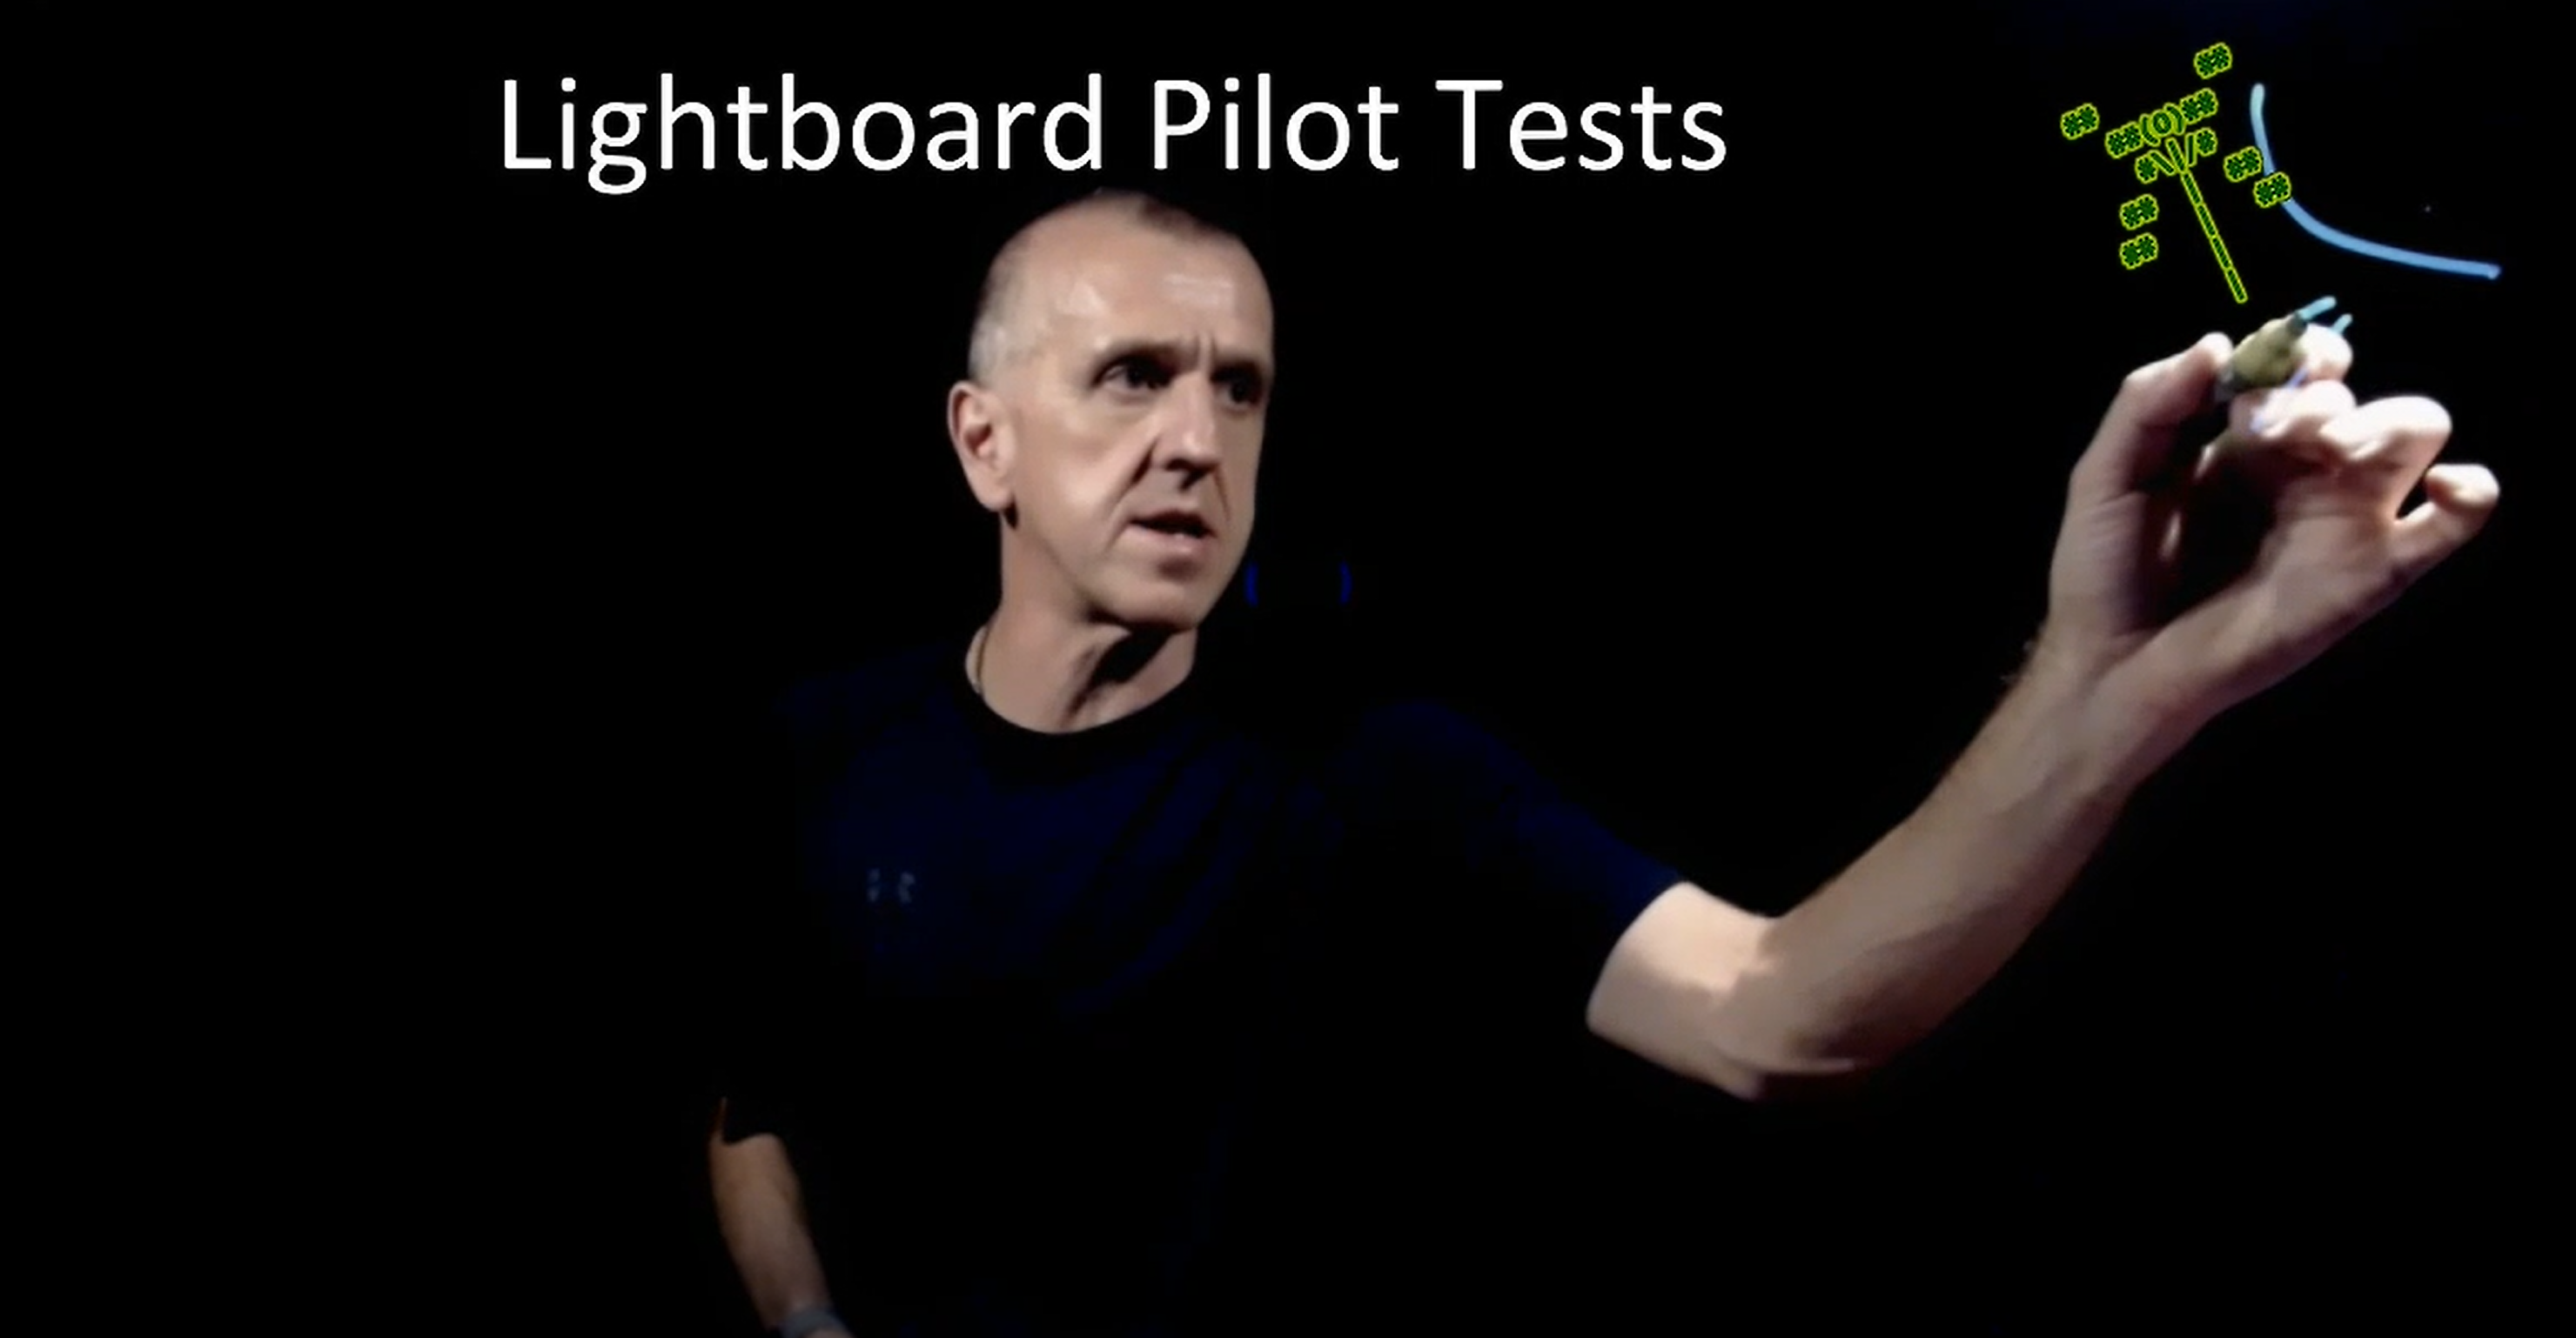
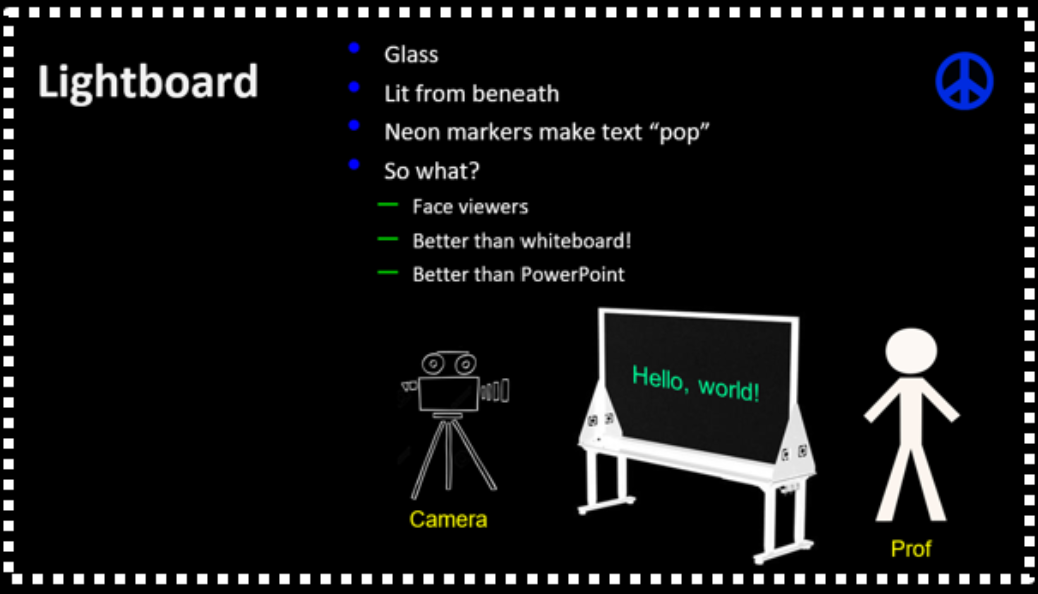
With the COVID-19 pandemic, a lot of traditional classroom teaching (including mine) moved online. An online lecture-helper option is the lightboard, designed to allow for whiteboard-style lectures, but where the lecturer faces the audience and writes in the air. Purchasing a lightboard can be expensive (about $2300 to buy just a tabletop lightboard), similar in function to the one presented in this blog, or up to about $8000 for a build-it-yourself studio). Fortunately, there are some inexpensive build options (the lightboard itself about $100, and total studio setup can be less than $200). This document details one such option - a 2'x4' tabletop lightboard studio.
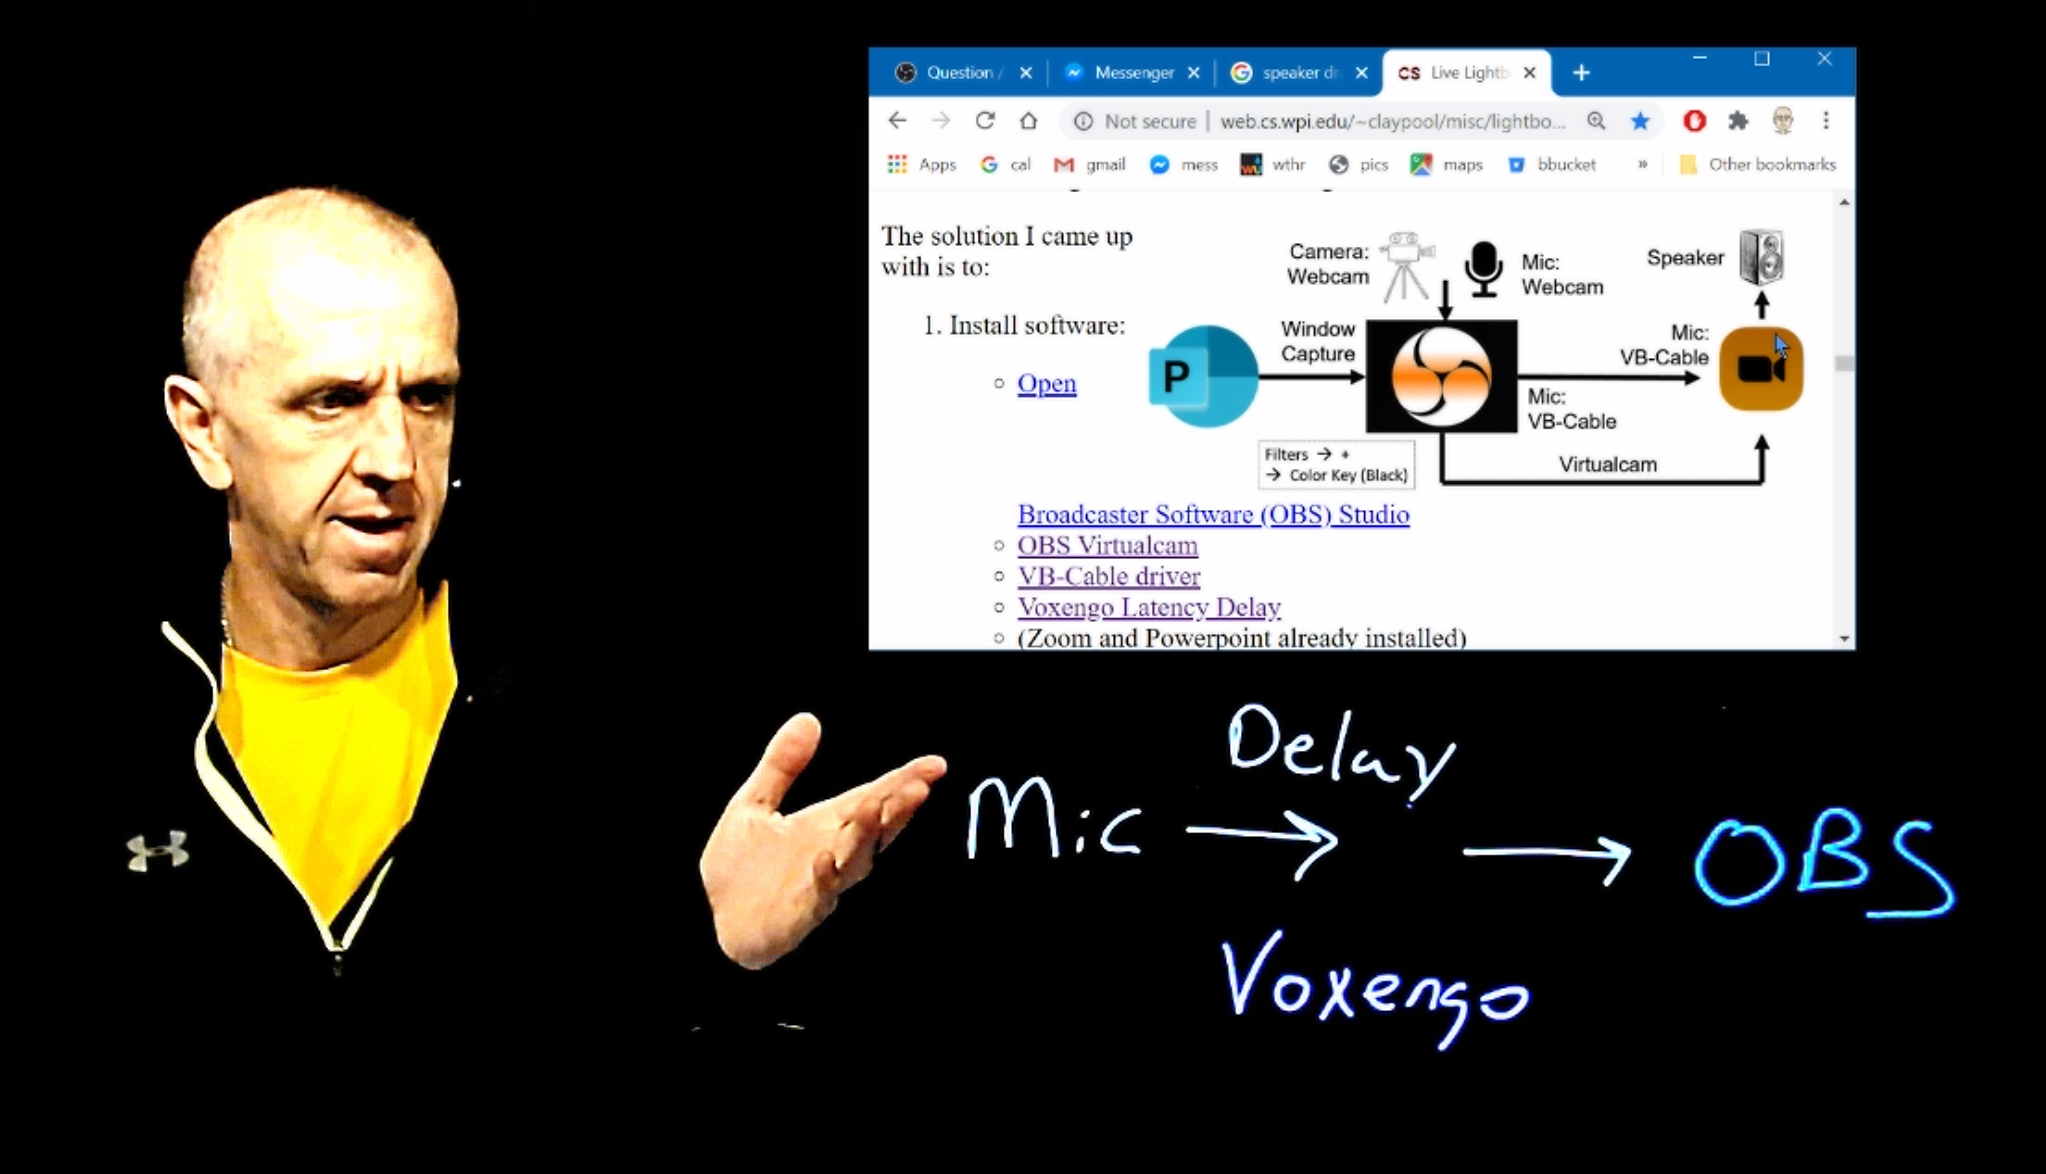
Once setup, a bit of software is needed to record lectures. In fact, most lightboard studios are setup to pre-record lectures, useful for, say, a flipped classroom. However, for my teaching, I wanted to have synchronous classes, where I can lecture in real time to the students. Setting up software to delivering live lectures takes a bit more software installation and setup. This document details one approach that works with Zoom.
My traditional classroom lectures make heavy use of Powerpoint. I wanted to be able to use Powerpoint in conjunction with lightboard annotations in real-time over Zoom. This takes a bit more software setup and configuration, and is described below.
There are also a few other tips and tricks - such as a monitor on the opposite side to see the class- that I discovered along the way. This document provides these tips in a more abbreviated form, but also gives links (e.g., to parts and other Web resources) that may be of use. It ends with a picture gallery from my setup.
So, to recap, some cool things in this blog:
Enjoy!
overview | build | studio | software | other | links | gallery
And a computer with a good Webcam and Internet connection (unfortunately, I don't think you can do the software setup in the rest of this blog with just an Ipad or just a mobile phone).
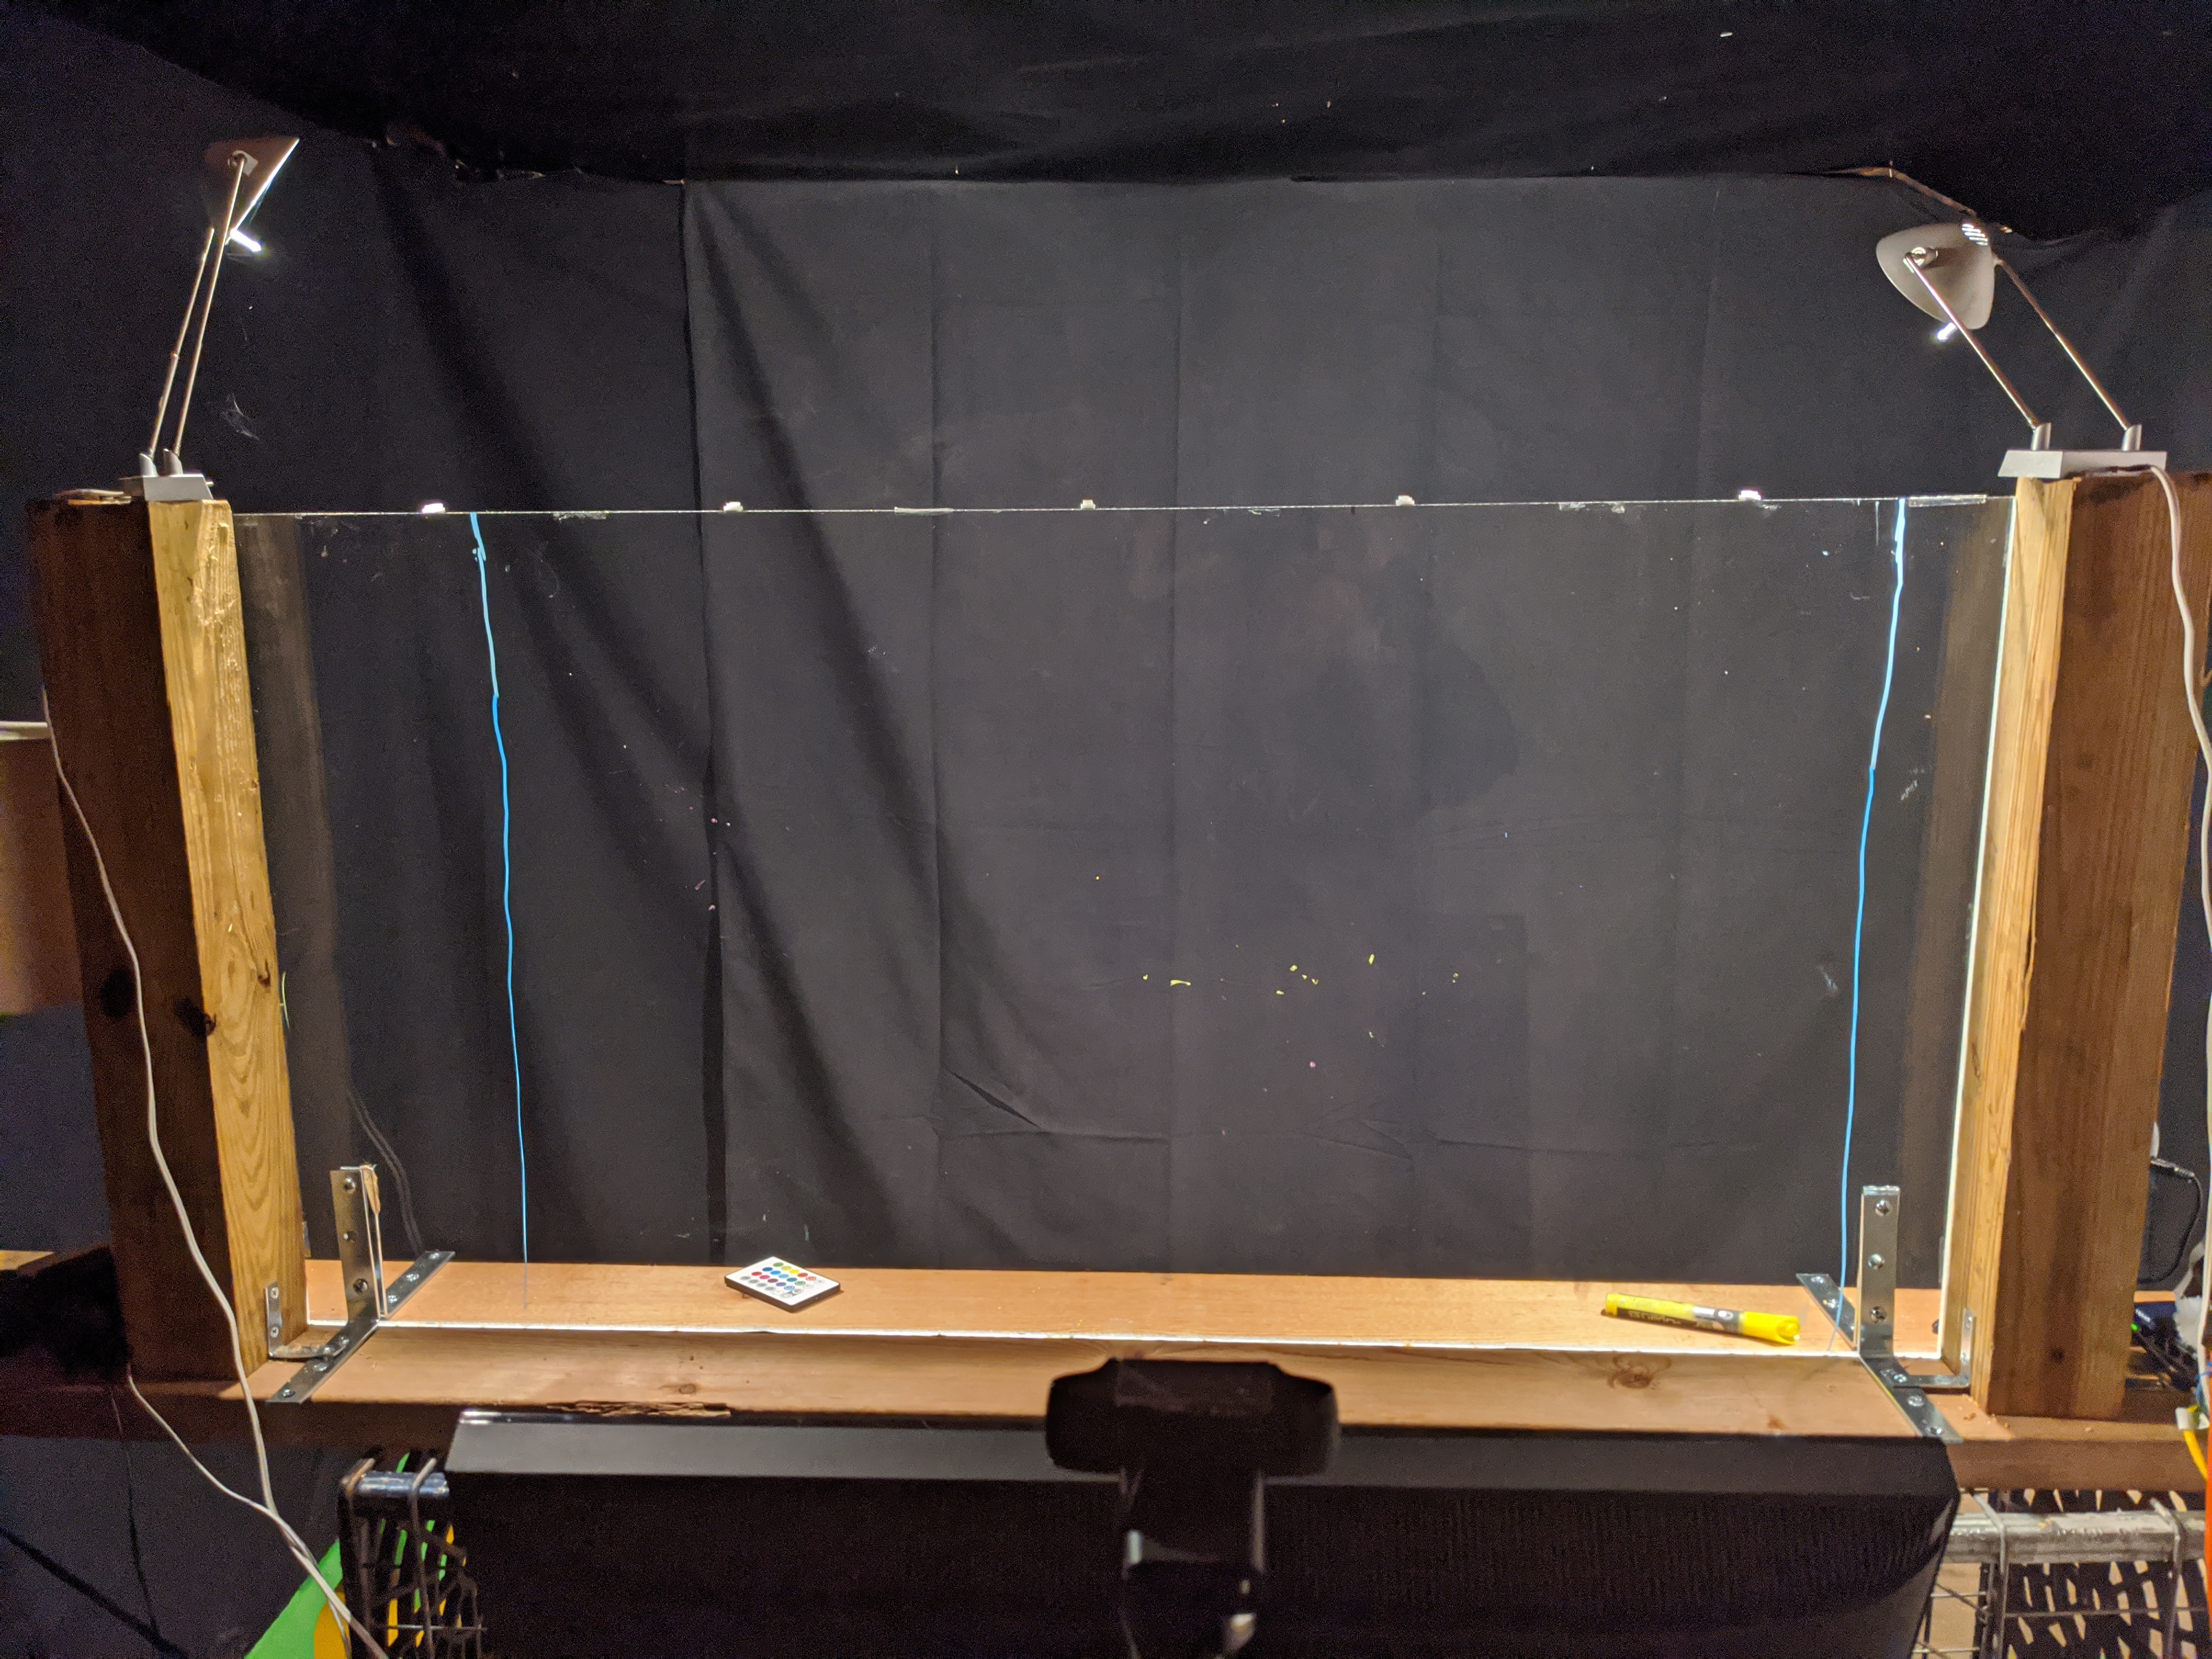
Note 1: there are many options for the above which can be explored for alternate designs or so as not to buy everything new. A short list includes: A) The acrylic glass can be mounted in a wooden frame instead of drilled; B) Tempered glass (like from an aquarium) can be used instead of acrylic glass; C) Black paint on a wall can be used instead of a backdrop cloth; D) Lights can be found around the house that are either directional or made directional/focused with cardboard and tape (that's what I did); E) Boxes or some such can be used instead of a camera stand; F) A regular drill bit can be used instead of a plastic one; G) a mobile phone can be used as a camera.
Note 2: acrylic sheets were hard to find when I was building my lightboard. Businesses had snapped them up, all thicknesses and sizes, in order to make sneeze/corono-guards for cash registers and such. But with a bit of persistence, I found one (at ACME Plastics).
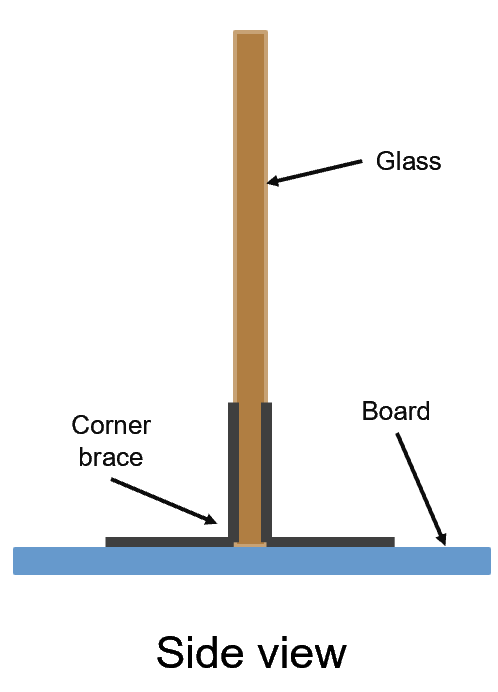
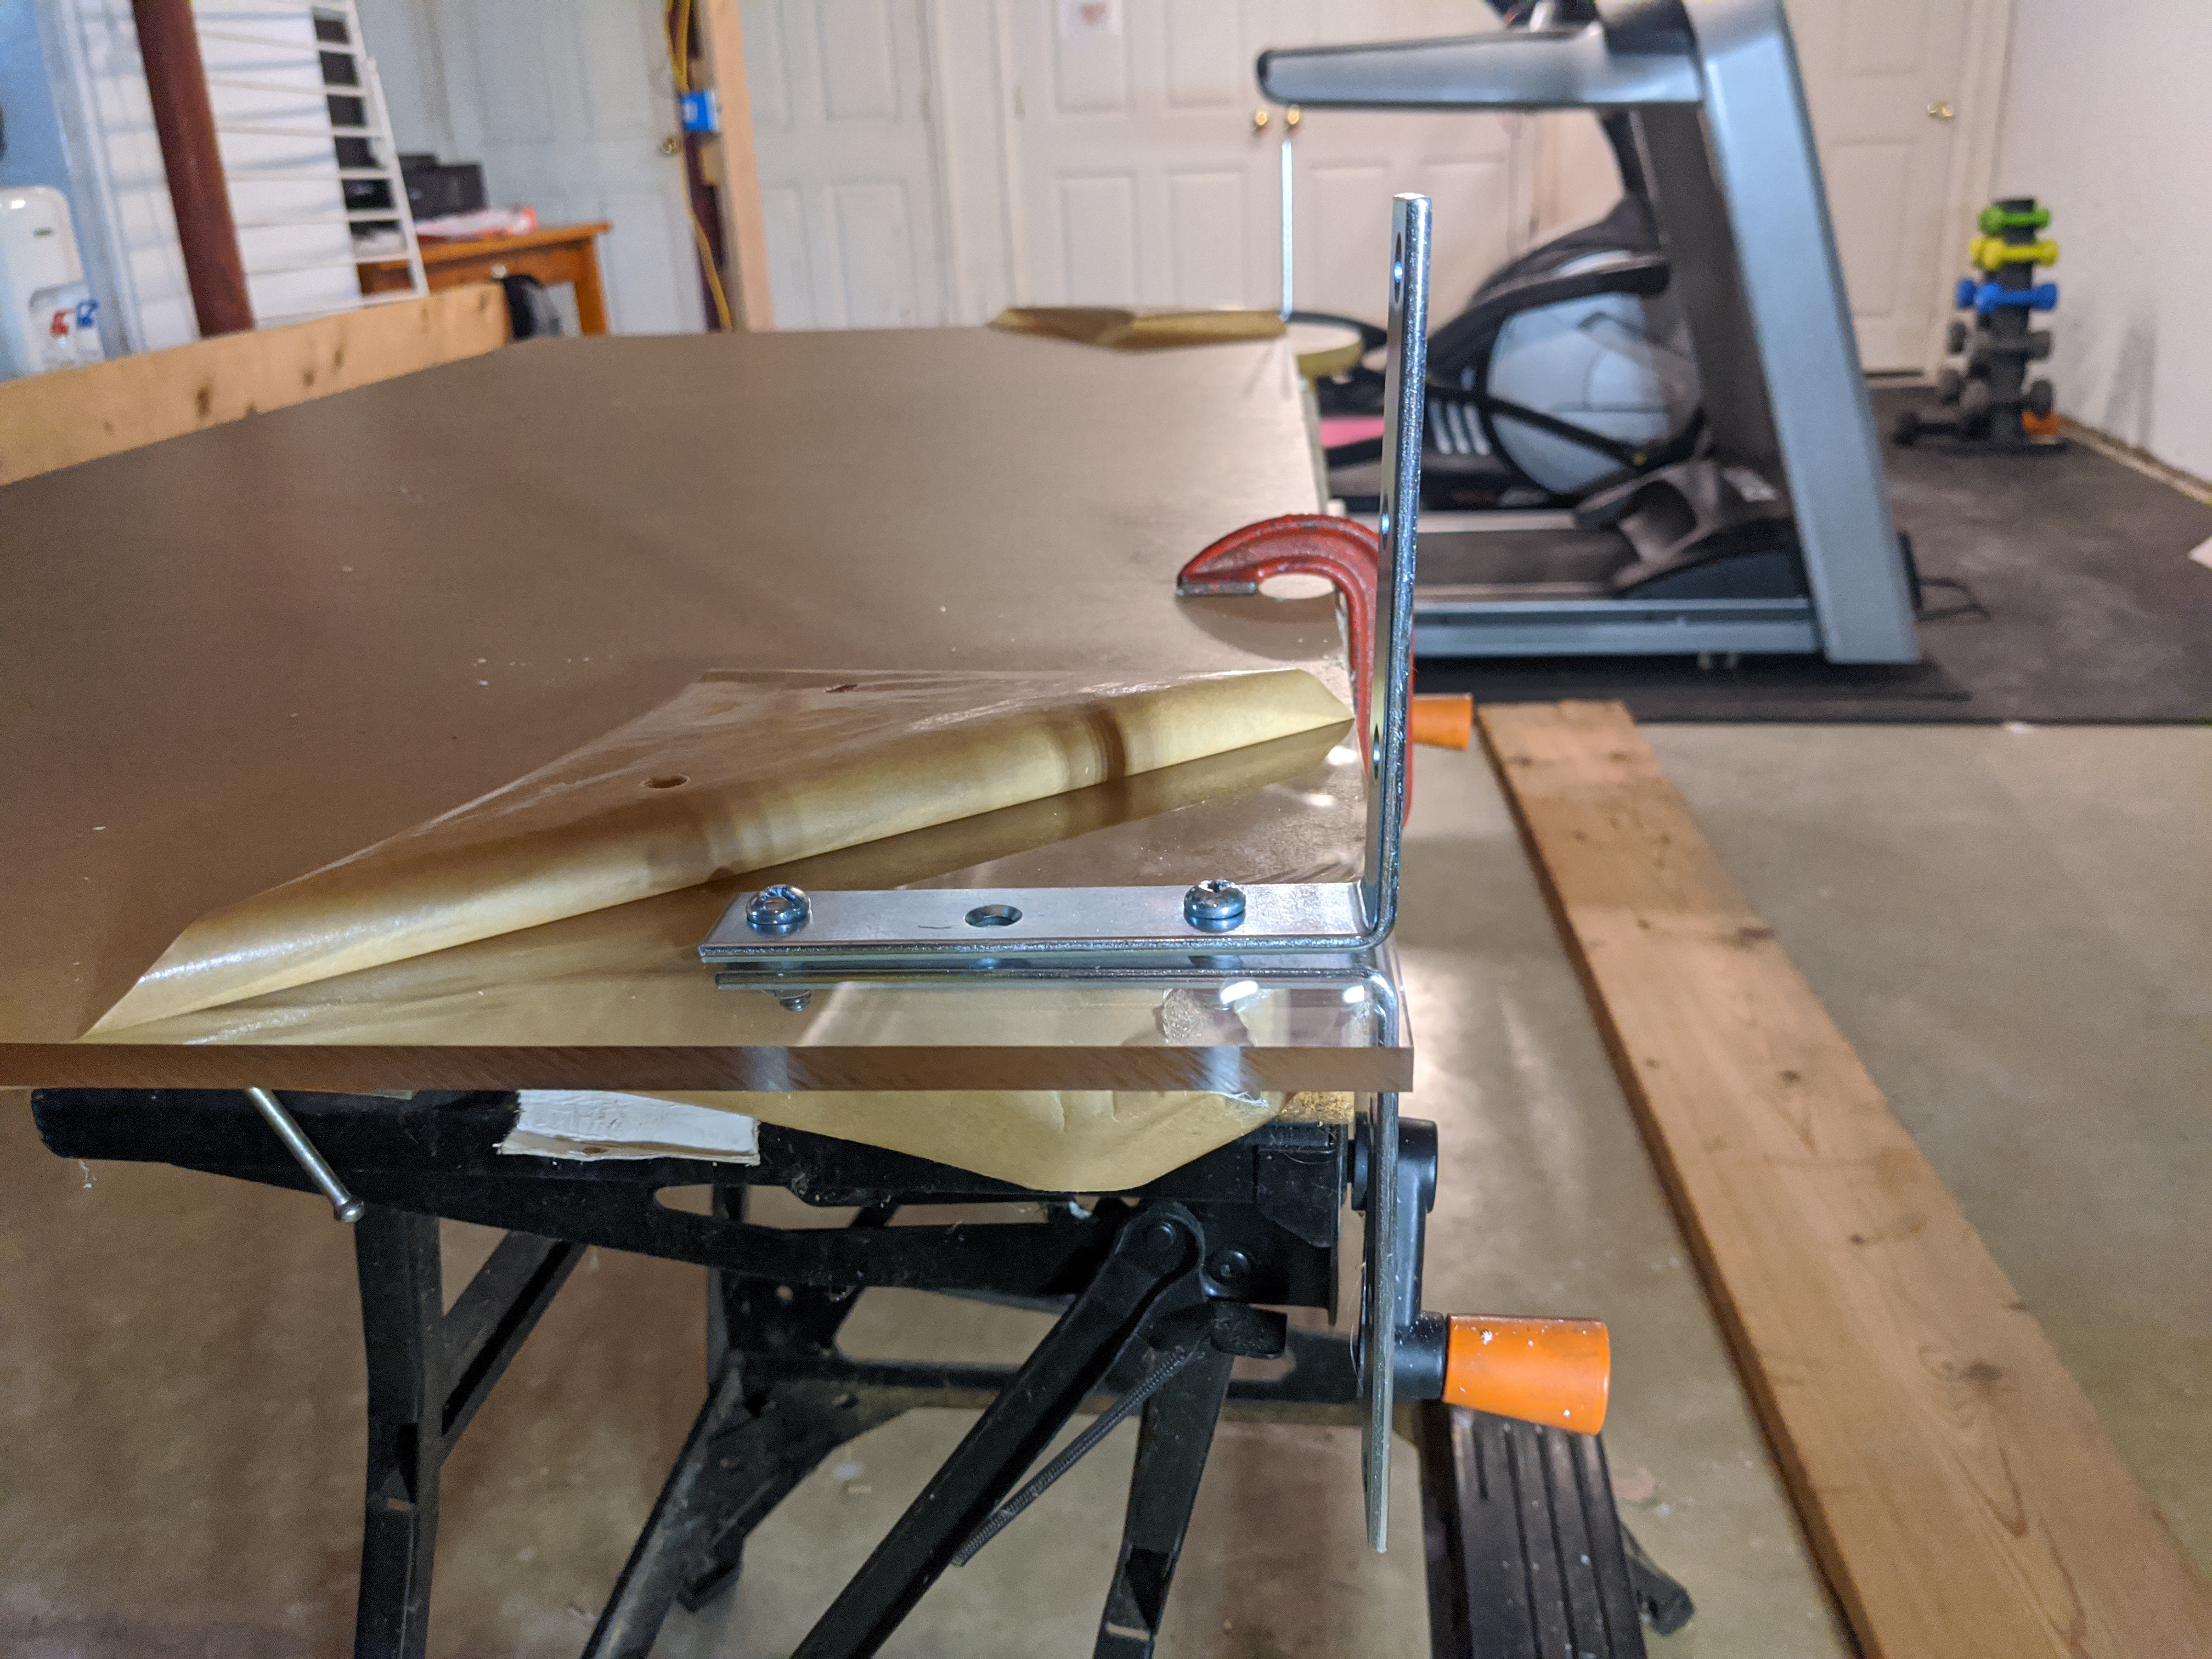
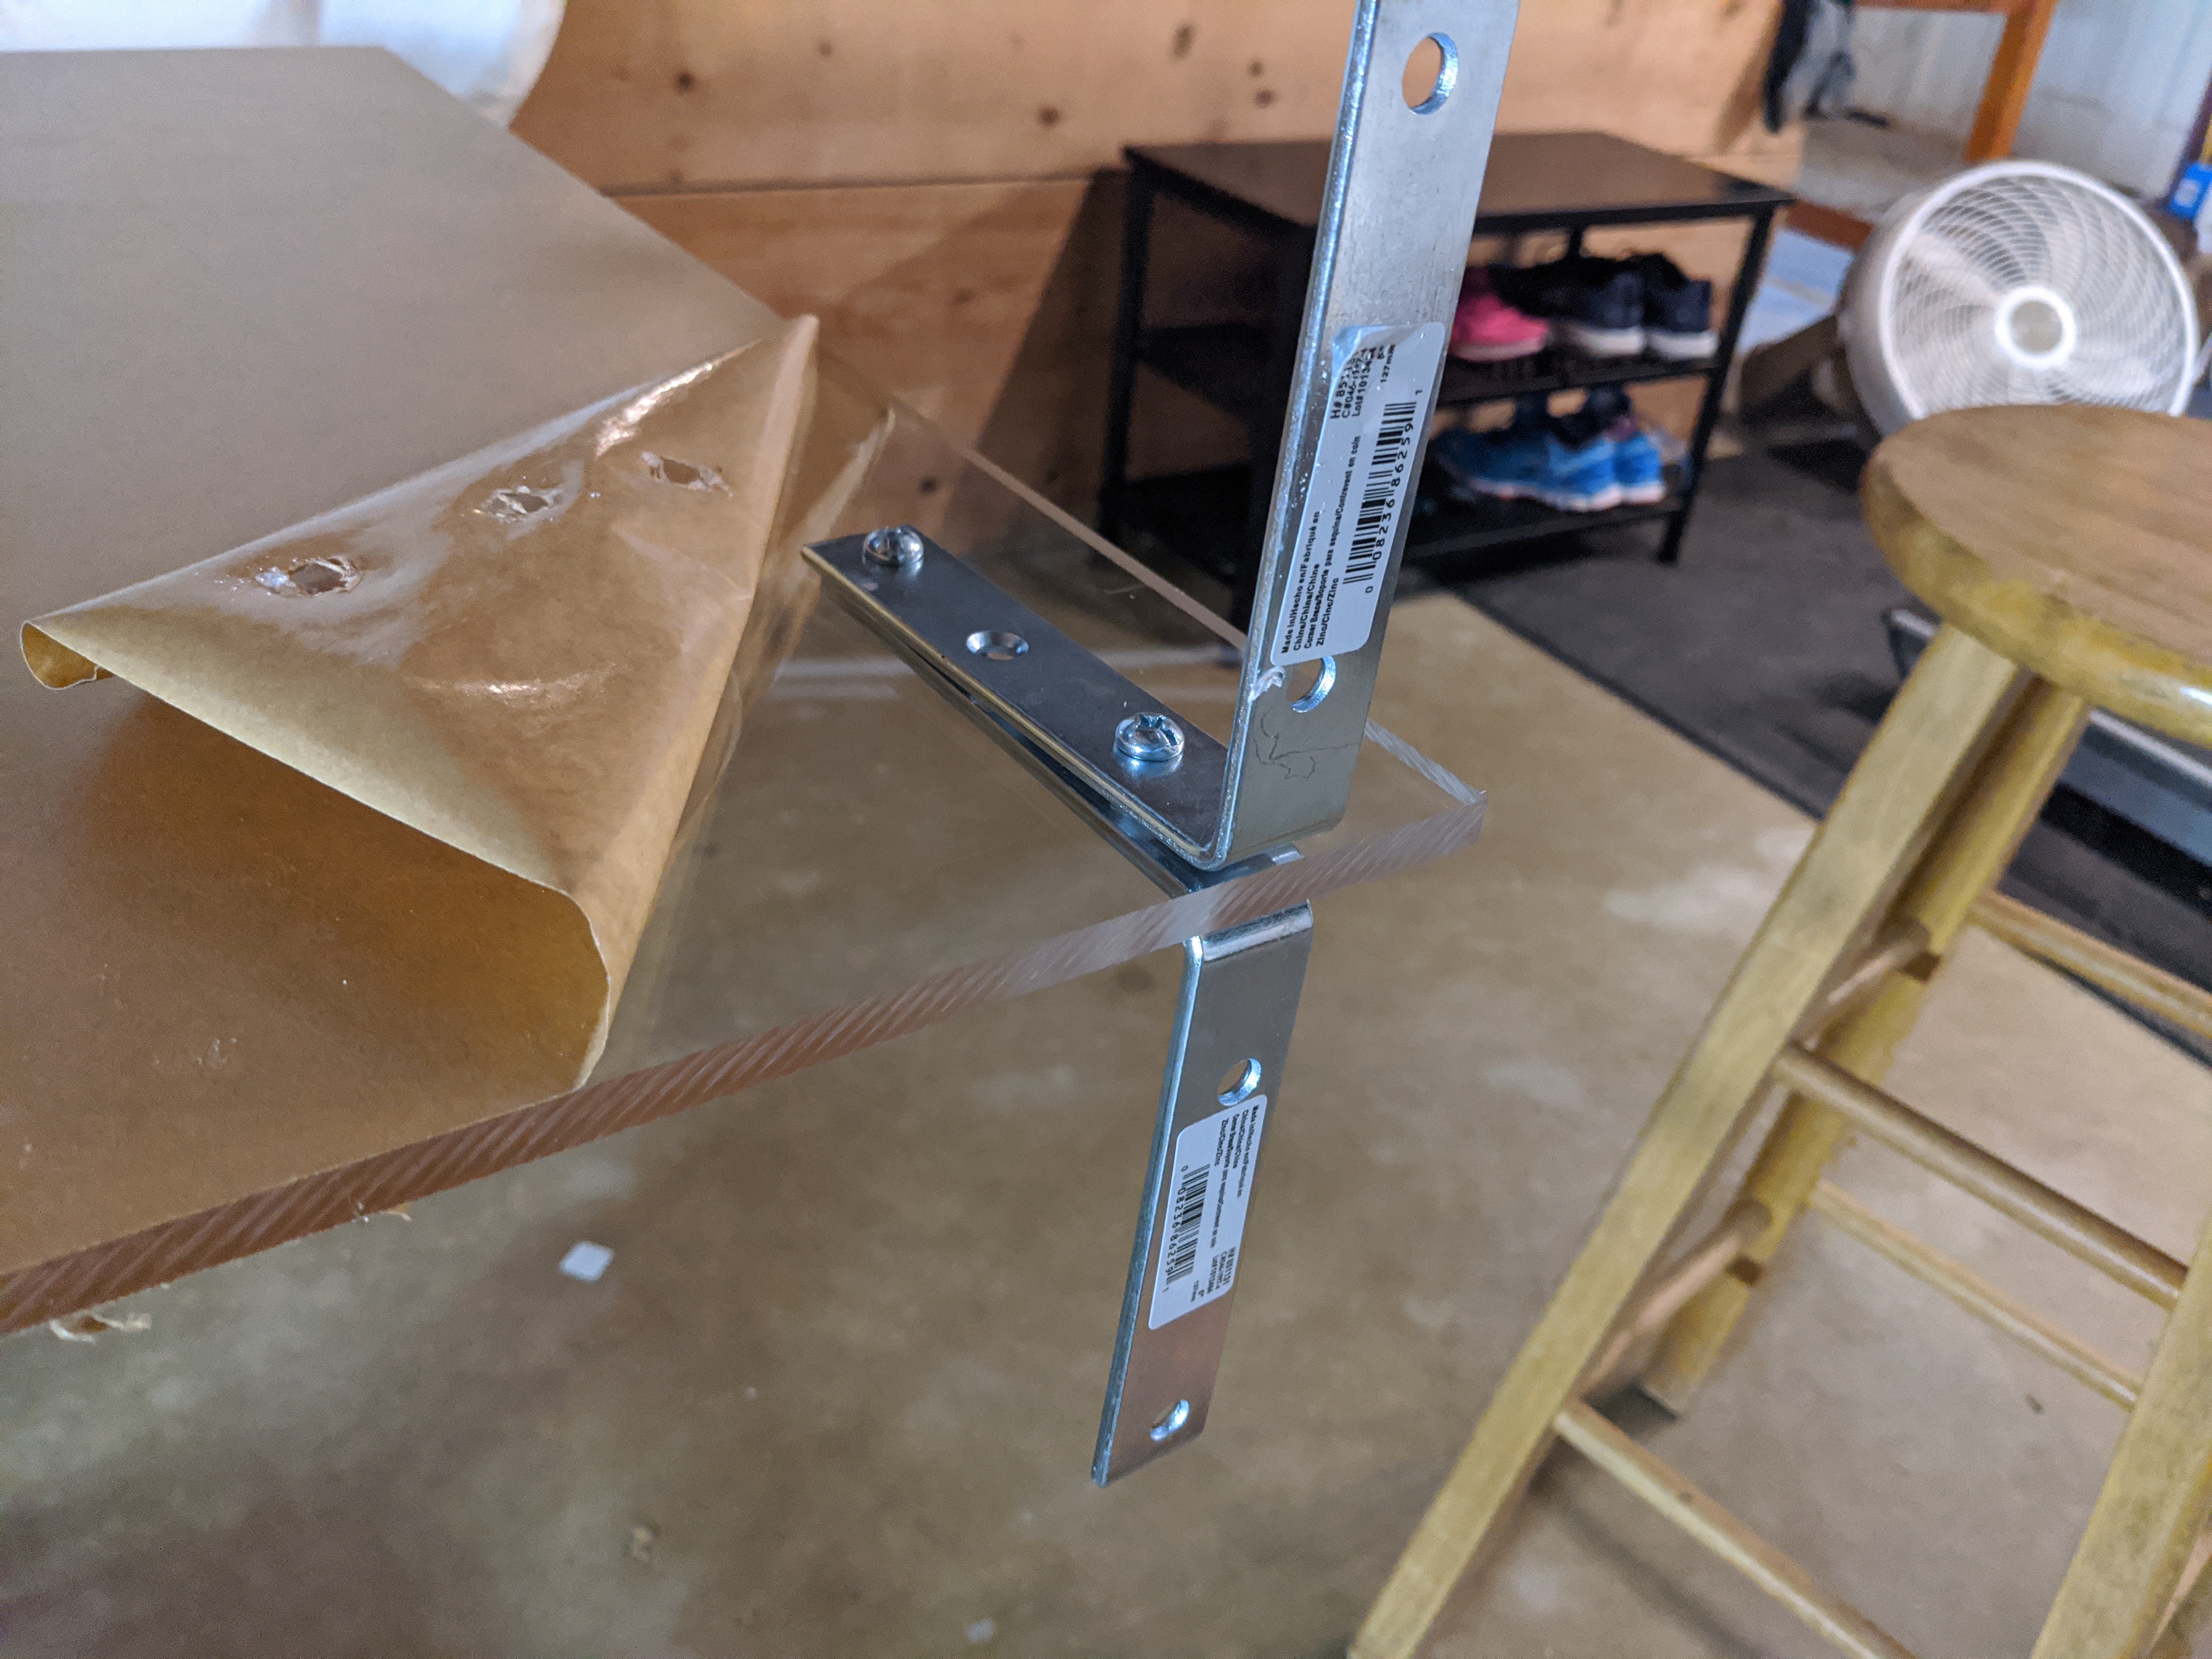
Drill holes in acrylic glass, aligned to the holes in the corner braces. Do this carefully and slowly. Make sure holes are large enough for the bolts to slip through.
Attach corner braces using bolts and nuts. Four total. Two braces on opposite sides in the bottom left and two on opposite sides on the bottom right.
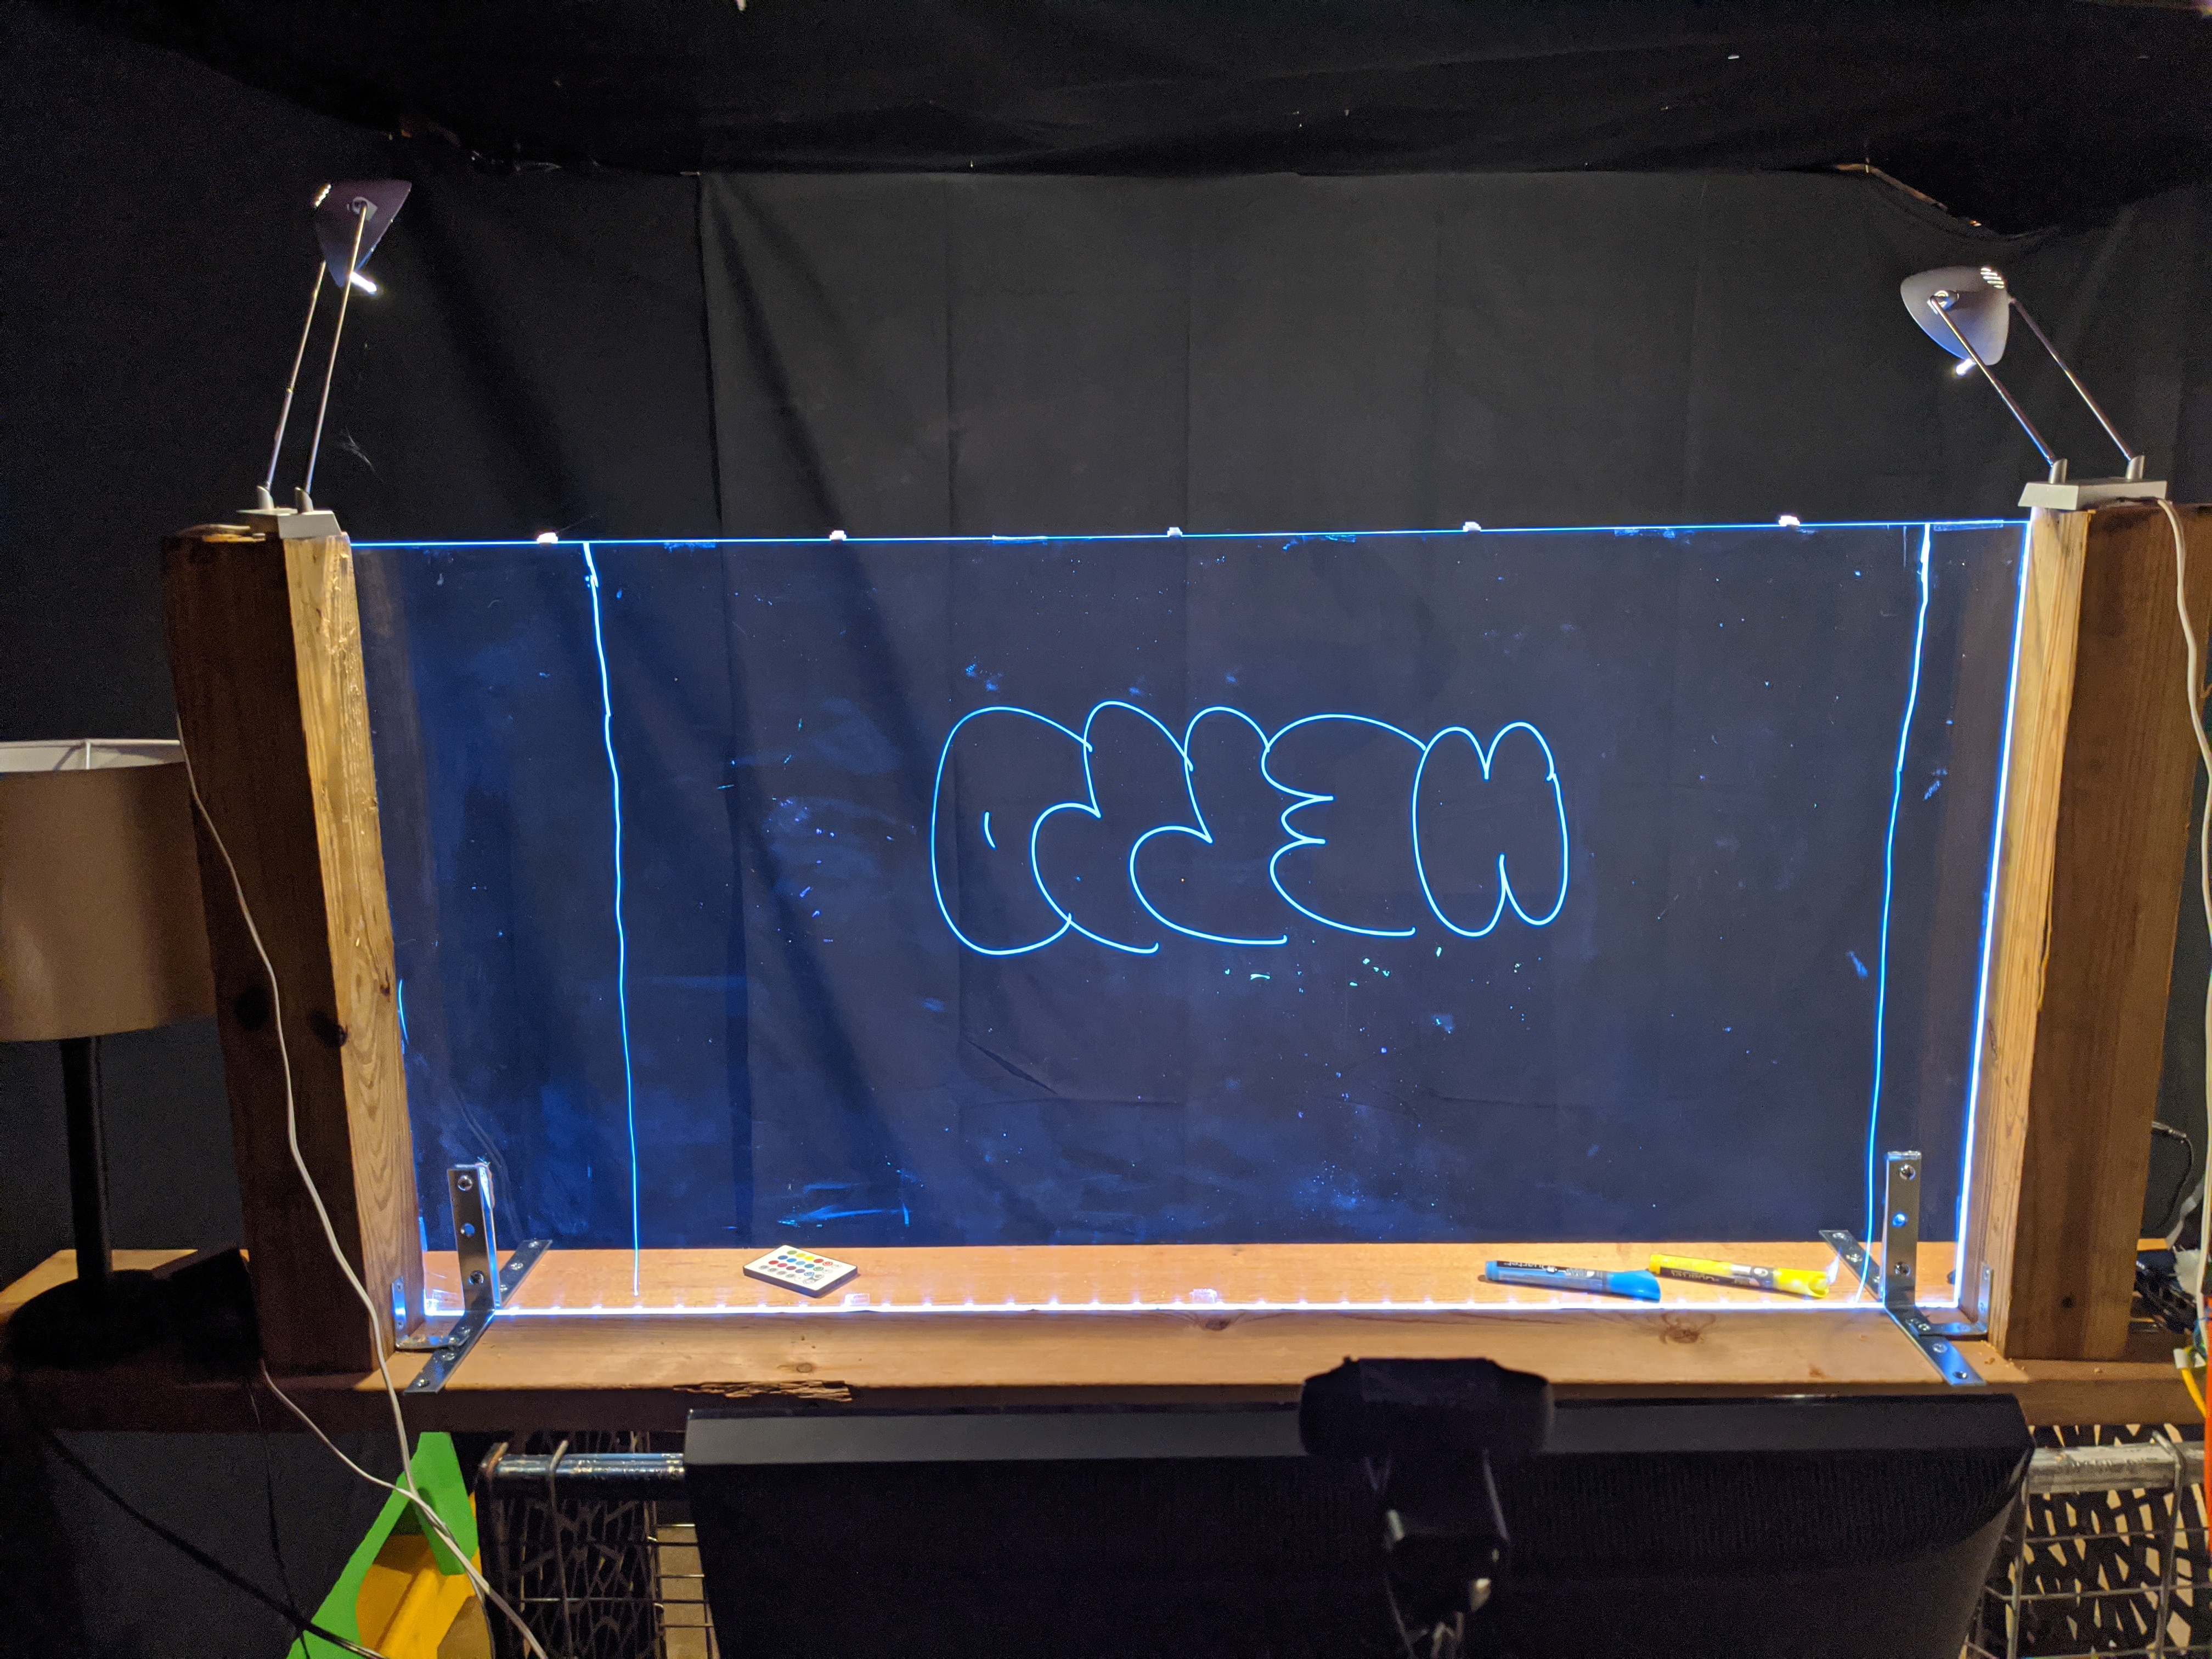
Put the LED lightstrip on the bottom edge of the glass, holding it in place with transparent tape. The strip itself will be held securely once the glass is attached to the board (the next step).
Important! The lightstrip should only be used on the bottom of the glass. More light is not better here (as I found out). Putting the lightstrip all around the board makes it reflect all over and the lightboard looks cloudy. Any lightstrip excess can be cut with scissors (do any cutting with the lightstrip off so as not to short circuit it).
Drill holes in the board/table.
Secure the lightboard to the board/table with wood screws.
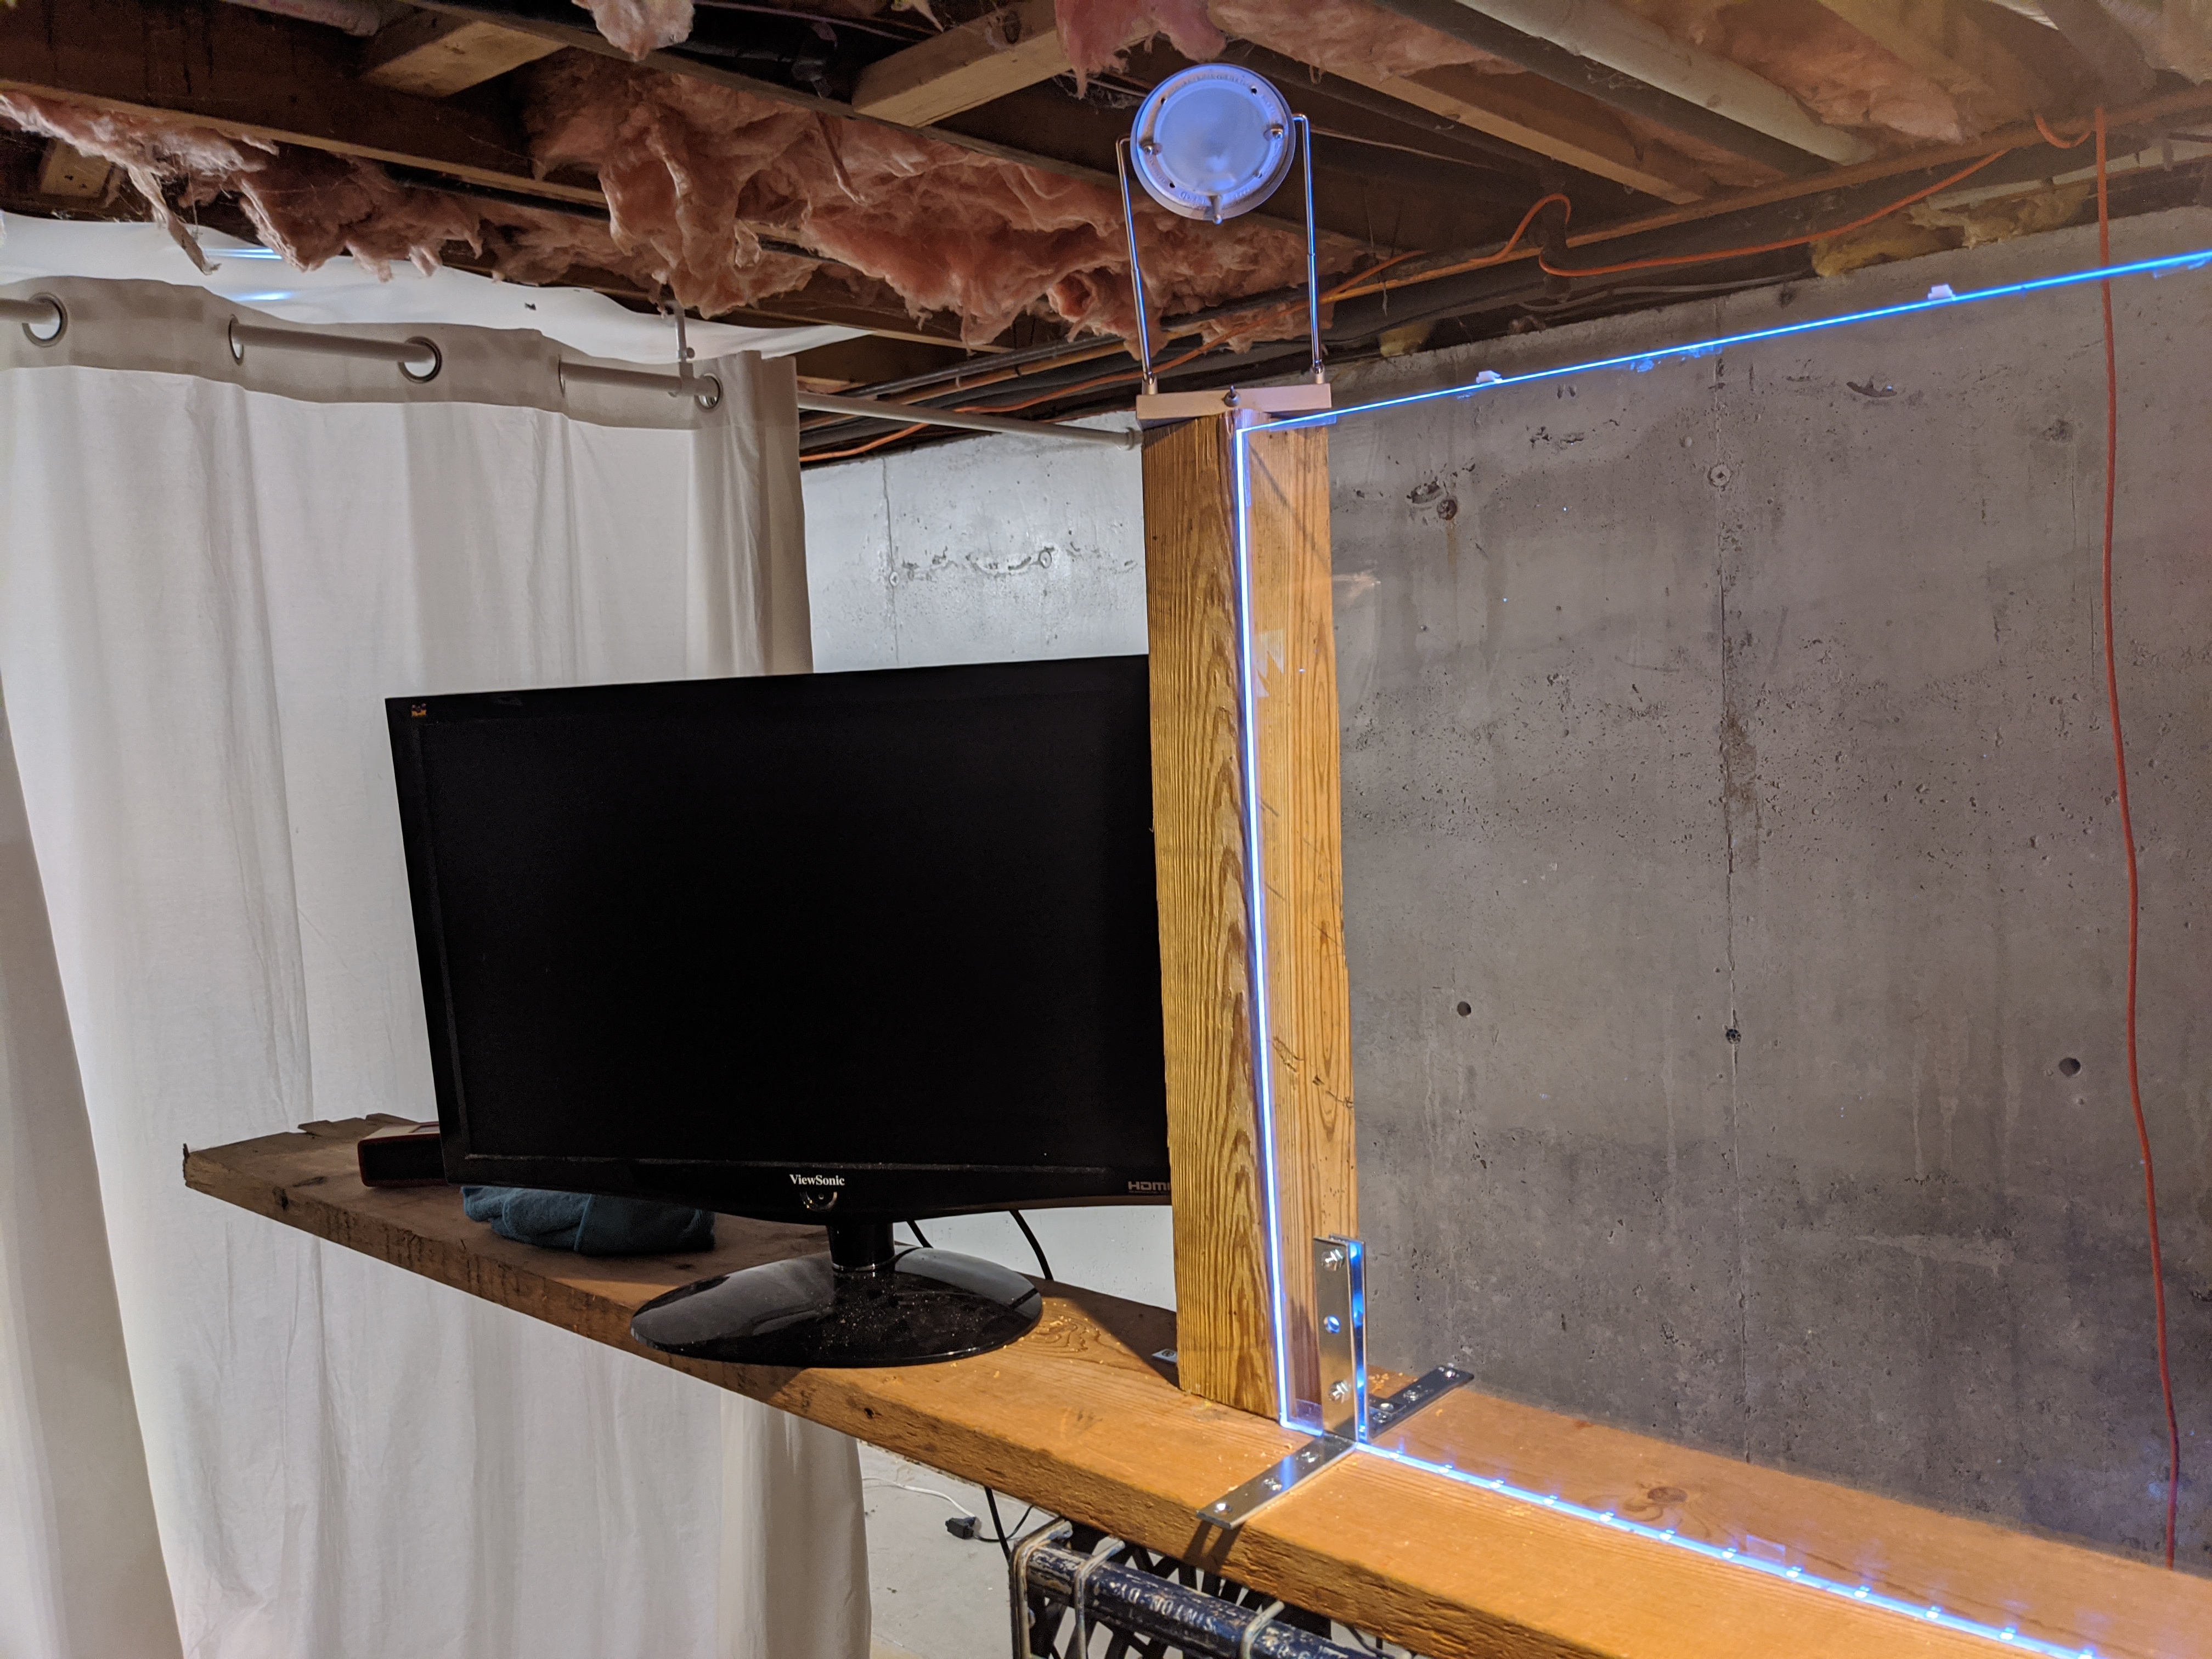
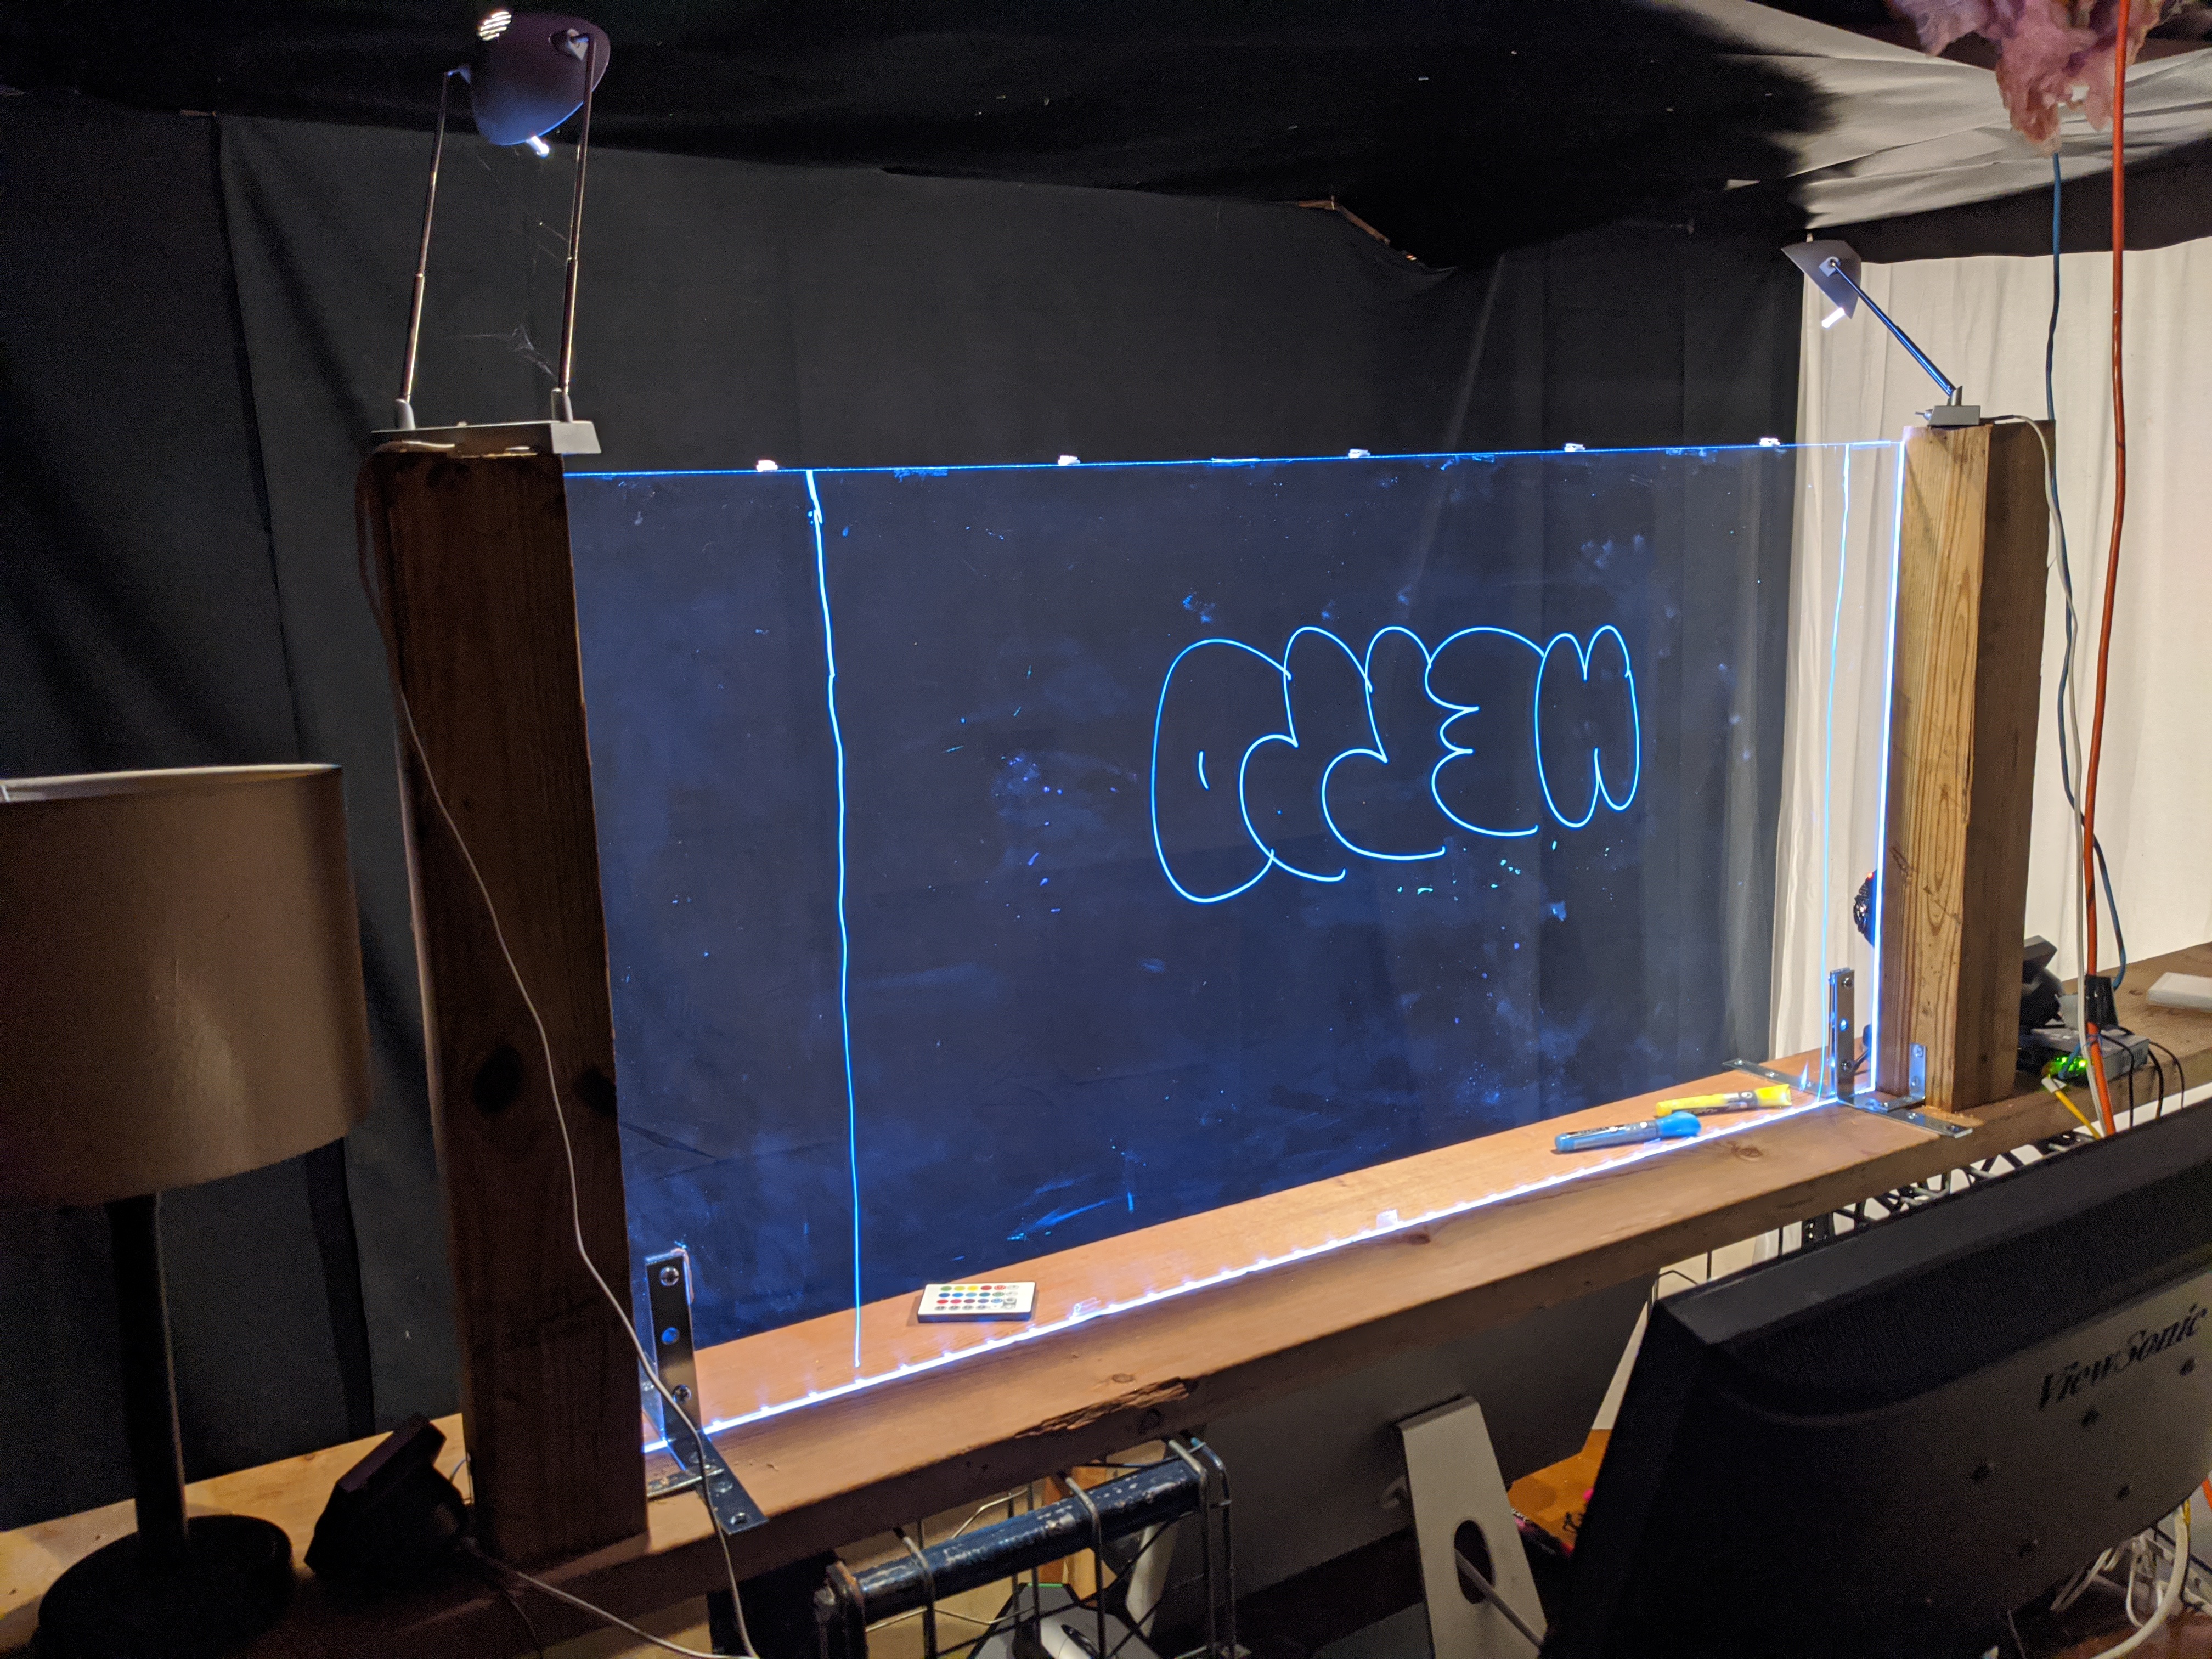
Note: I wanted to lecture standing up, so I attached my lightboard to a long 2x8" board, setup an old kitchen table, and raised my lightboard to standing height using two old milk-crates placed on top of the table.
overview | build | studio | software | other | links | gallery
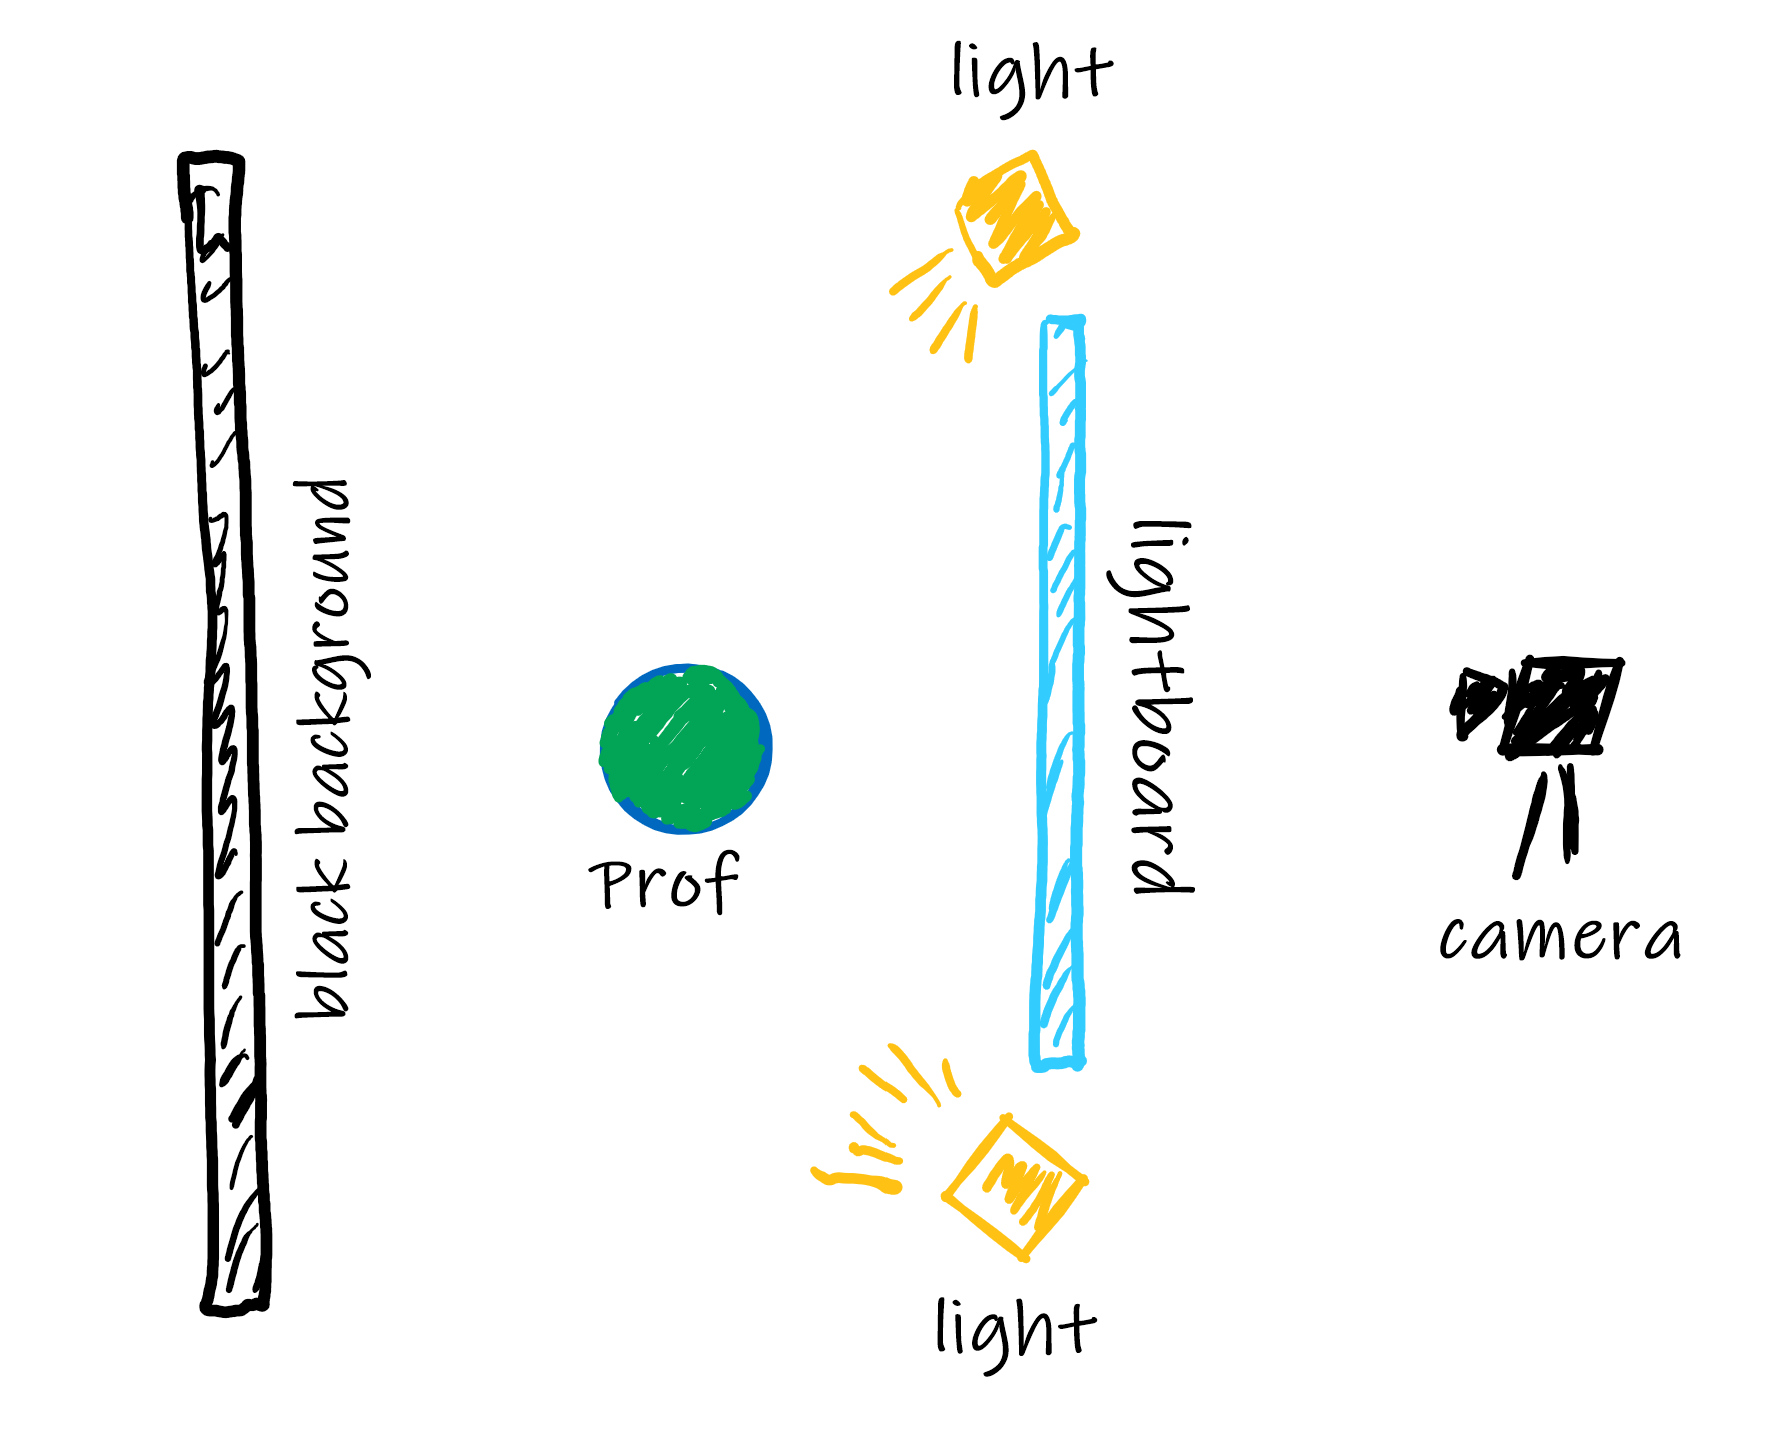
Controlling lighting is important, so either a basement (like mine) or a room with blackout curtains is preferred.
Hang up the black cloth as a backdrop (or paint the wall black). Consider putting some on the ceiling, too (black poster board or paper can work for this, too) - it makes it easier to adjust the camera tilt and height without getting light background material.
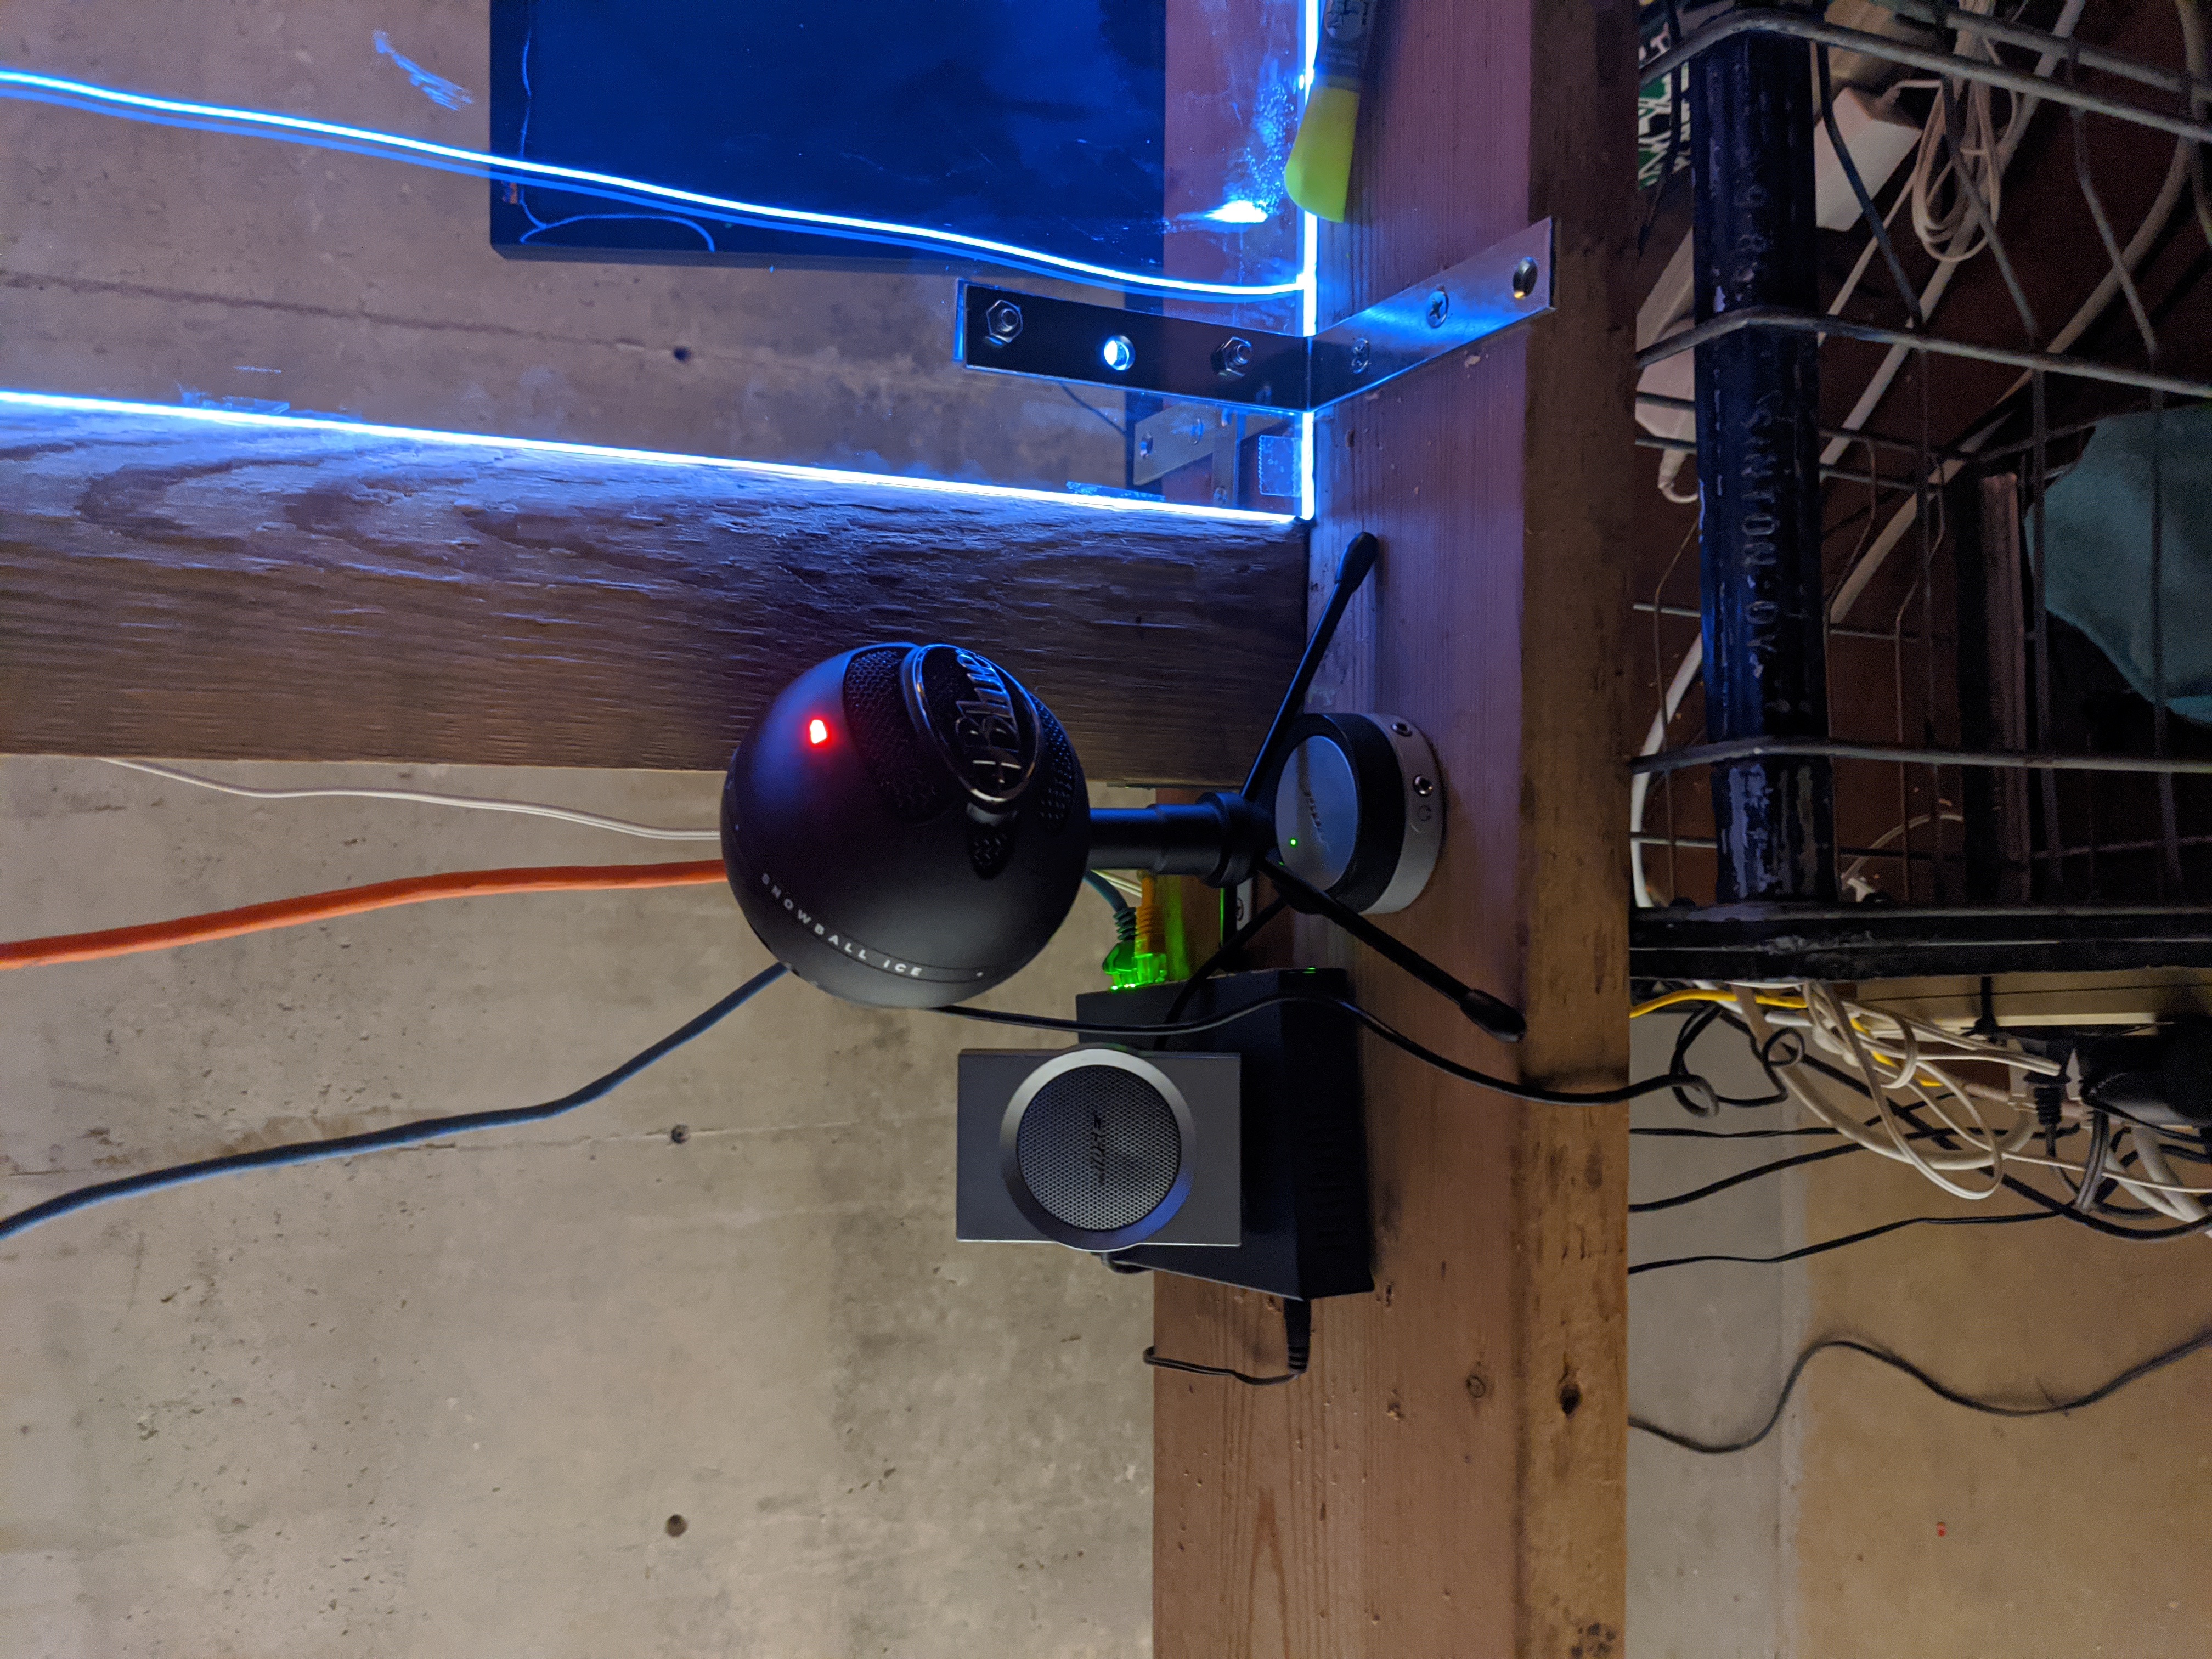
Setup the Webcam on the opposite side as the presentation roughly 2 feet from the lightboard, centered vertically and horizontally. The camera will need to be adjusted (pan and tilt) depending upon the size of the glass and the camera field of view. Take care not to get any non-black items in the camera (a larger backdrop can help with this).
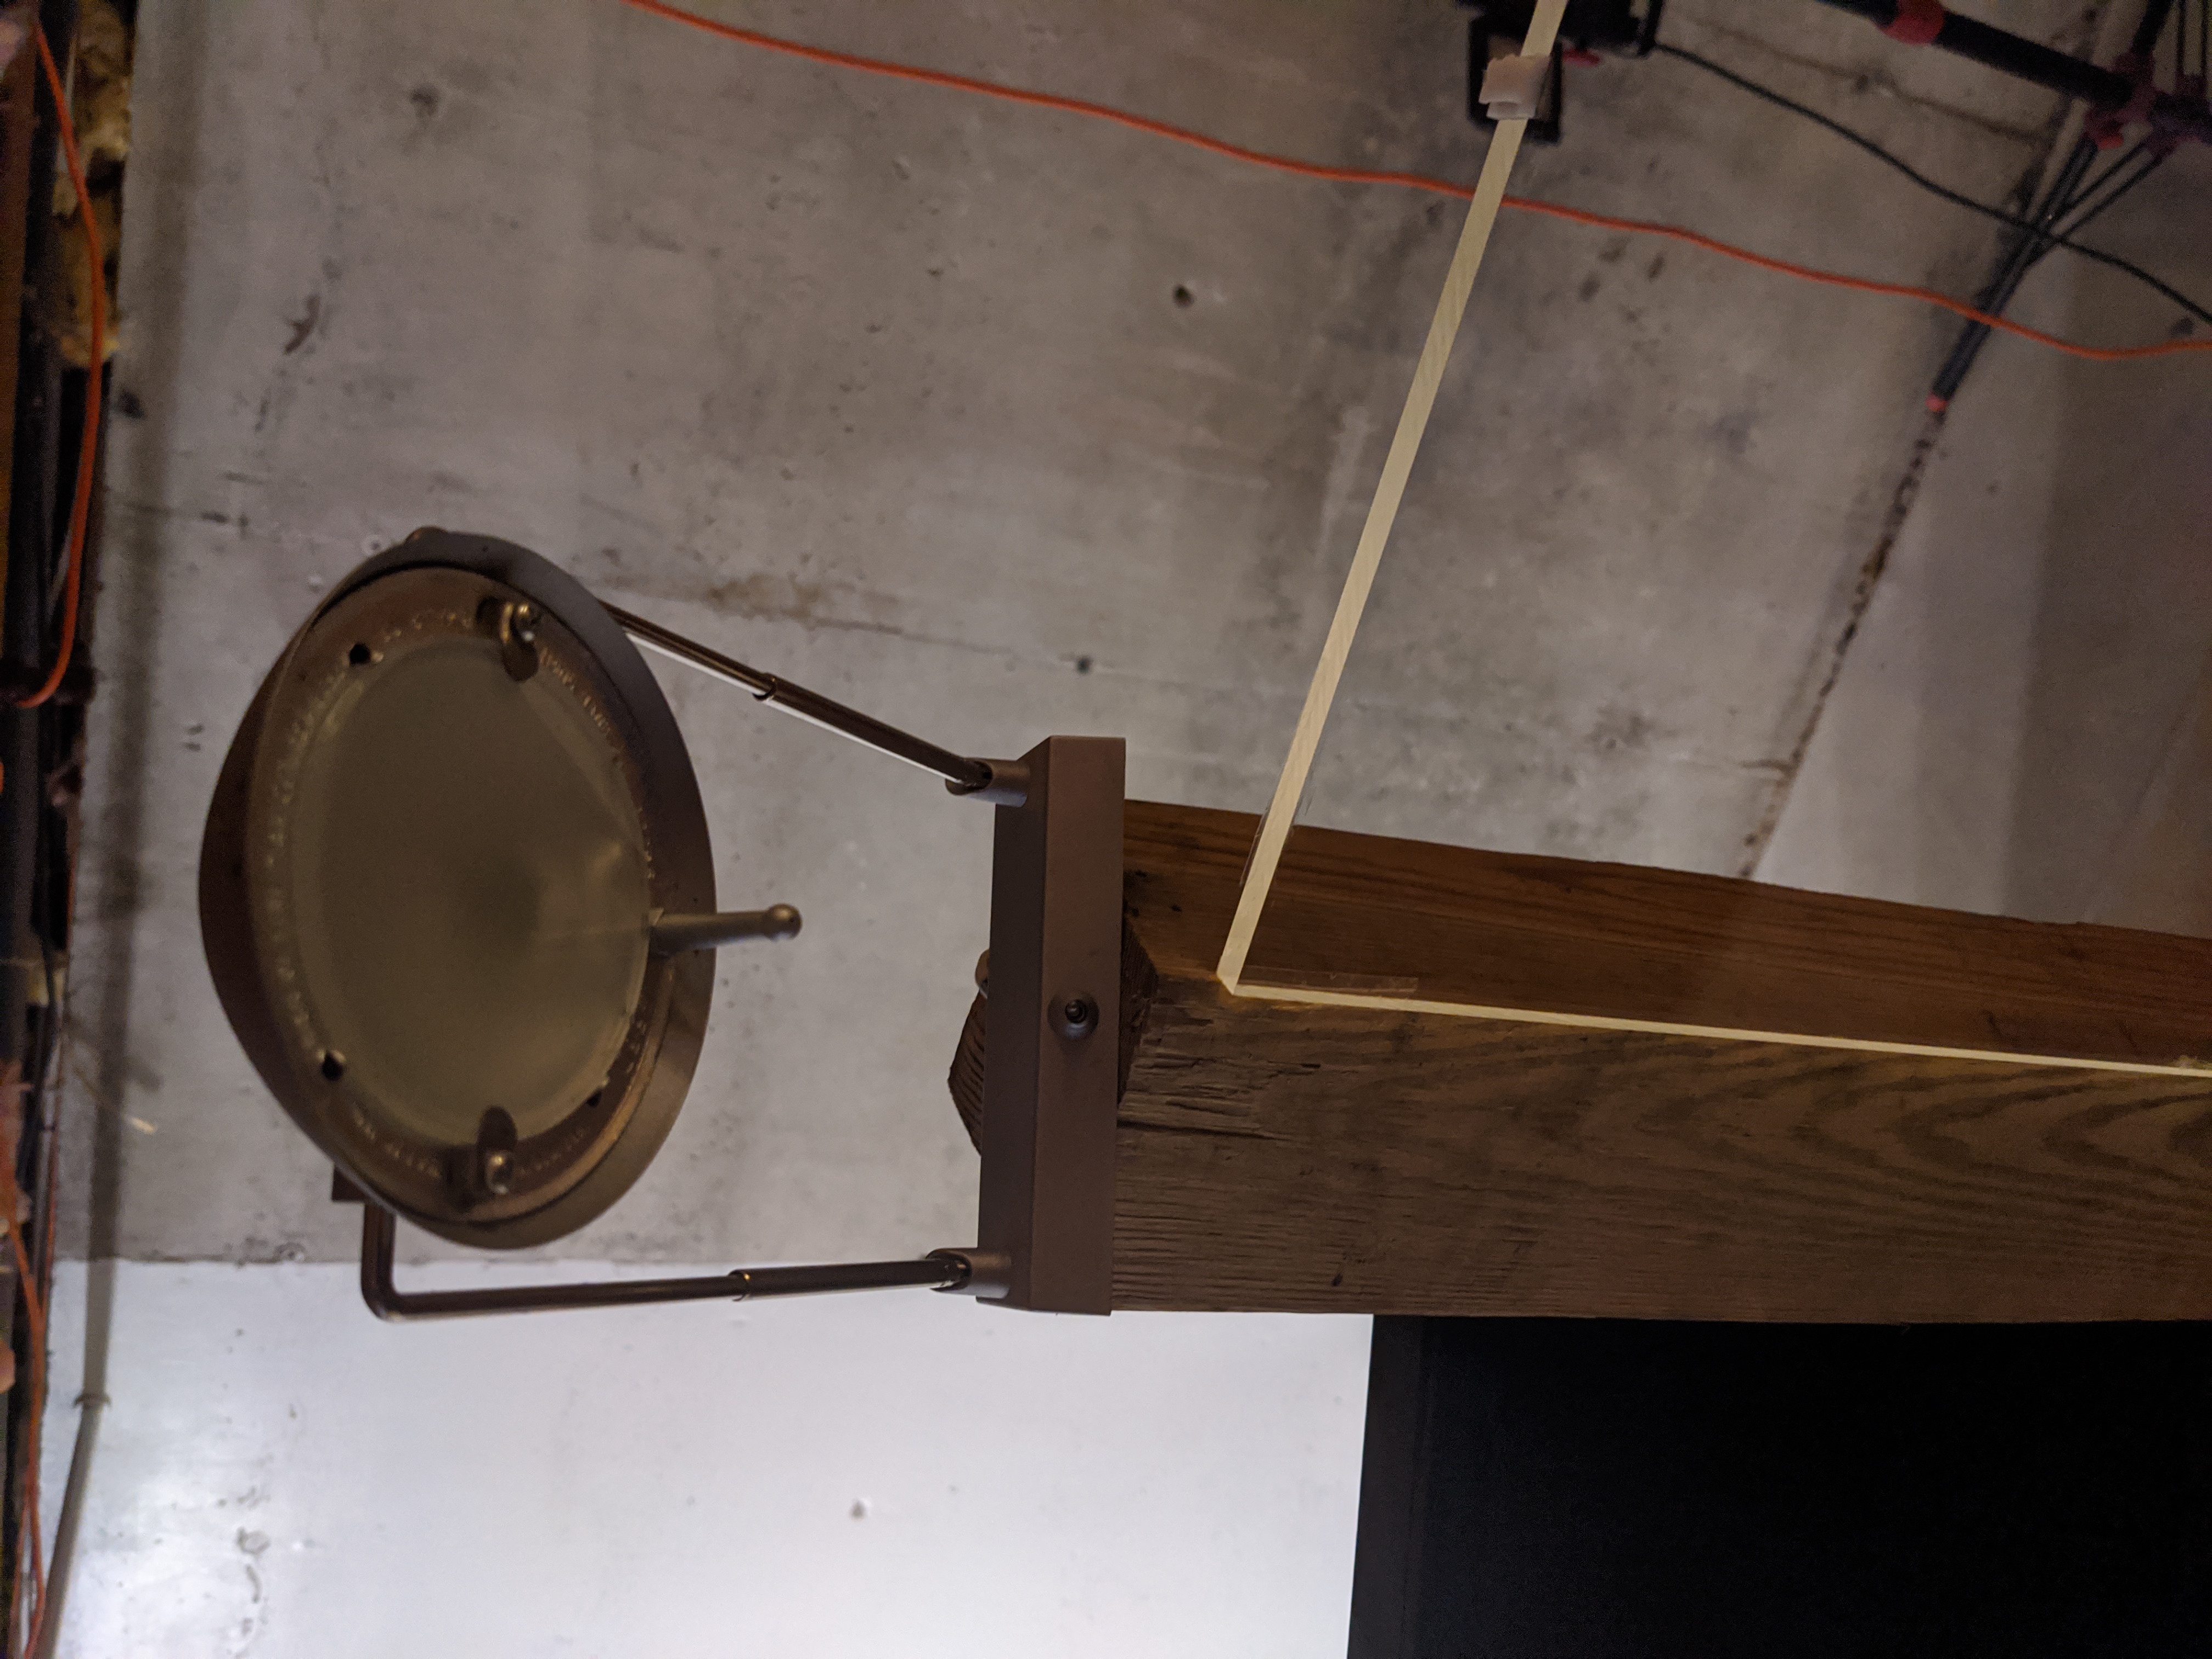
Mount directional/spotlights on posts on edges of board (or clip them onto the glass if you have clip-on lights). Consider one in the center too, clipped on top of the lightboard (like mine) or overhead.
Secure the posts with the lights to the board.
Important! Getting the lighting right is tricky. The lights should illuminate the "talent" but not the front edge of the lightboard nor the black backdrop. Cardboard and tape can be used as inexpensive "barn doors" to help focus the light. Moving the lightboard further from the backdrop can help too, but make sure the camera doesn't catch any non-black background. Be patient - with trial and error, you can get it right. Try out various light settings (with the Webcam and Zoom), too, to refine the look before securing and finalizing the setup. Fortunately, once you get it setup right, you don't have to change it again.
overview | build | studio | software | other | links | gallery
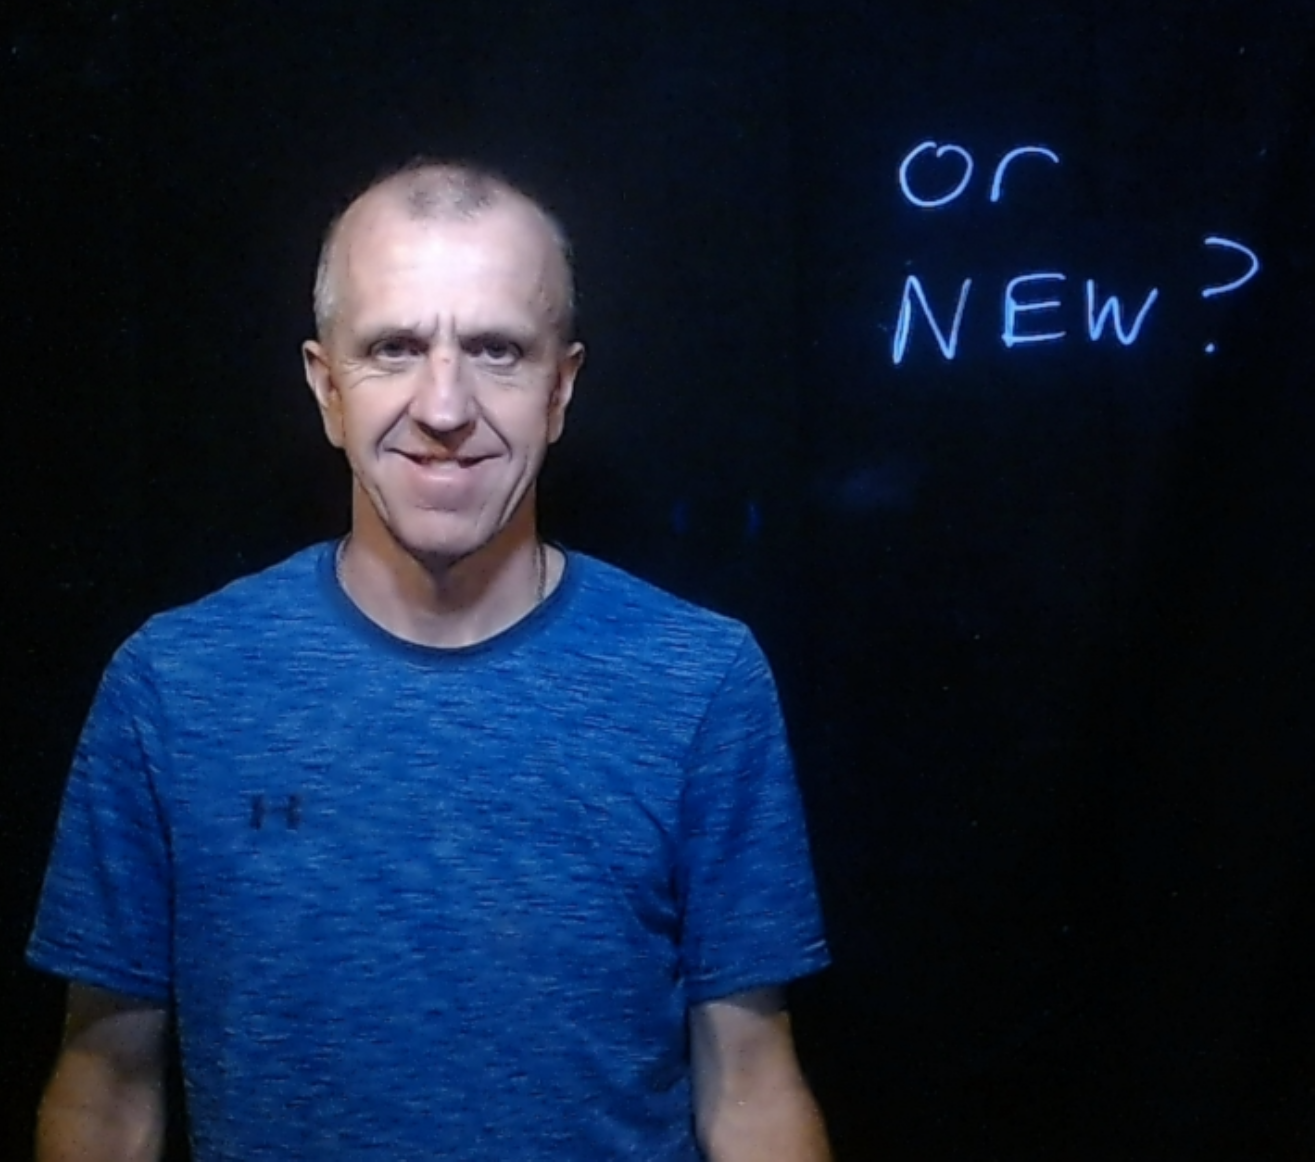
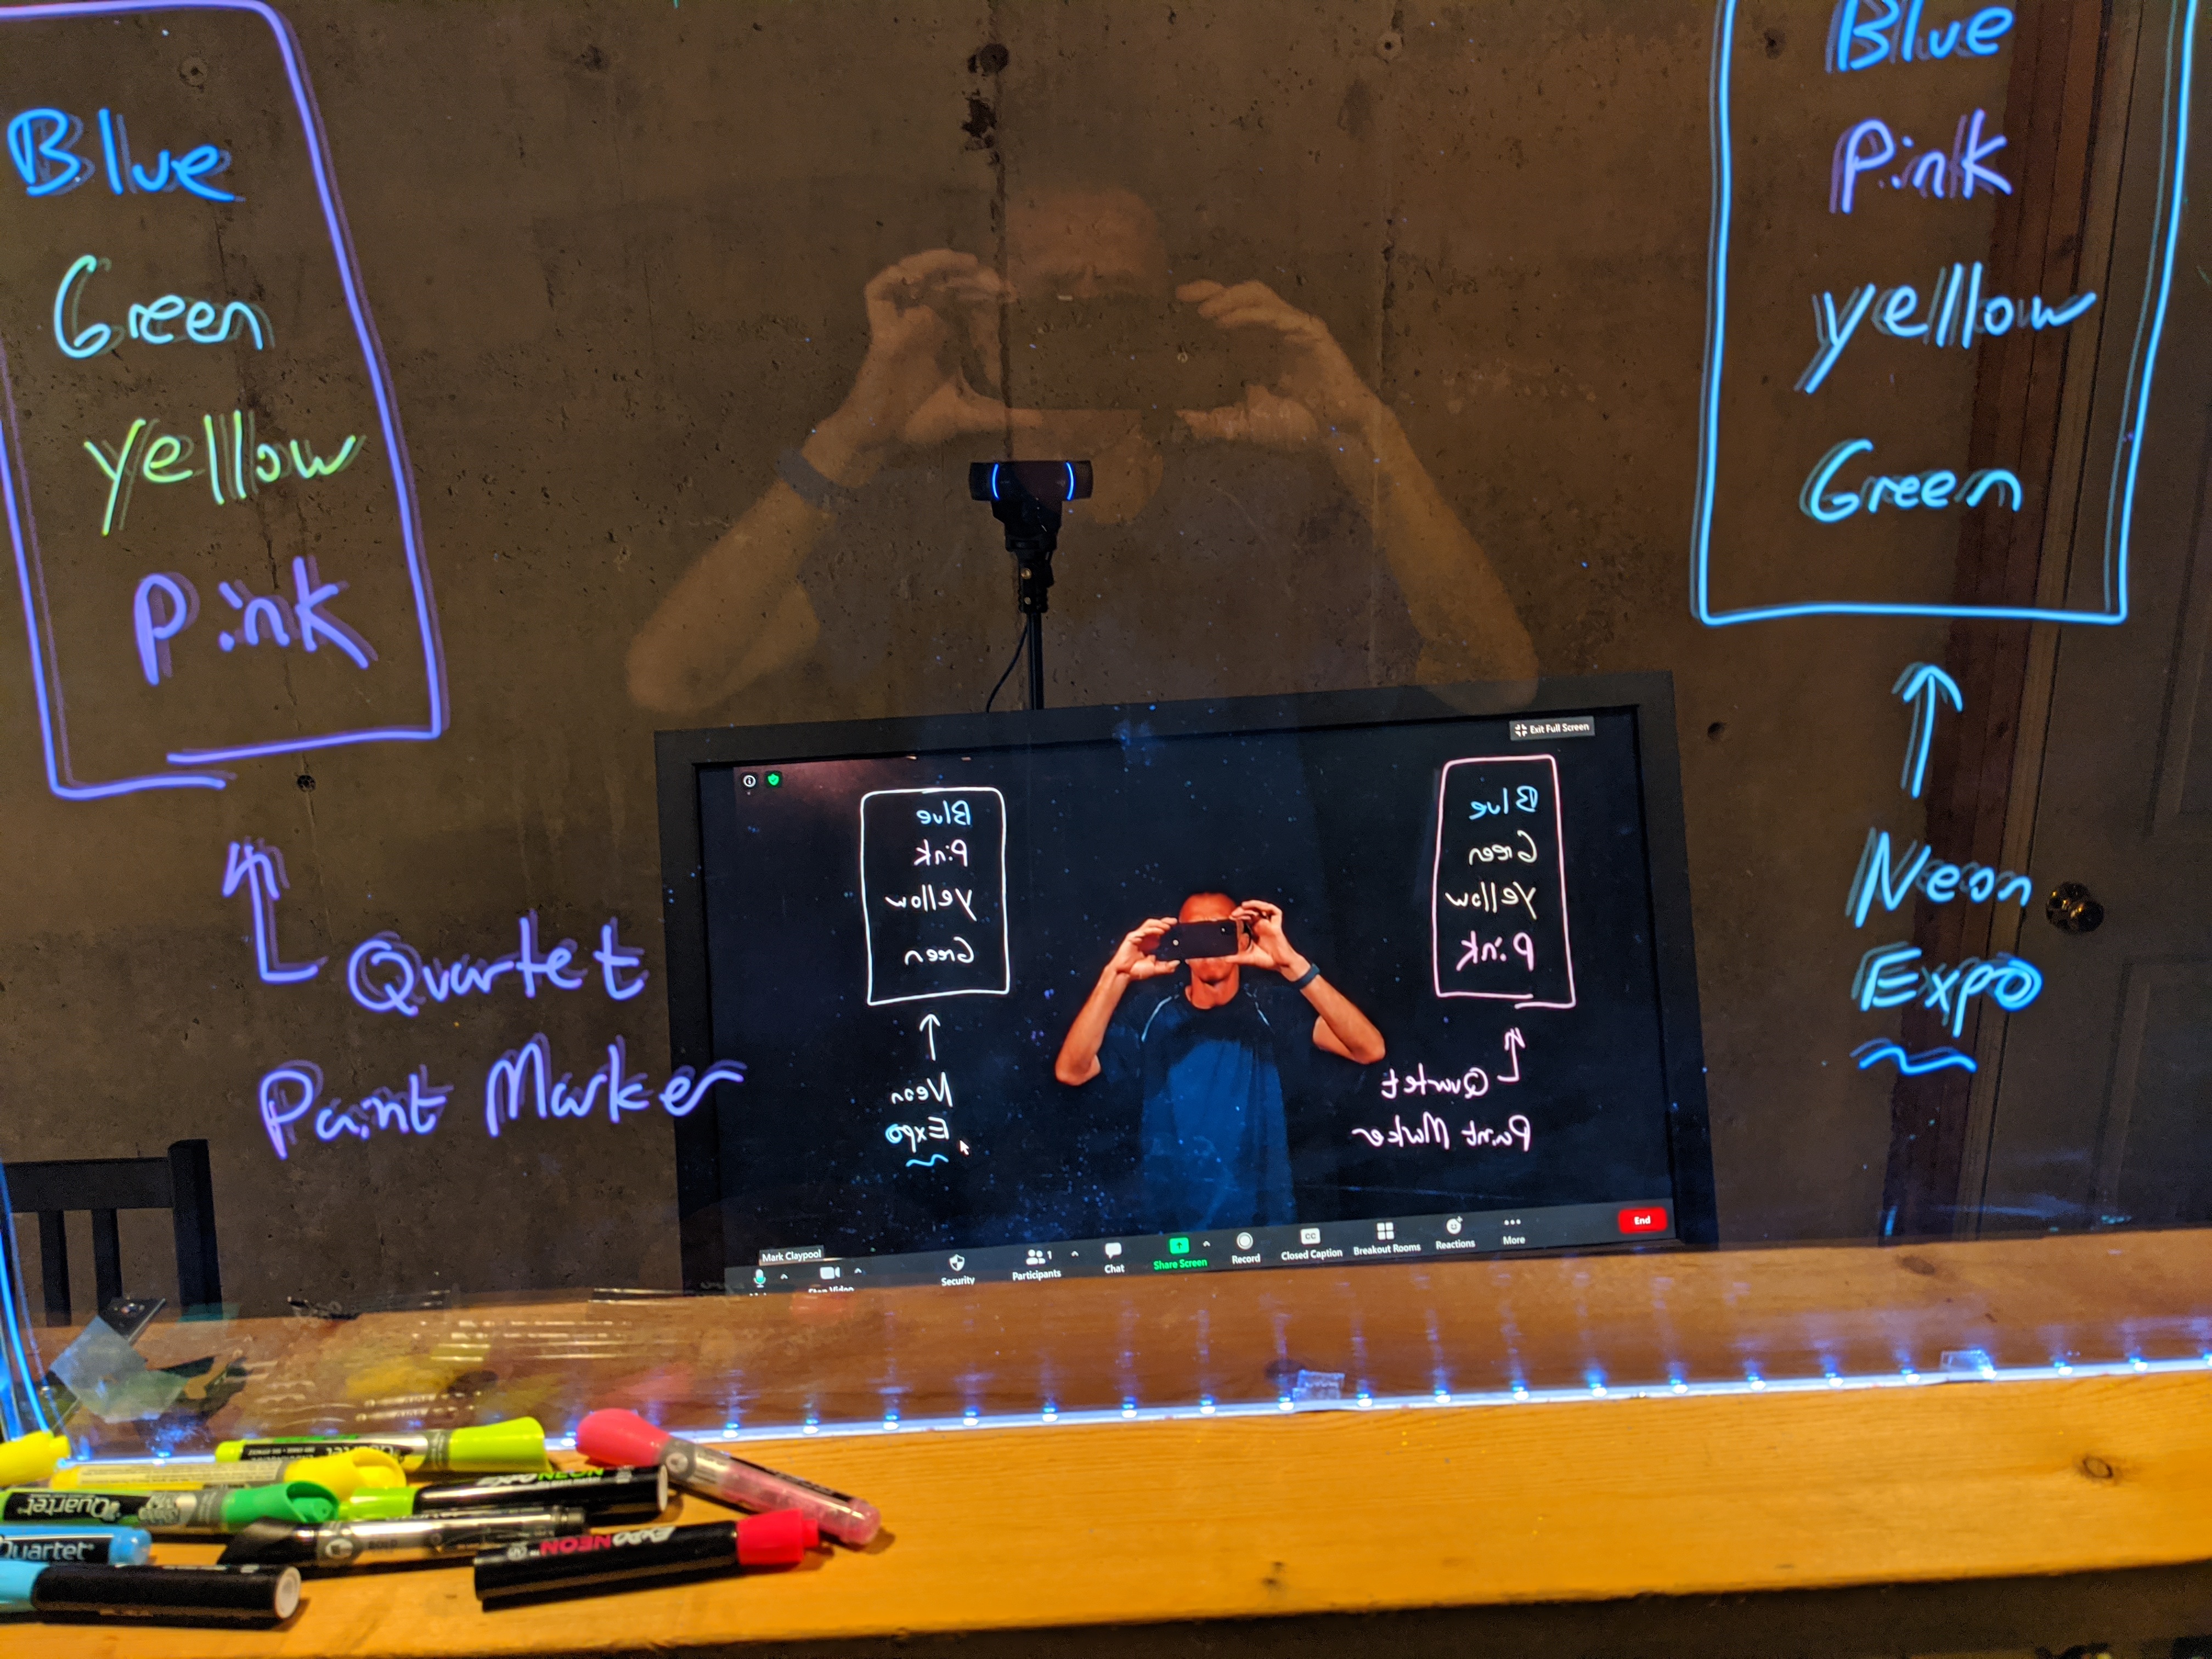
At this point, it might seem like you can fire up Zoom, pull out some pens and you are good to go. But the trouble is, all writing will appear reversed to the students since they are looking through the other side of the glass. You either need to learn to write backwards (ha, ha!), or the video needs to be flipped horizontally (mirrored). Unfortunately, Zoom doesn't have an option to do this. It does have a "mirror" setting, but that only changes the orientation for the presenter, not the viewers. There are a lot of software options to flip a video once it is recorded, but far fewer options to flip the video live while Zoom-ing.
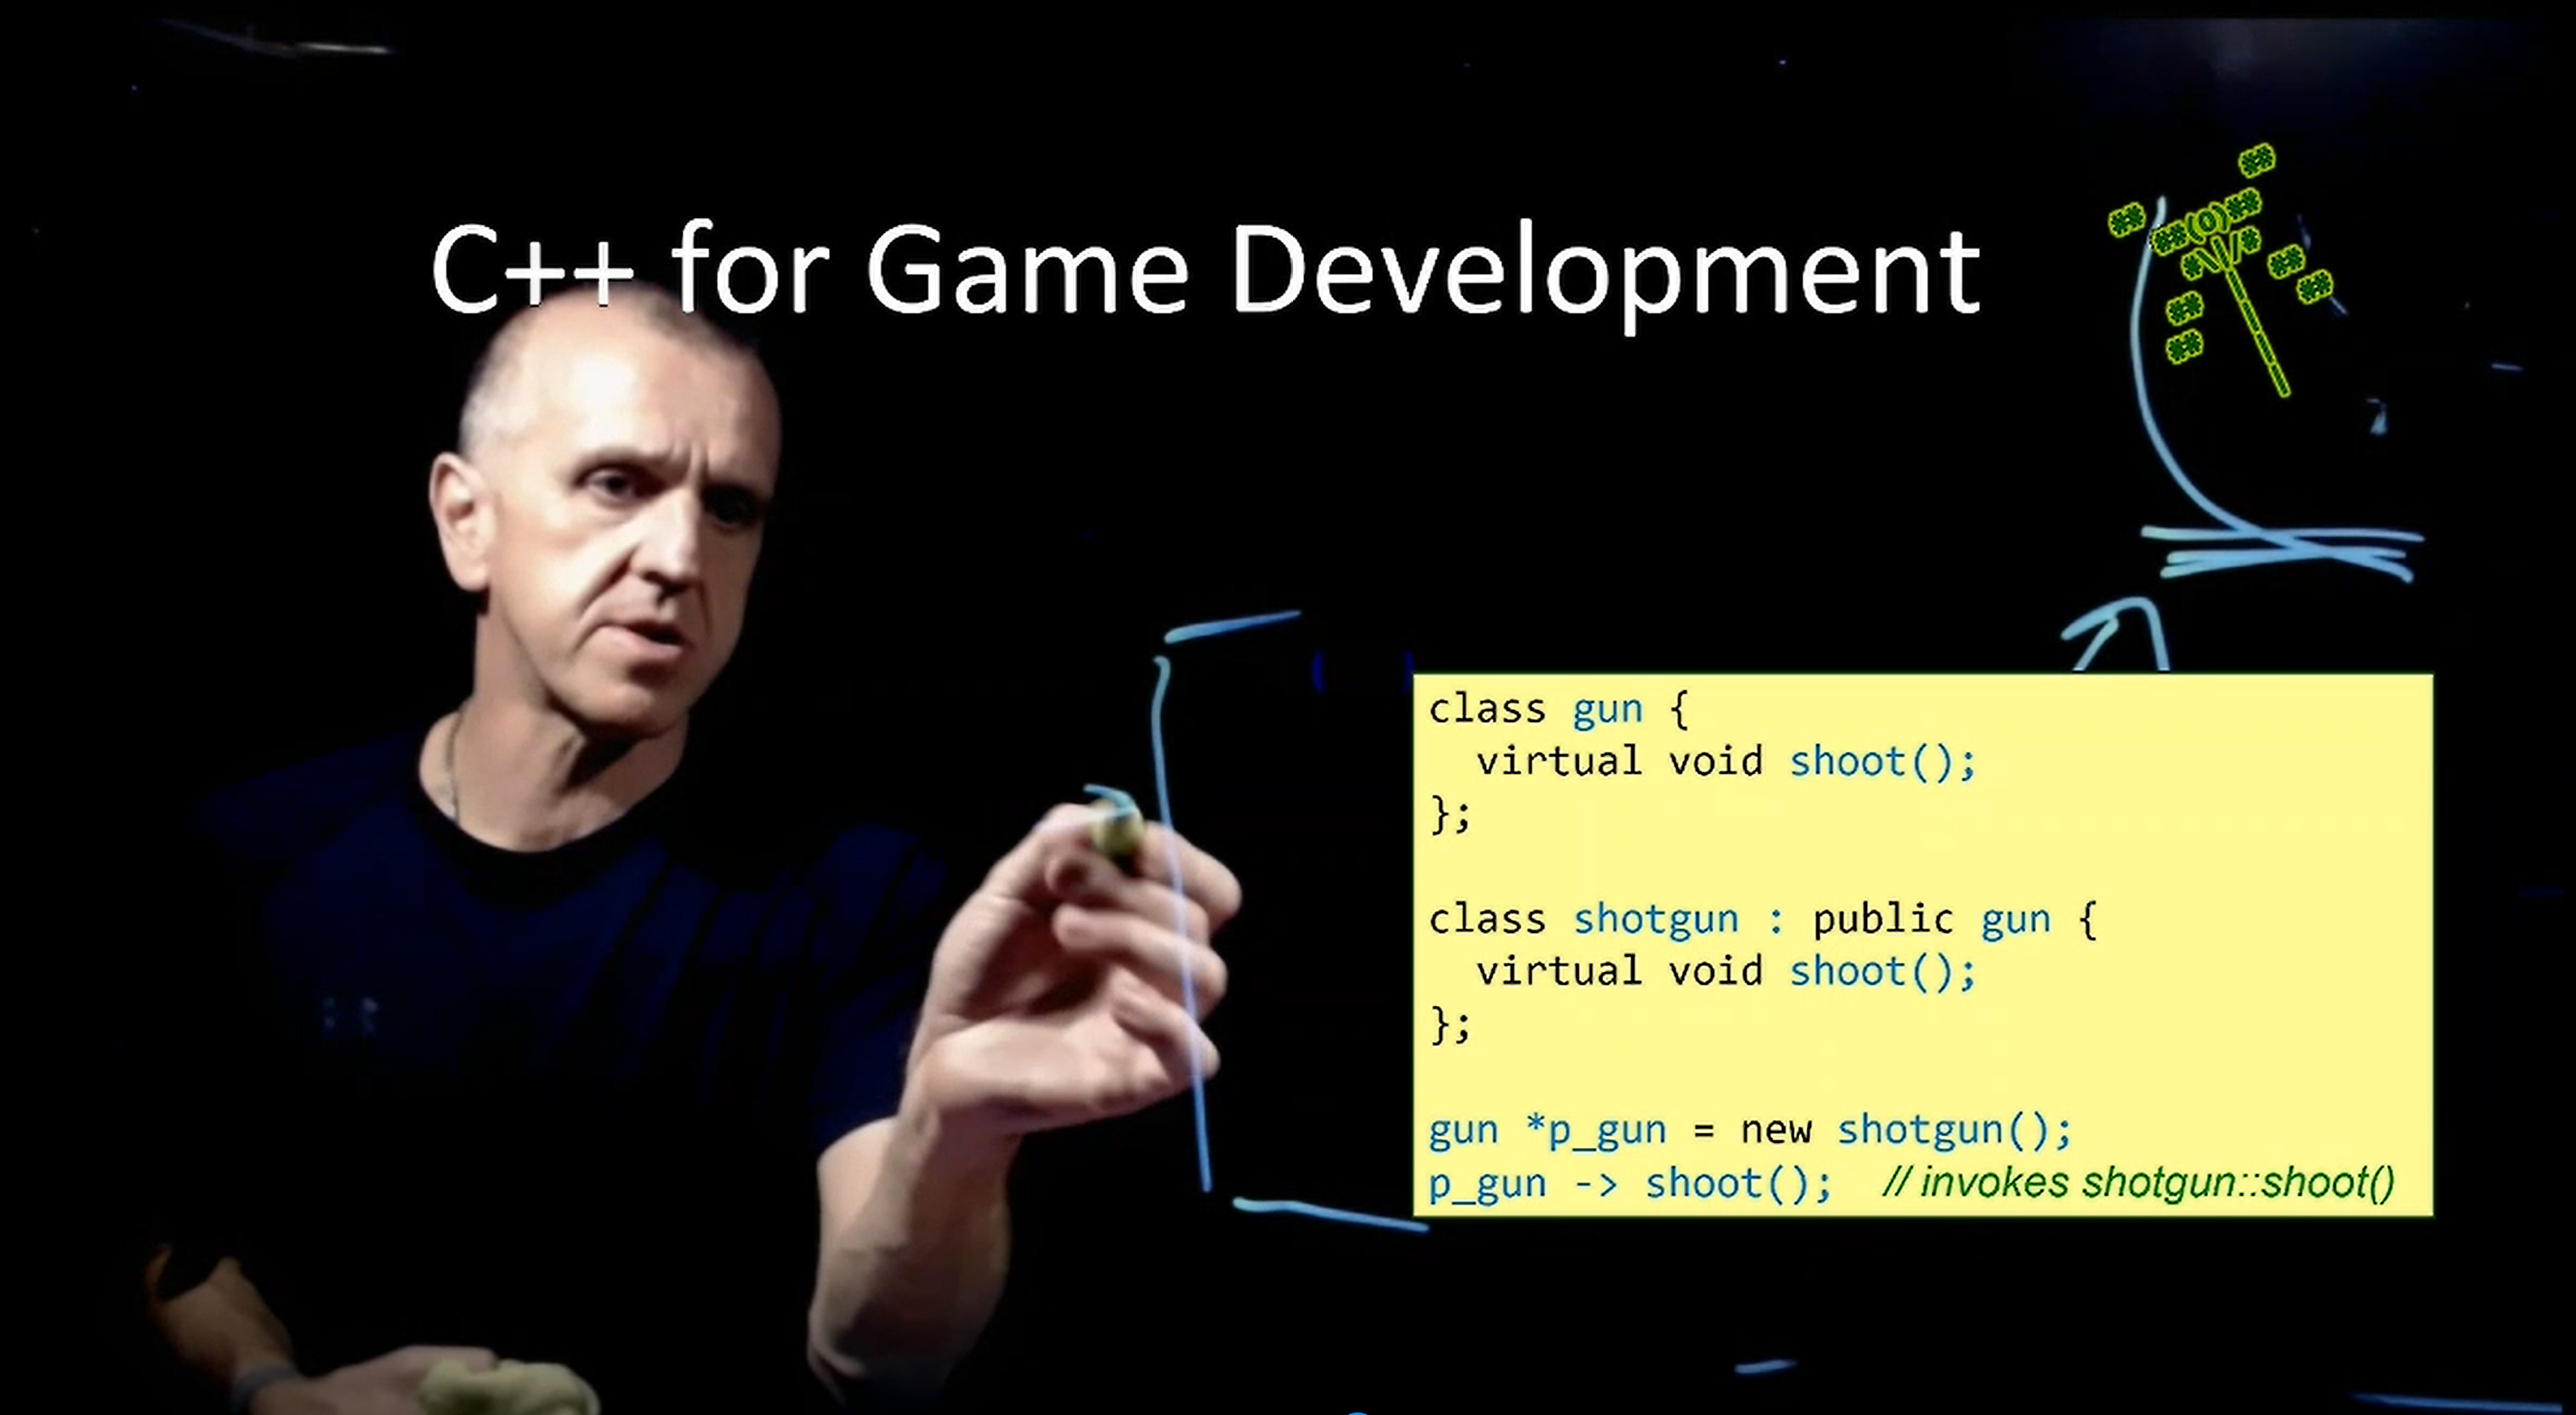
As mentioned in the overview, for my teaching, I wanted to mix lightboard writing with Powerpoint slides. This would let me create guiding class material ahead of time (e.g., a complicated figure or C++ code), and still get the benefits of real-time annotations facing the students via the lightboard.
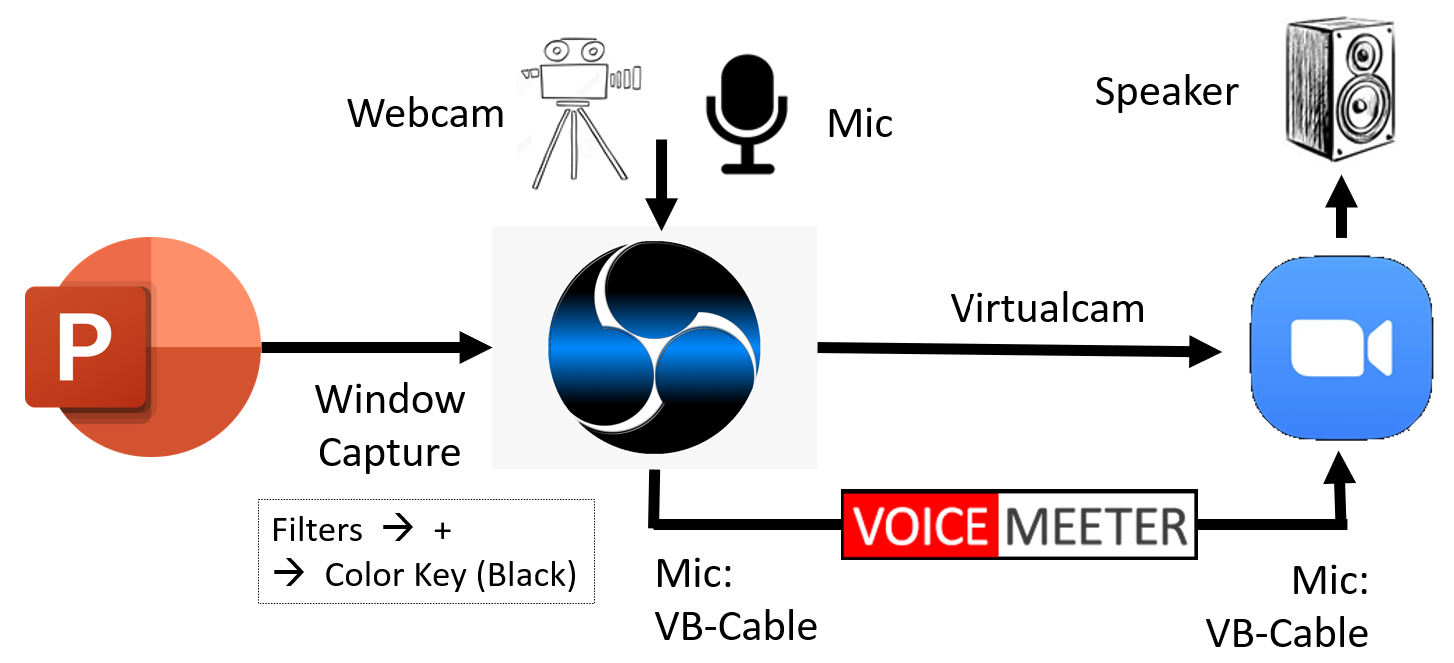
The solution I came up with is to:
Install software:
Note: the latest version of OBS for has a virtual camera in the system so the "OBS Virtualcam" step above may not be needed. I have not tried the new built-in camera, however, and it appears to only be in place for Windows (not Mac or Linux).
Configure OBS:
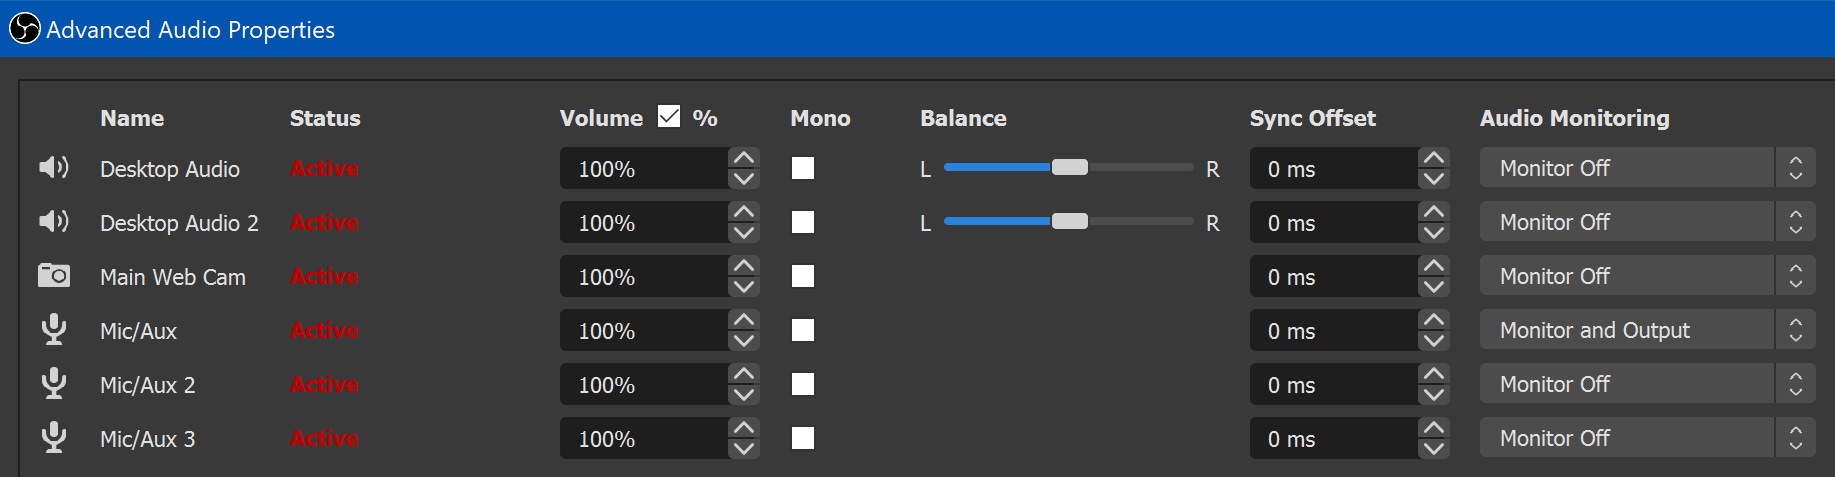
Configure Voice Meeter:
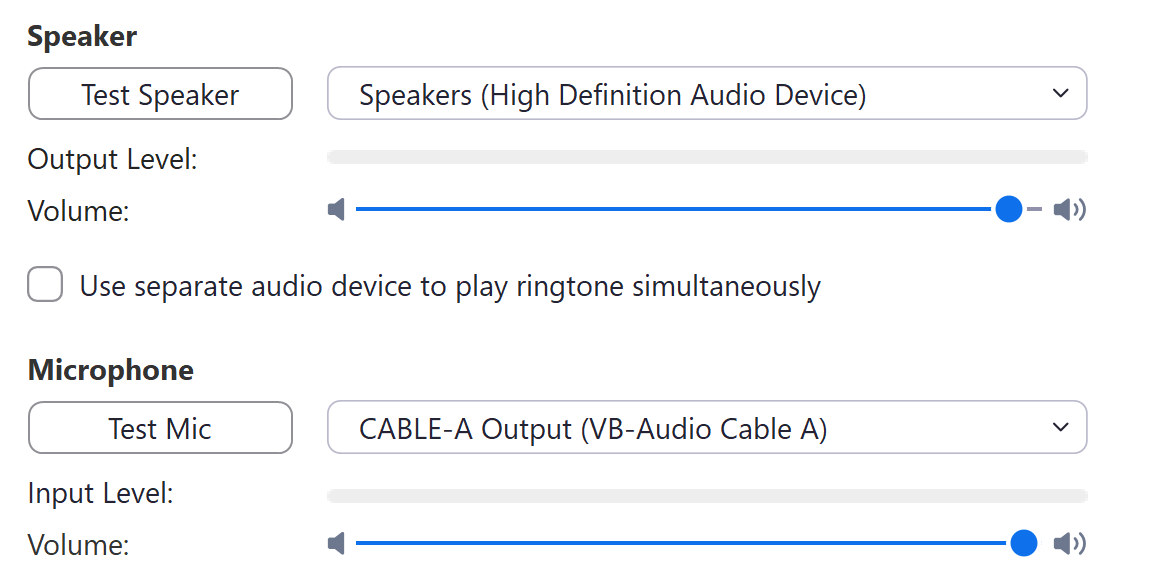
Configure Zoom:
Configure Powerpoint:
Option: Install Logitech Capture. My Webcam is a Logitech, so works with Logitech Capture. This allows me to adjust the camera settings to make me look my best :-). Helpful settings include brightness adjustments and manual focus, helpful to avoid some of the auto-focus wonkiness of my Webcam. If you install Logitech Capture, it runs inbetween the Webcam and OBS. Logitech Capture then pulls directly from the Webcam and registers itself as a virtual camera named "Logi Capture". OBS is then adjusted to pull video from Logi Capture instead of the Webcam
Screenshots of my final settings:
overview | build | studio | software | other | links | gallery
Depending upon the studio space, light darkening curtains can help, as can putting black cloth or paper on the ceiling. This makes it easier to adjust the camera pan and tilt and the lightboard and background positioning.
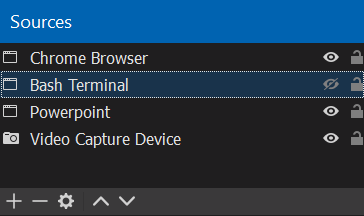
While Powerpoint is the overlay example presented here (and my goto source when lecturing), OBS can be used to overlay any window, such as code examples or browser Web pages or even videos. Use the OBS "Window Capture" steps above to add a window of choice. Each window can be renamed (e.g., "Powerpoint", "Bash Terminal") so that they are easily identified during lecture. The OBS "Sources" window "eyeball" icon can be used to toggle a window overlay on and off.
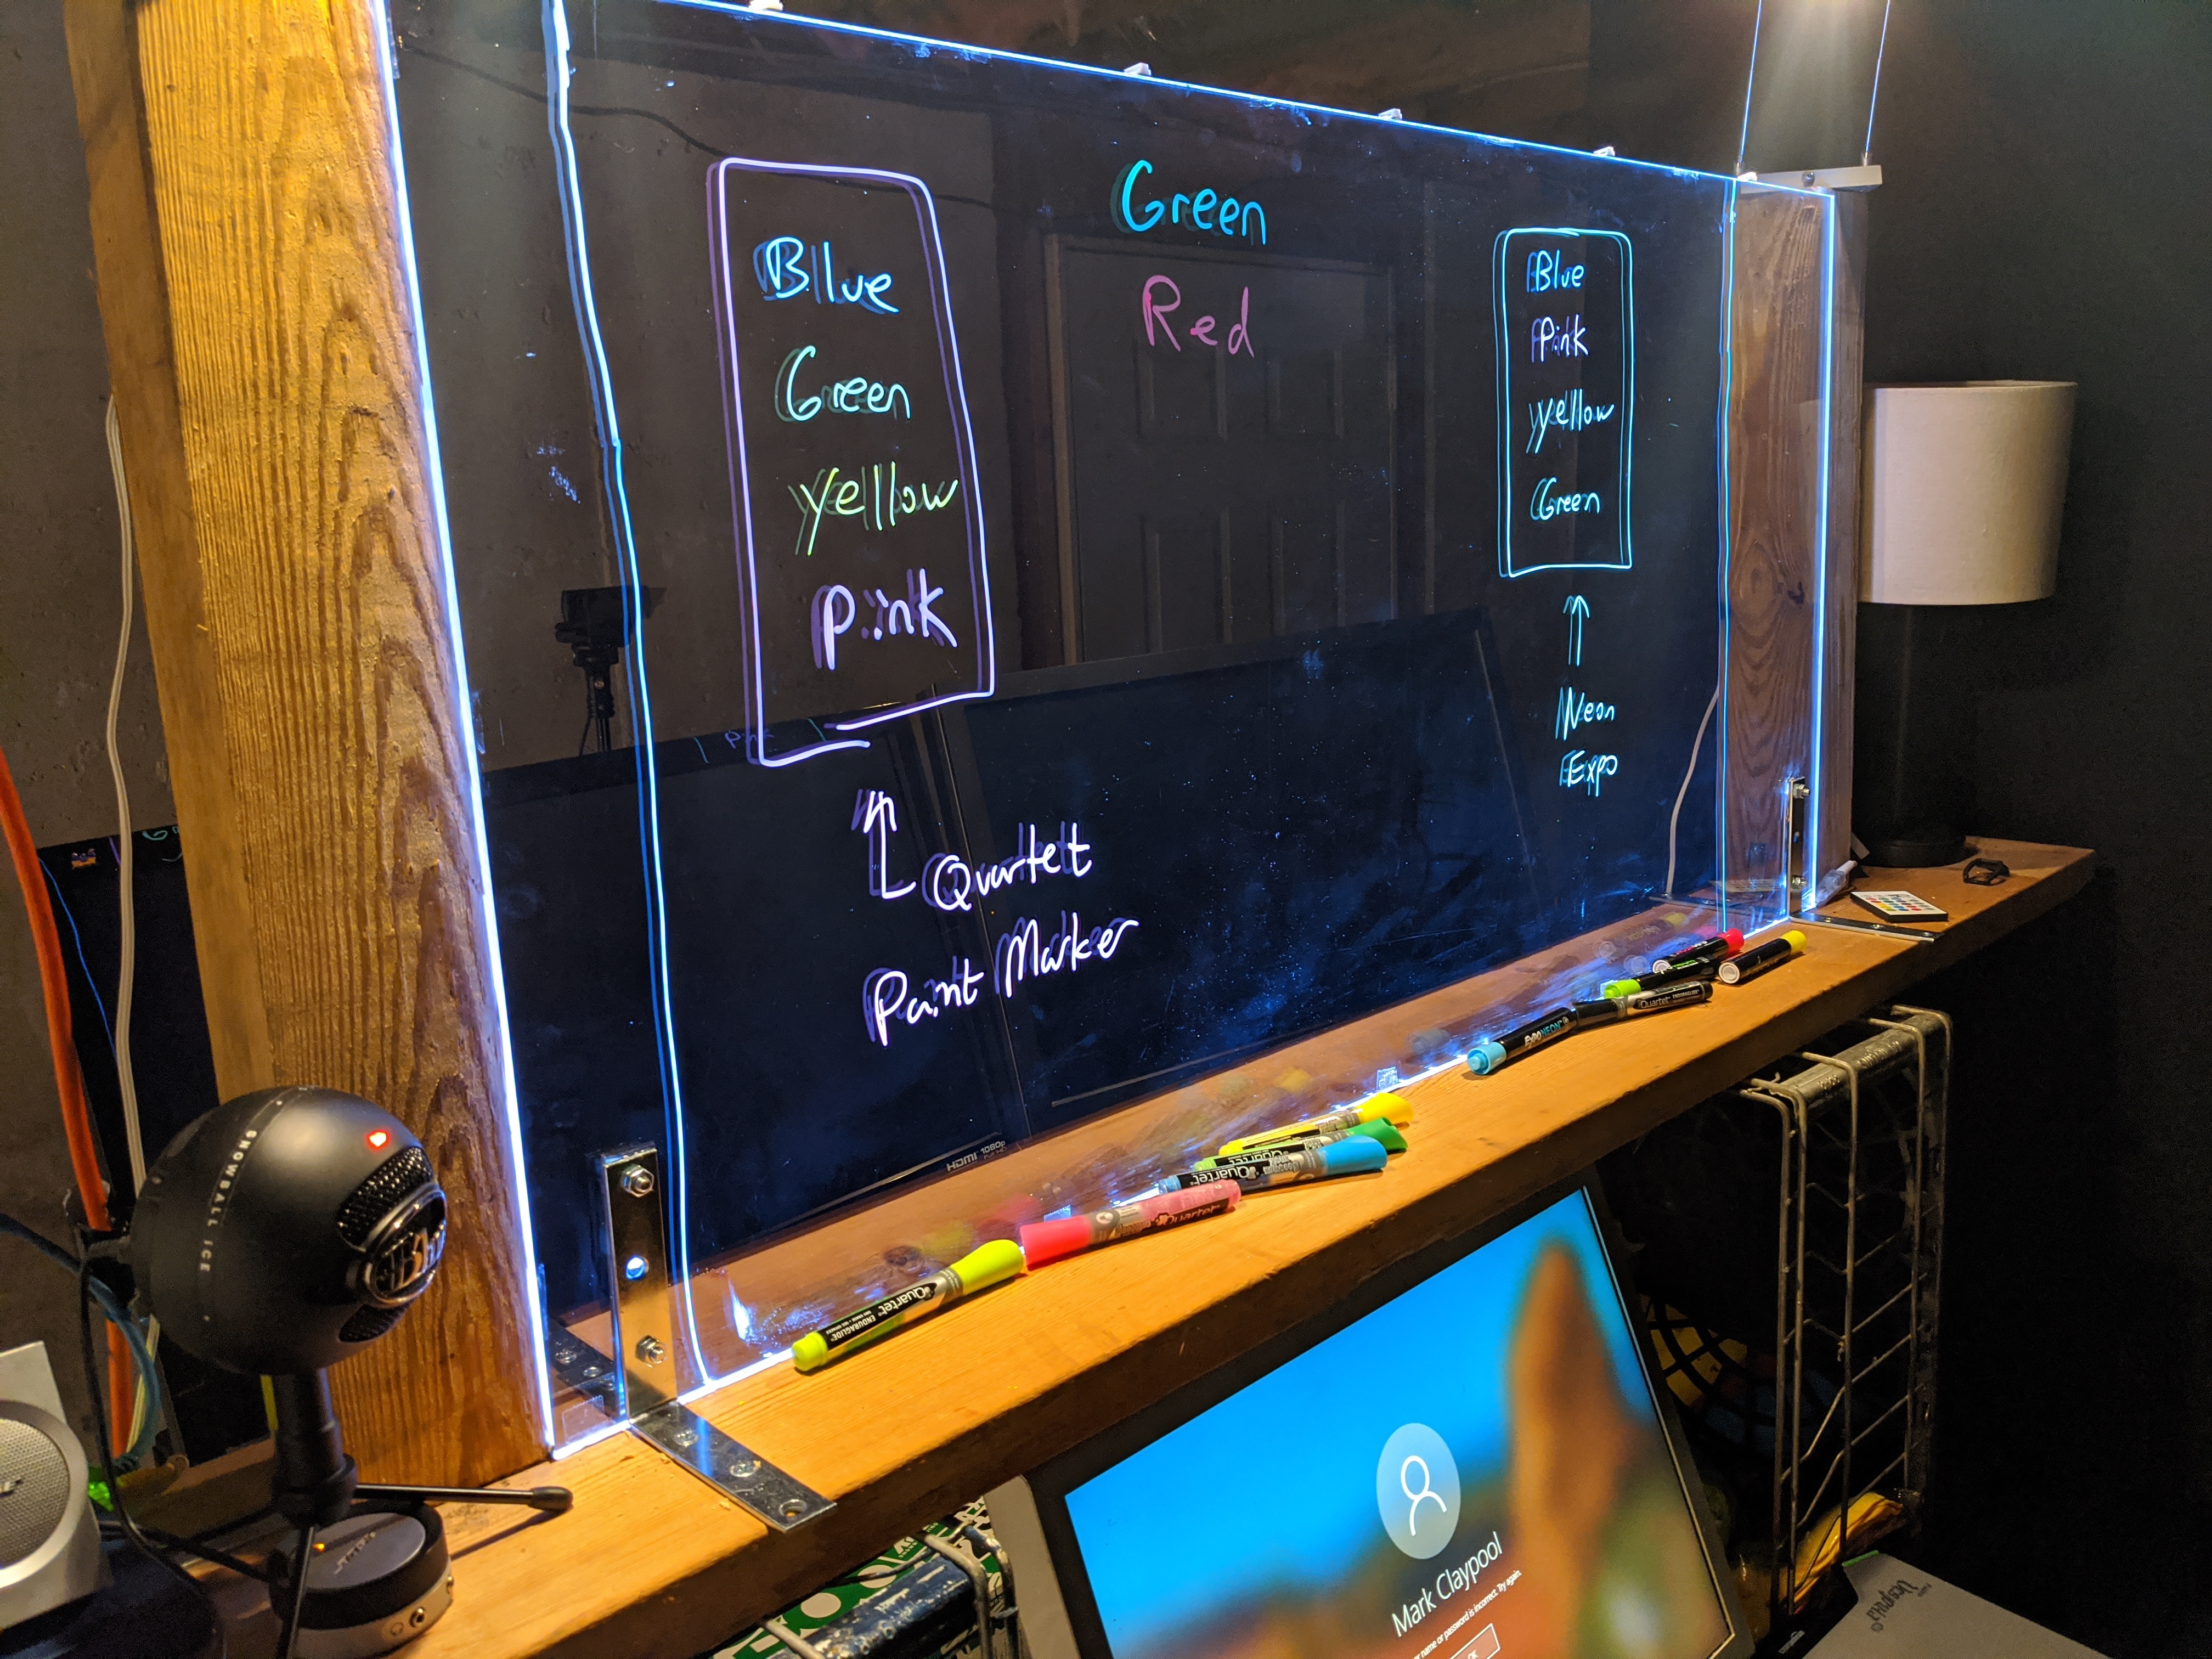
As noted above, using more lightstrips is not better. Similarly, adjusting the lightstrip can help with color and clarity of the board and writing. Too bright and all the pen colors look white (and the lightboard might look cloudy). Too dim and the colors don't pop. Fortunately, most lightstrips have a dimmer that can be adjusted, mostly using trial and error. And if light seems to be "escaping" without coming out of the writing, a strip of black tape (e.g., electrical tape) on top may help.
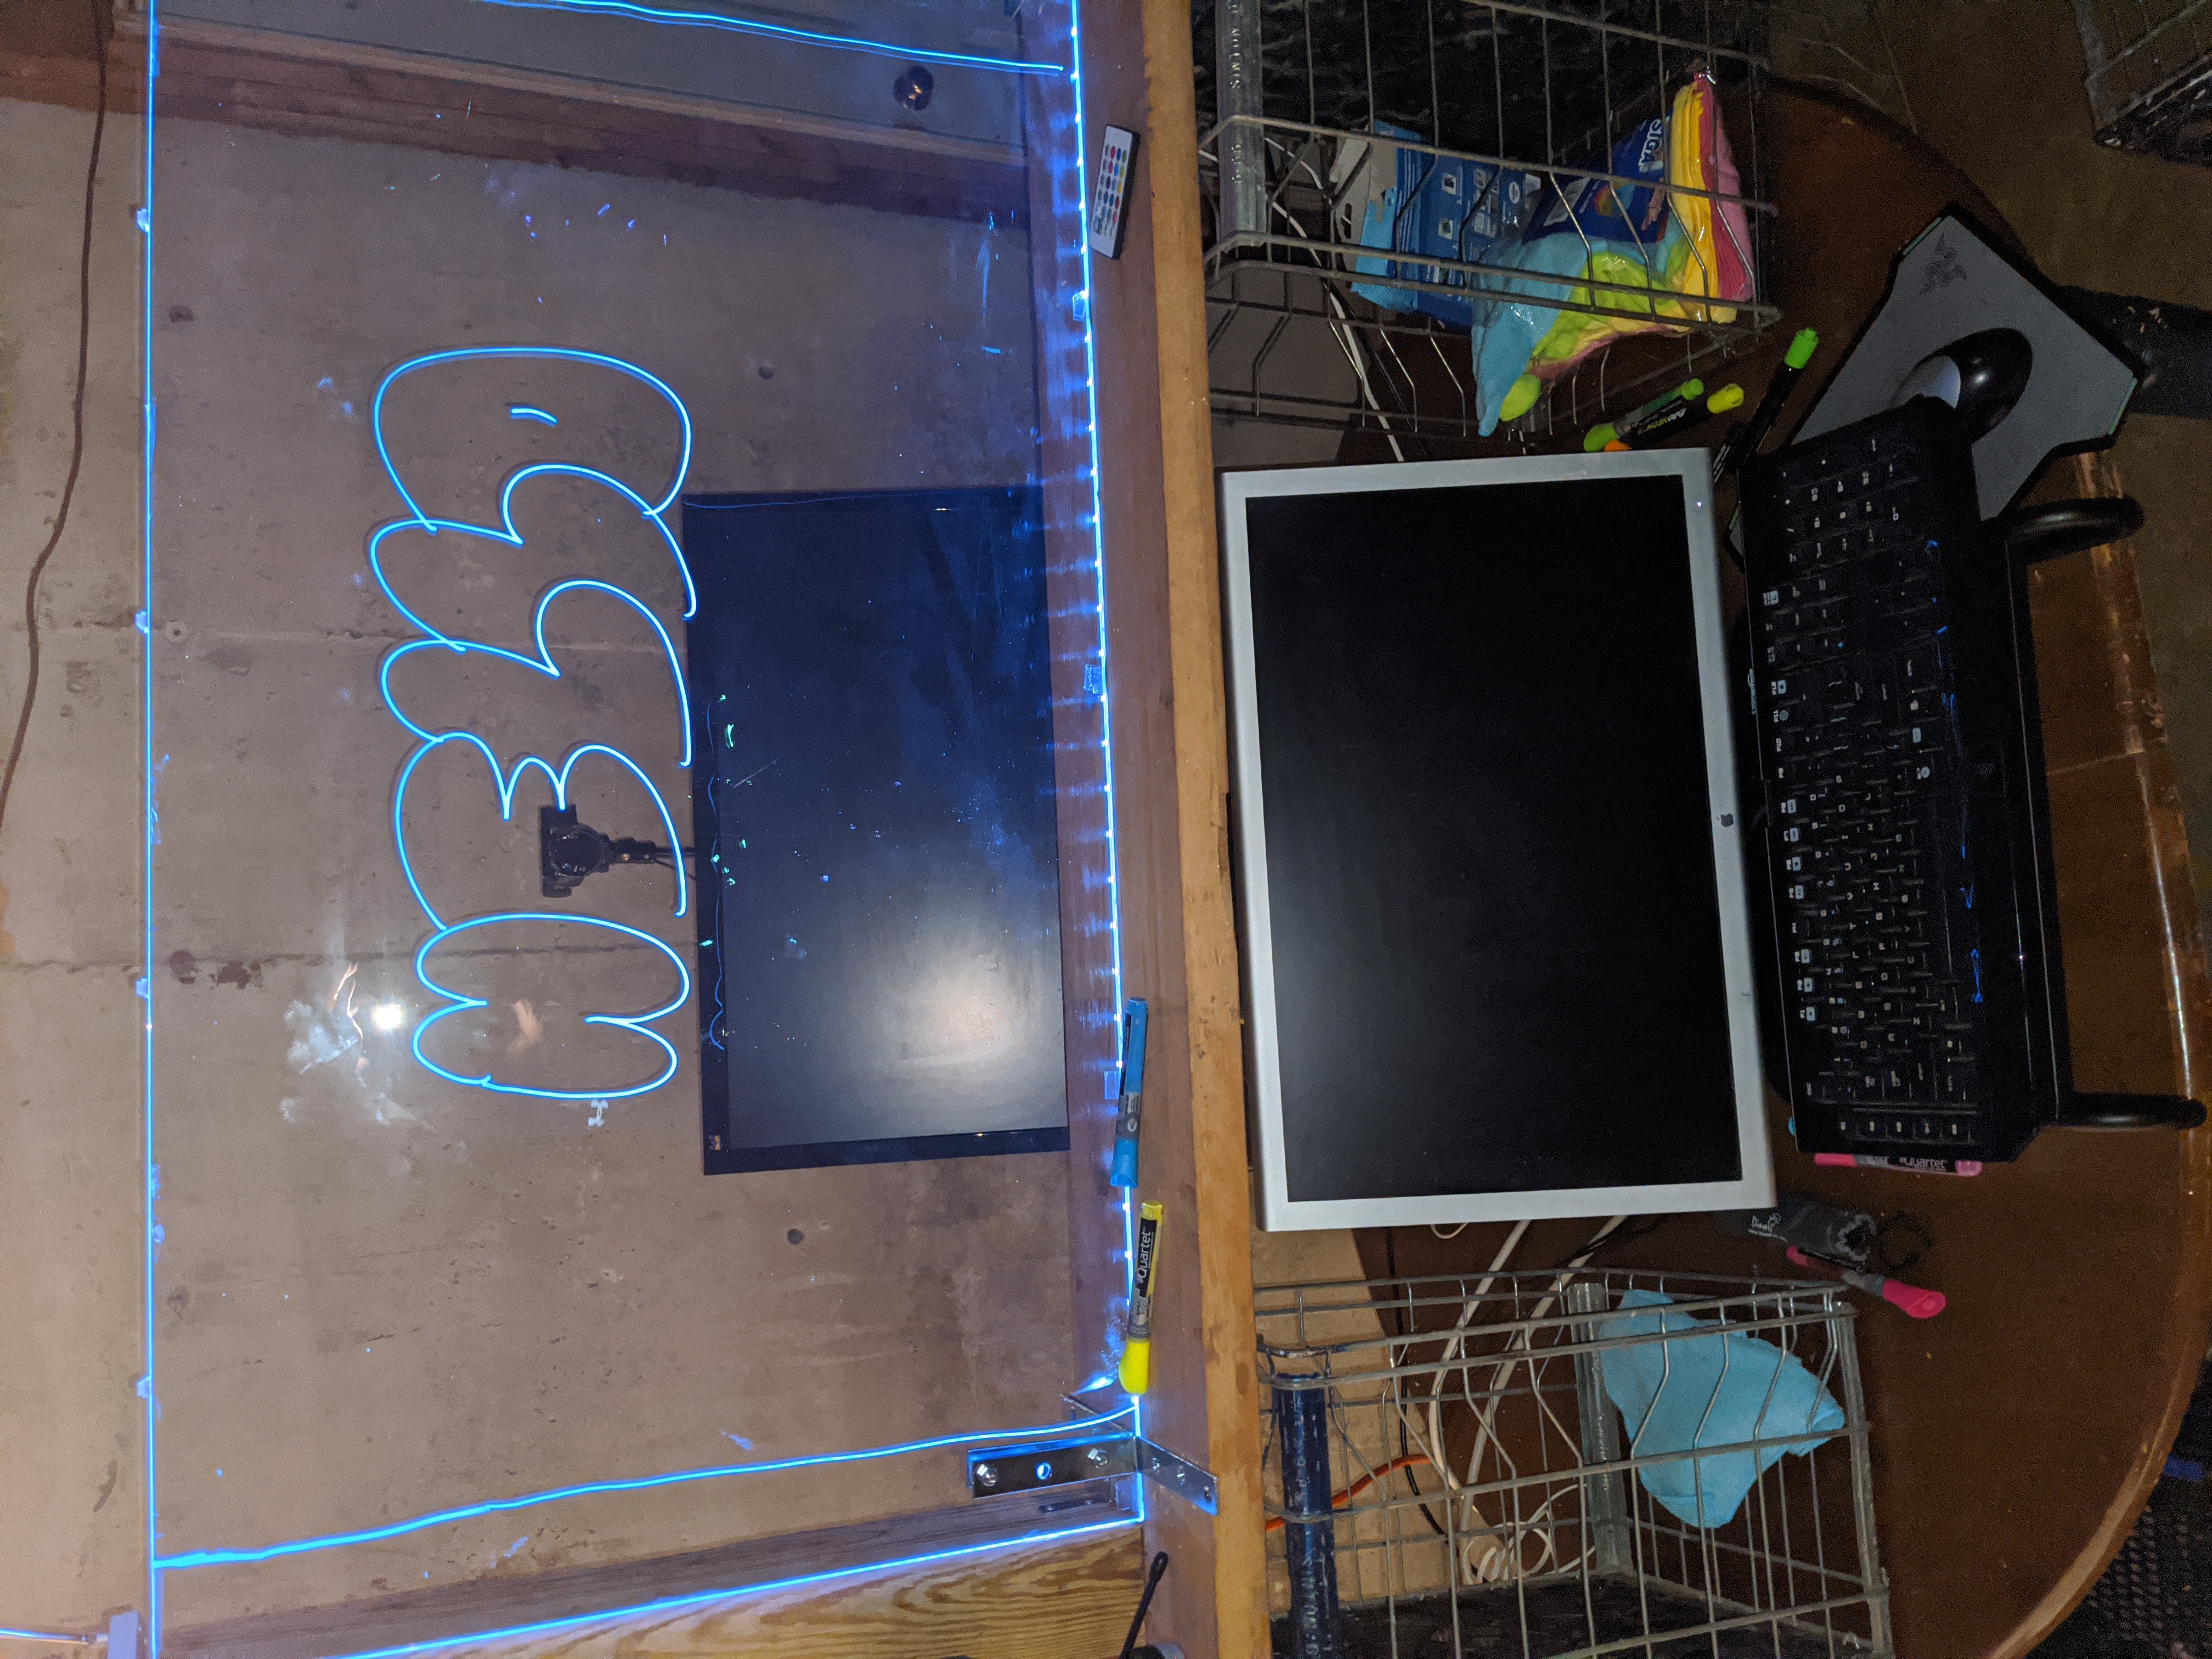
For Zoom, it's nice to have a monitor positioned at a convenient angle to observe the class. Ideally, this will be through the lightboard since that way it will look more natural as the presenter writes and speaks (kind of like having the Webcam in the same direction as the Zoom window rather than off to the side). See the setup picture above or the photo gallery for pics of my setup. The same monitor is also useful for the presenter to see the video feed with the Powerpoint overlay.
However, without care, this monitor (sometimes called a "confidence monitor") will reflect in the glass and be picked up by the camera. Fortunately, reflections can be blocked by using a polarizing filter, oriented so as to block reflections. Basically, a polarized lens is placed in front of the camera, then rotated until the reflections disappear and secured in place. While Webcams do not typically have lens options, what did work for me was using relatively inexpensive polarizing sheets, cut to size and carefully taped onto the Webcam lens.
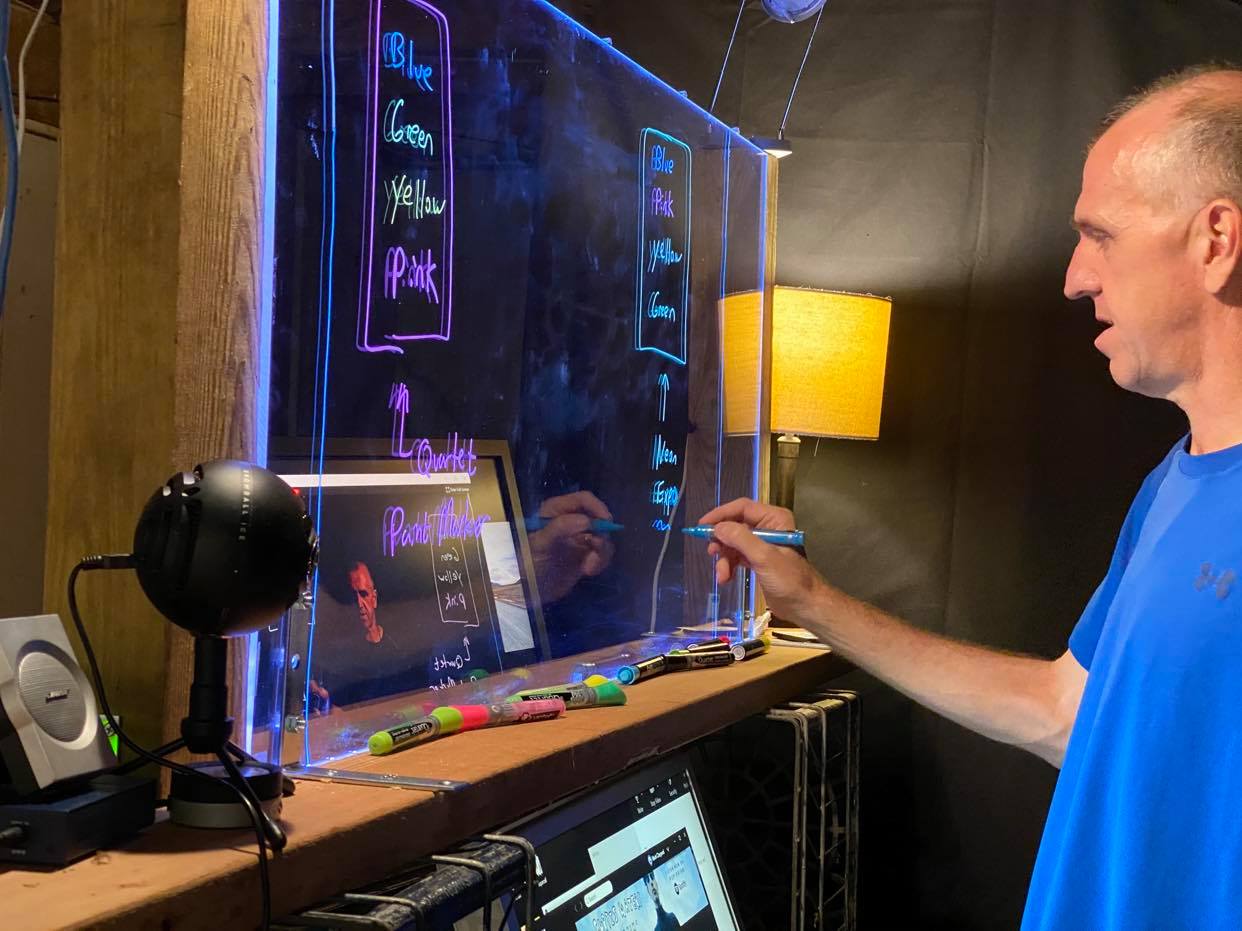
Spending a bit of time making a good lightboard slide template - e.g., black background, white text, logo - provides a good foundation for lightboard presentations and provides a uniform style across lectures. Make sure there is room for the speaker. For example, I have a template with a black background (made transparent by OBS, see the "Color Key" above) and leave the bottom left empty for me to stand since I'm right handed. For ease of overlay, the template aspect ratio should be the same as the lightboard so it can stretch to fit the camera/lightboard without distortion when in OBS.
During presentations, small black marks can be placed on the lightboard ahead of time marking where, in relation to the slides, writing should go - the camera won't pick them up but the presenter can see them. A wireless presentation clicker can be helpful, too. Update: I like the Logi R500 better since the non-uniform-sized buttons mean I can use it by "feel" without looking at the controls.
Erasing the lightboard can take a bit of muscle, especially once the marker ink dries. An alternative method I've found: 1) lightly spray the lightboard with water (I bought a small spray bottle for this), 2) smear it around with one of your microfiber cloths, 3) let it sit for a 30 seconds or so, and then 4) wipe the whole board clean with another (clean) microfiber cloth. Perfecting this technique takes a bit of practice - adjusting the of water, smearing and waiting - but is easier (and more satisfying) when erasing the whole board. Note! Make sure your lightstrip is for outdoors/waterproof (or be careful not to let the water run down) if you use this method.
overview | build | studio | software | other | links | gallery
Some links that may (or may not) be useful:
Courtesy my colleague, Sudeep Chandra, who worked through getting his Mac setup working (note, uses NDI tools instead of VirtualCam):
overview | build | studio | software | other | links | gallery
overview | build | studio | software | other | links | gallery
Happy lightboard-ing!
-- Mark