
In this tutorial you will get an introduction into Game Development and learn how to:
As a look ahead, the game you will make is:
For reference (or if you get stuck), you can download the full project source here. The archived file includes the explosion sprite used in this tutorial.
This tutorial only assumes you have some basic computer knowhow and a willingness to learn and that you have done Tutorial 1 ("Choose Your Own Adventure"). The tutorial will use ActionScript 3.0 to handle the interactive elements. Though this tutorial is more code-heavy than the last tutorial, all the code will be provided and the tutorial will try to explain it as clearly as possible. No prior programming experience is neccessary, although it can help.
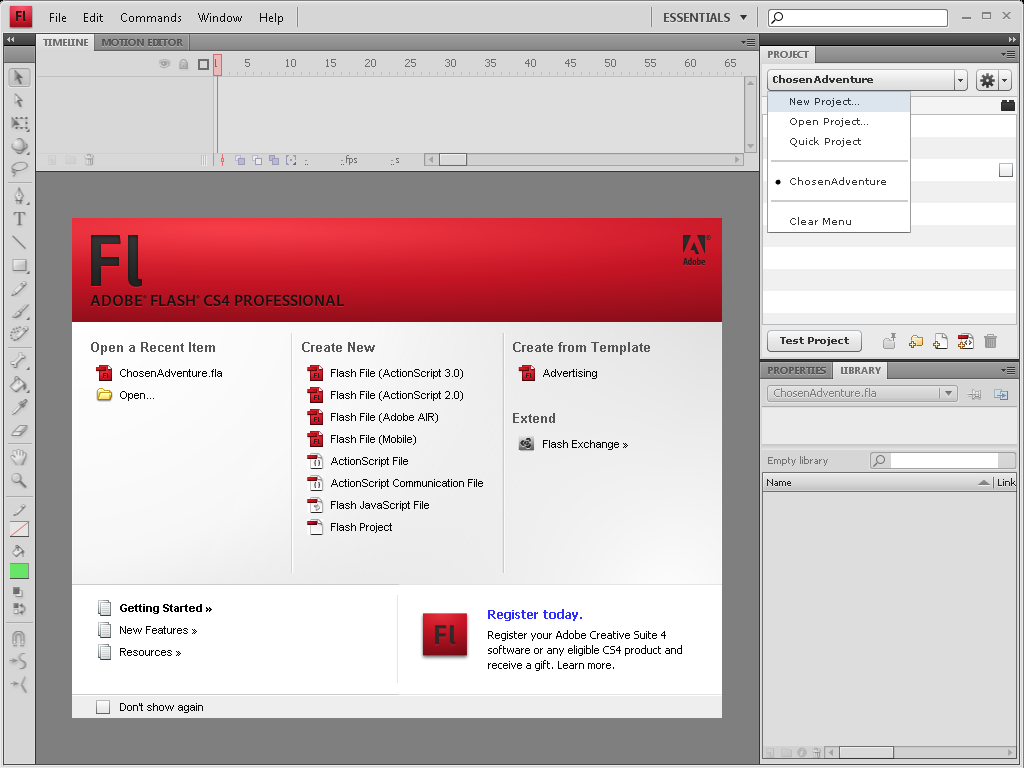
Once again, open up Adobe Flash CS4. Use the Project panel to make a New Project by clicking on where it says "ChosenAdventure", and selecting "New Project" (Fig. 1). This is the same control that you can use to switch between projects. When the "Create New Project" dialog pops up, it will be inside the Project panel. You may want to drag the panel off the sidebar so that you can see the whole dialog. I named my project "FlightSim", and ensured that it is still set to use ActionScript 3.0.
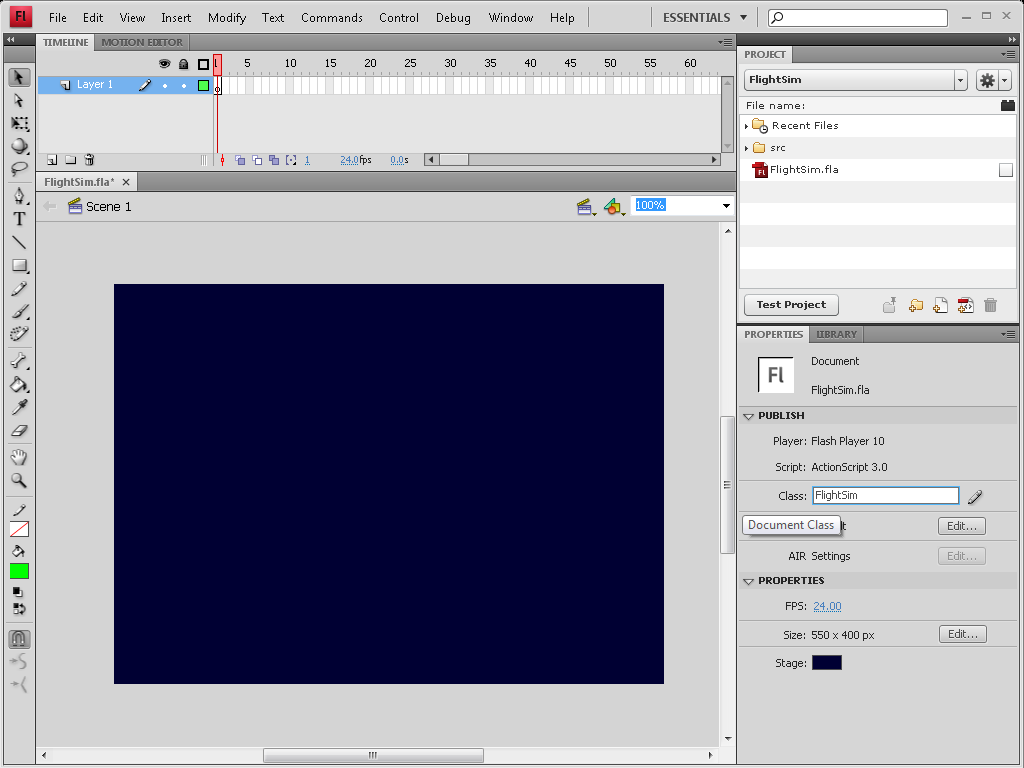
Add a new Flash file to the project, naming it "FlightSim.fla". You should also make a "src" directory and, like we did in the first tutorial, set up Flash to know about it (by adding it as a Source Path in the Publish Settings).
Change the stage's background color to a more space-like color. At this time you should also assign a Document Class at this time through the properties panel.
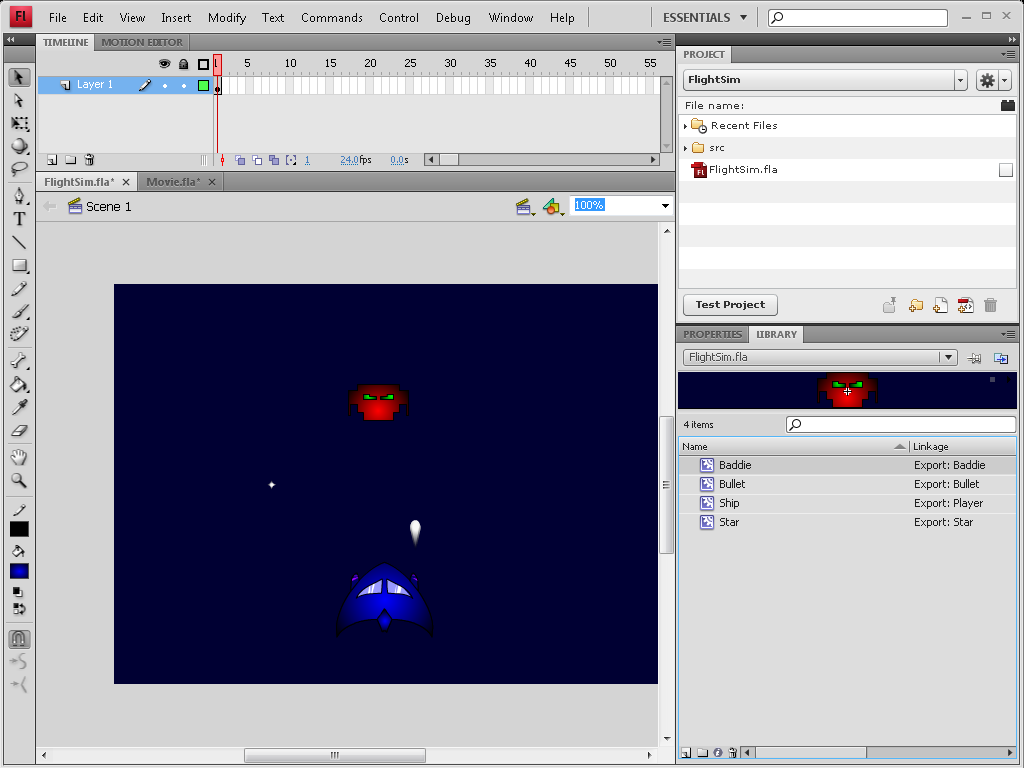
It's now time to put your artistic abilities to the test. Use the various drawing tools to draw the player's ship, an enemy, a bullet for the player to shoot, and a star which will eventually form the background of the game. Convert each into a symbol and assign an ActionScript class name to each. I named mine "Player", "Baddie", "Bullet", and "Star".
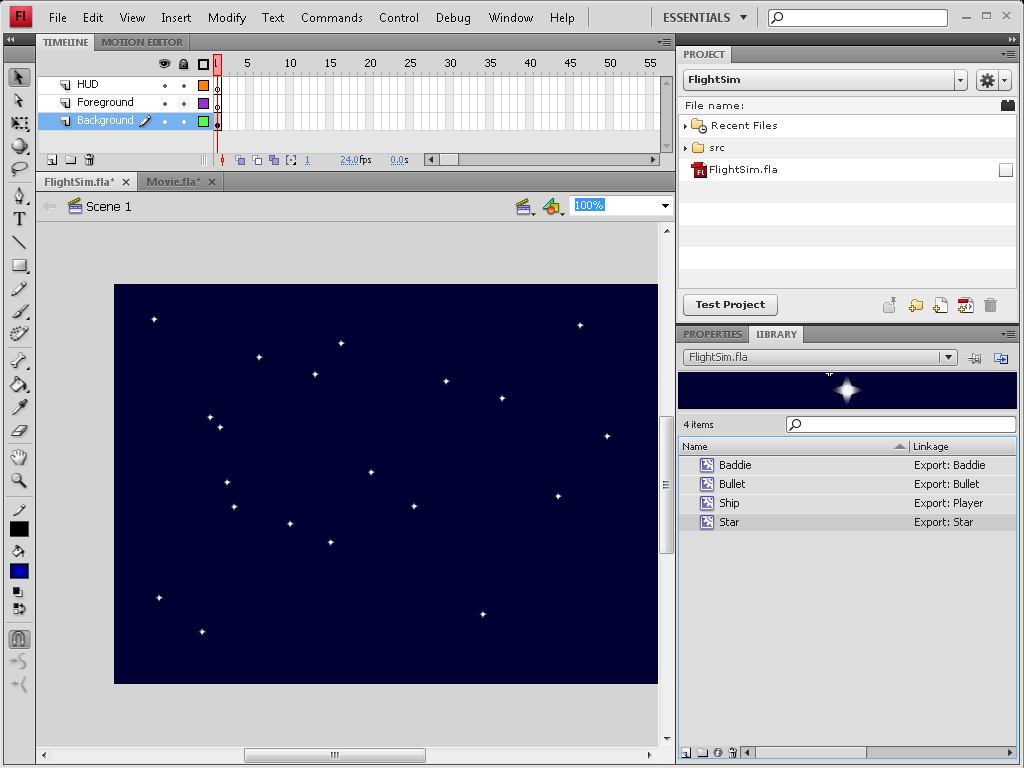
Delete the symbols (Player, Star, Baddie, and Bullet) from the stage. Although you deleted the symbols from the stage, they still exist in the Flash file's Library panel. Make three layers, naming them "Background", "Foreground", and "HUD".
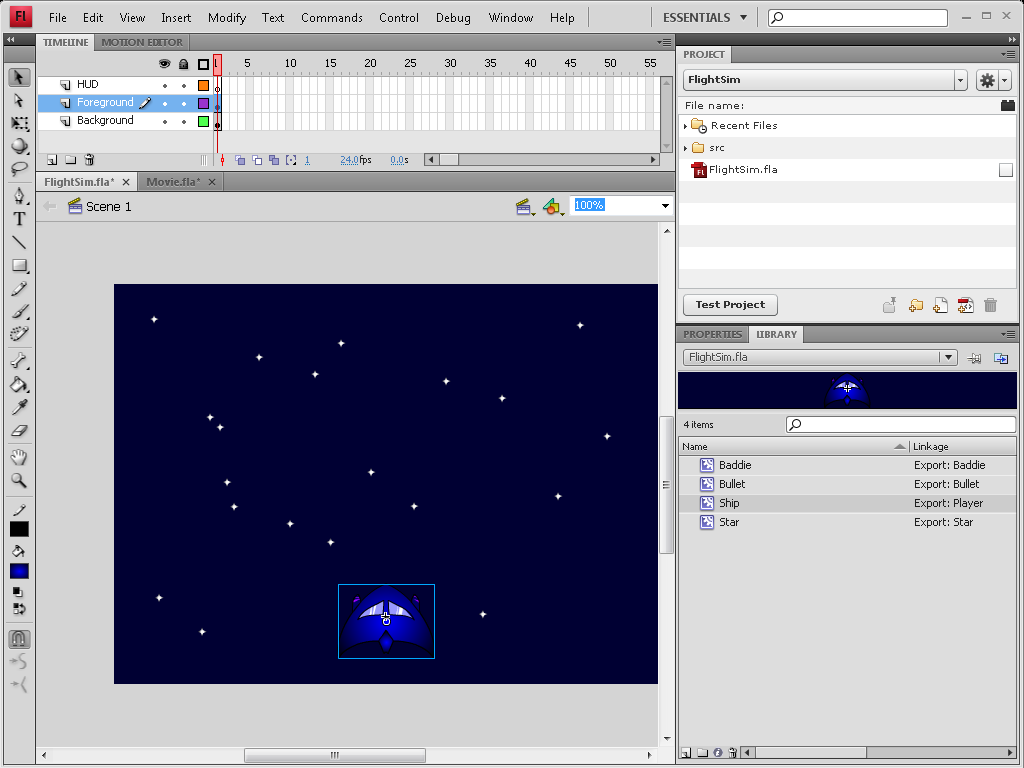
To create the starfield background of our game, select the Background layer and drag a bunch of stars onto the stage from the Library. Keep dragging stars until you feel your starfield has a good density of stars on it.
Now select the "Foreground" layer and drag the player's ship onto it. Only put one player on the stage.
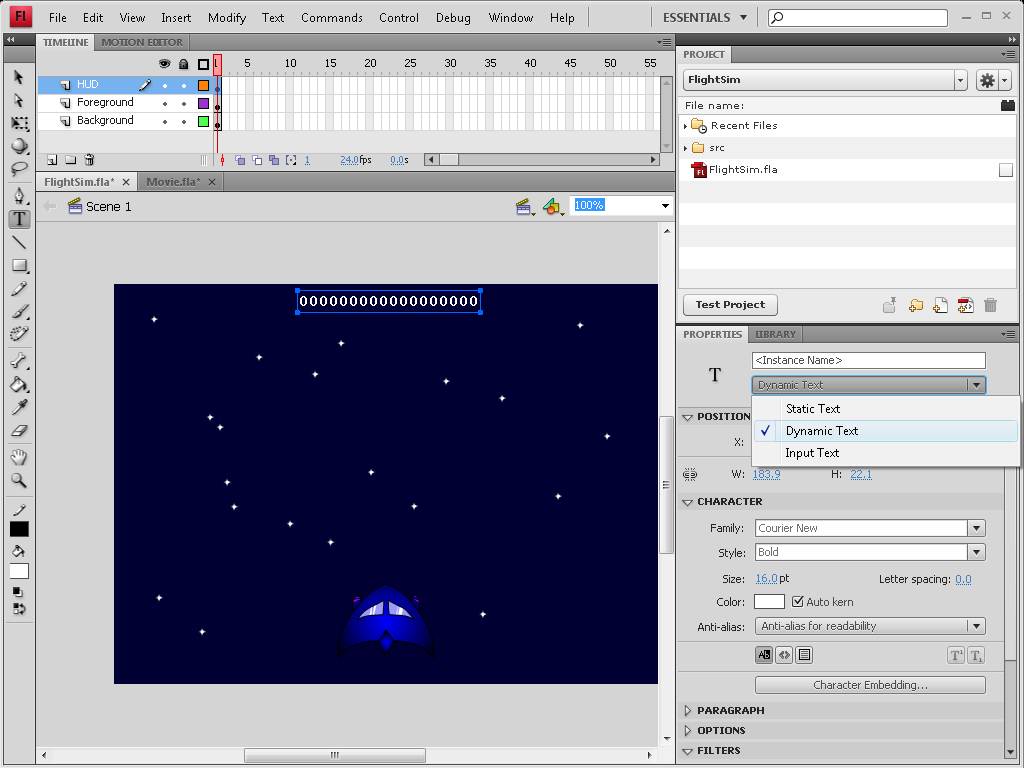
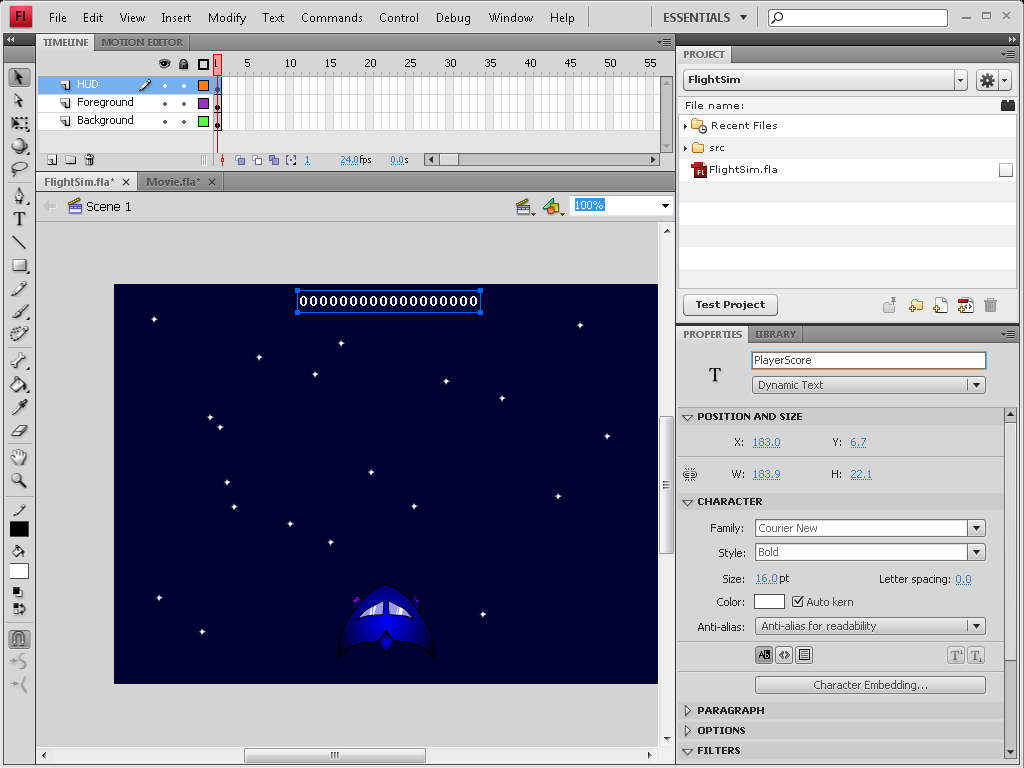
After selecting the "HUD" layer, use the text tool to add a score output. Give the text an instance name of "PlayerScore". Fill the score with 0's for now, and while the text element is selected, change it from "Static Text" to "Dynamic Text" in the properties panel. By changing it into a dynamic text field we will be able to change its content during our game using ActionScript.
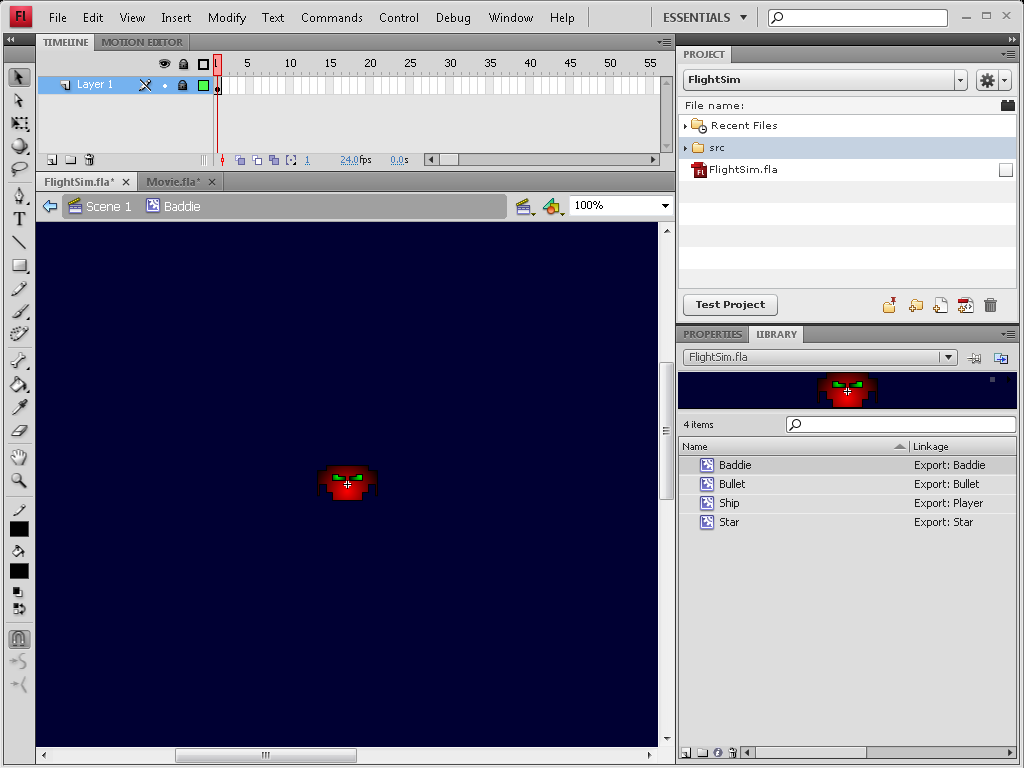
We have a bullet for the player to shoot, but without an explosion animation it would be pretty boring to kill enemies, so let's add one. Double click the "Baddie" symbol in the Library panel. This will open it up for editing.
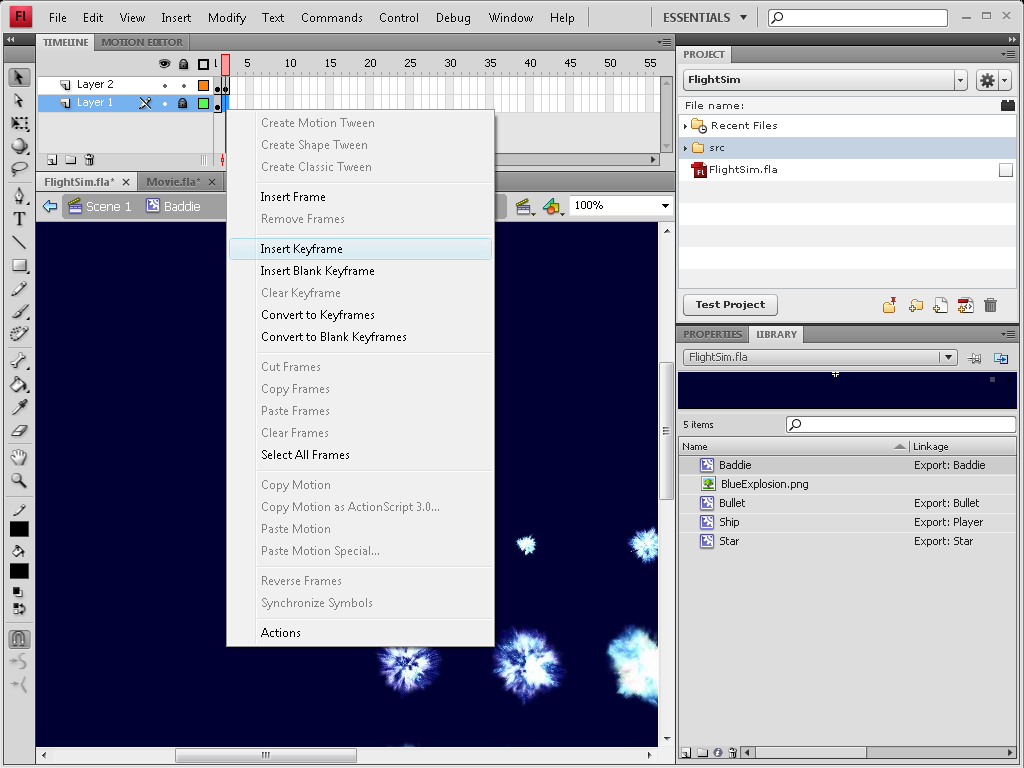
Use "Insert Keyframe" to create a second frame on Layer 1 which still has the enemy ship. Create a second layer and make a blank keyframe on the second layer. This will be the layer for explosion, so import an explosion spritesheet into this layer using the same technique from the last tutorial (when we imported the game logo). Also, you might want to name the first layer "Ship" and the second layer "Explosion" to help remember which layer has what.
It may be eaier to work on the explosion layer if you lock the "Ship" layer. To do this, click the dot underneath the masterlock icon to the right of the "Ship" layer's name.
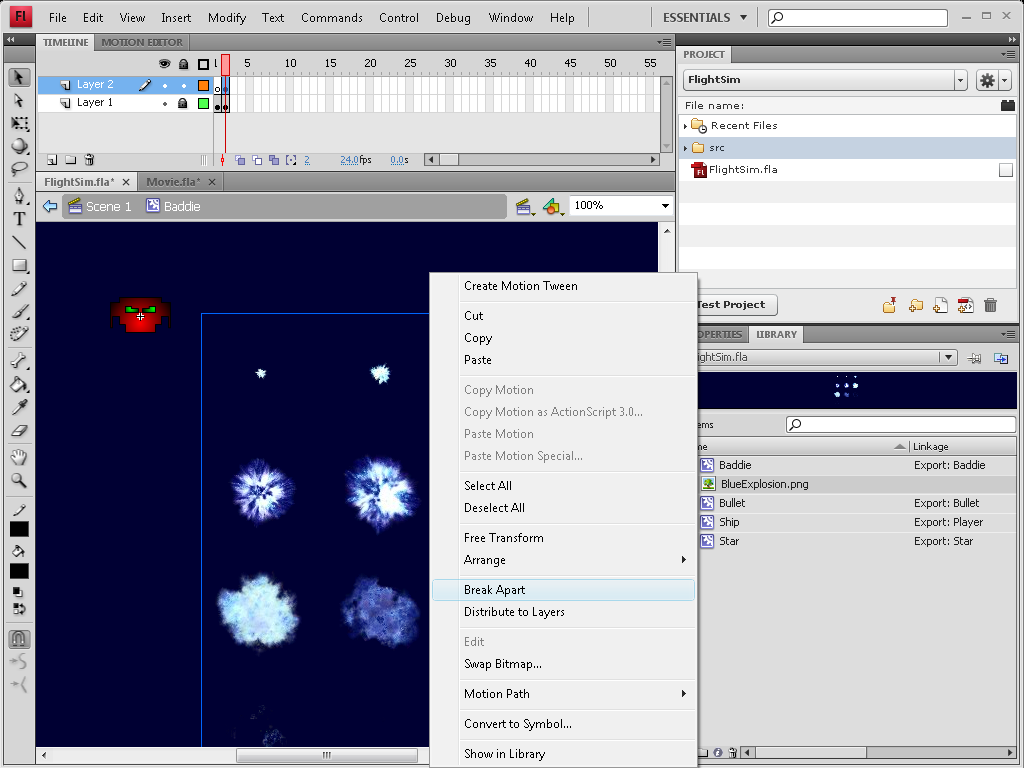
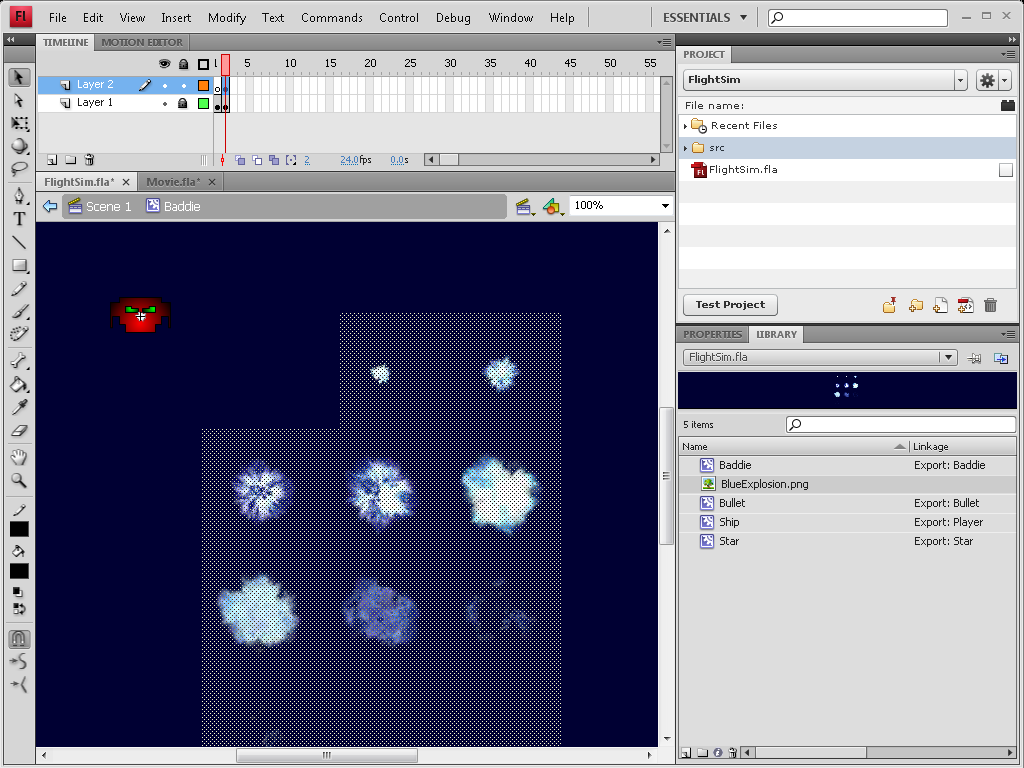
Now, right click on the sprite sheet and choose "Break Apart". Select the first sprite by dragging a selection box around it and pull this over the ship. Select the rest of the sprite sheet and hit "ctrl-x" to cut it (or use the right click menu). Insert another blank keyframe on the second layer and hit ctrl-v to paste the sprite sheet. Keep repeating this process until you have made a frame for every explosion sprite.
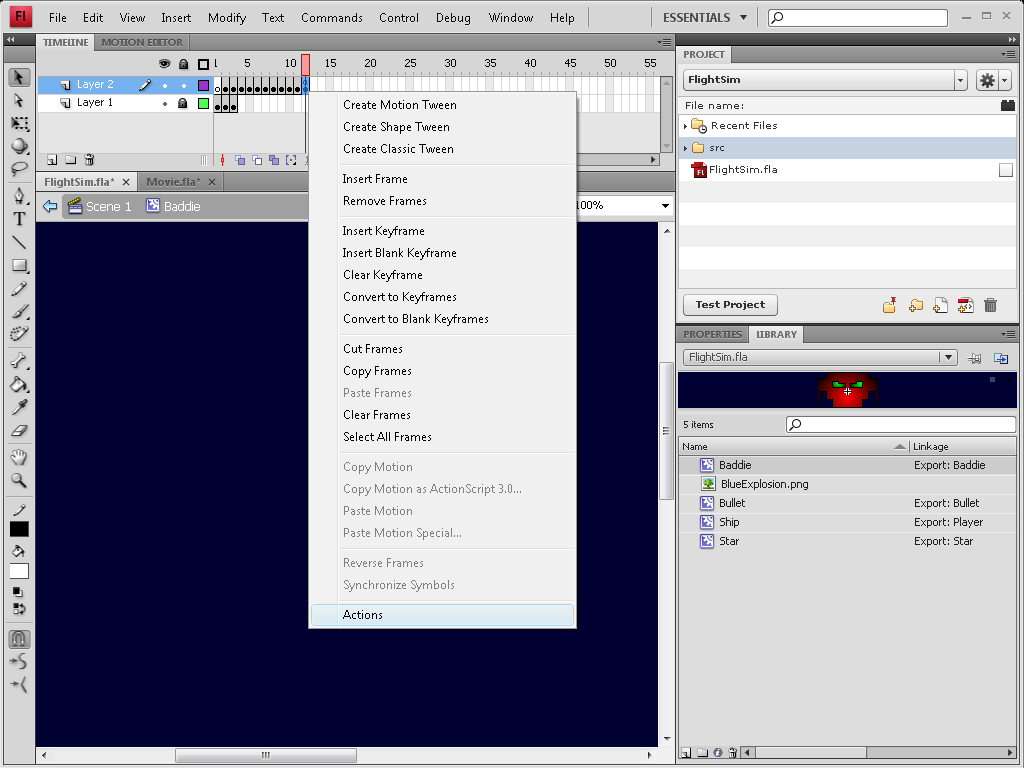
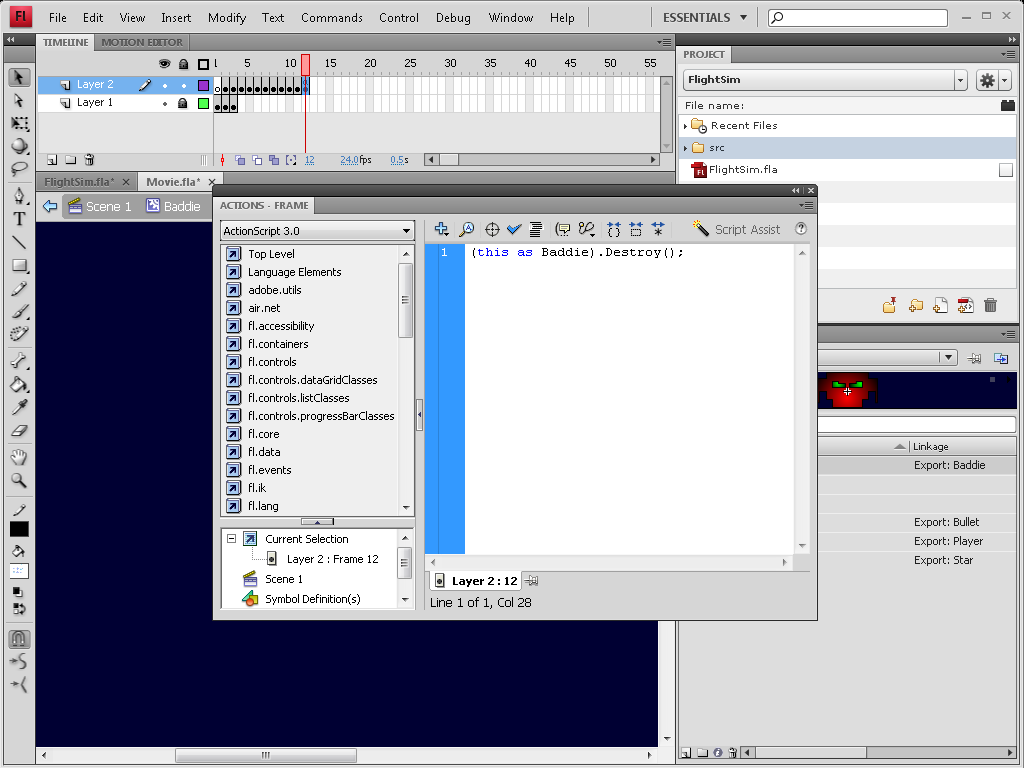
Finally, create one extra blank keyframe after the explosion animation has finished. On this frame, right click and go to "Actions". In the dialog that pops up, add:
(this as Baddie).Destroy();
This code will execute when the animation hits that frame, and although the "Destroy()" function is currently undefined, we will soon be writing it.
The first thing you should do so that we can test our movie, is create all the required ActionScript files ("Baddie.as", "Player.as", "Bullet.as", "Star.as", "FlightSim.as"). After creating them, fill each with the minimum amount of code required so that the compiler doesn't complain (replace "SYMBOL_NAME" below with the name of the ActionScript file you are putting it in - remember, as indicated in the first Tutorial, the filename needs to match the class name and the constructor name):
package
{
	import flash.display.MovieClip;

	class SYMBOL_NAME extends MovieClip
	{

	}
}
And in "Baddie.as", also add a function stub for "Destroy()" by putting the following function declaration between the two brackets that start after the class declaration (class SYMBOL_NAME etc.).
		private function Destroy() {
		}
You should now be able to run your movie. Try it, although nothing exciting will happen yet.
Let's start with the easiest part -- getting the stars to move. We are first just going to make it so that stars have a variable size my using the built-in "Math.random" function, and then use an update loop to make the stars move down the screen.
/* Star.as */
package
{
	import flash.display.MovieClip;
	import flash.events.Event;

	public class Star extends MovieClip
	{
		var speed:Number;
		public function Star()
		{
			// Set the star's size and calculate a speed based on that
			var scale = this.scaleY = this.scaleX = Math.random()*1.0;
			speed = 1 + scale;

			// Make it so we can update it
			this.addEventListener(Event.ENTER_FRAME, Update);
		}

		public function Update(evt:Event) {
			// Add the speed to our yposition on every frame, this will
			// give the illusion of movement.
			this.y += speed;
		}

	}

}
If you run your movie now, you will quickly notice we have a problem -- the stars fly off the bottom of the screen and never to return! To fix this, we are going to add a test (in our "Update()" function) to check for when the star moves off the screen, and reset it to the top of the stage when it does.
/* Star.as */
package
{
	import flash.display.MovieClip;
	import flash.display.Stage; // We need to import this so that we can access the stageHeight propert
	import flash.events.Event;

	public class Star extends MovieClip
	{
		var speed:Number;
		public function Star()
		{
			var scale = this.scaleY = this.scaleX = Math.random()*1.0;
			speed = 1 + scale;

			this.addEventListener(Event.ENTER_FRAME, Update);
		}

		public function Update(evt:Event) {
			this.y += speed;

			// if the y position is greater than the height of the stage, it is offscreen so...
			if (this.y > parent.stage.stageHeight) {
				var scale = this.scaleY = this.scaleX = Math.random()*1.0; 	// choose a new size and speed
				speed = 1 + scale;
				this.y = -5; 												// put the star at the top
				this.x = Math.random() * parent.stage.stageWidth; 			// and at a random x position (bound by stage width)
			}
		}

	}

}
Try it out again. The starfield should now be moving with a lovely fake paralax effect due to how we based the speed of a star on its scale (in other words, closer stars appear bigger and move faster and vice versa).
The next easiest thing to do will be to make enemies spawn and move down the screen. Open up "Baddie.as", and copy in the below code. The code should look very familiar as the Star and the Baddie both are required to move down the screen.
/* Baddie.as */
package
{

	import flash.display.MovieClip;
	import flash.events.Event;

	public class Baddie extends MovieClip
	{
		public function Baddie(x:int, y:int)
		{
			stop(); // this stop the baddie from playing the explosion animation

			this.x = x;
			this.y = y;

			this.addEventListener(Event.ENTER_FRAME, Update);
		}

		public function Update(evt:Event) {
			y += 2;

			if (y > parent.stage.stageHeight + 20)
				Destroy();
		}

		private function Destroy() {
			this.removeEventListener(Event.ENTER_FRAME, Update);
			parent.removeChild(this);
			stop();
		}

	}

}
The "Baddie()" function, known as the constructor for the Baddie class, is different here than the Star's constructor ("Star()"). We have two parameters being passed into it, the variables "x" and "y" (the "int" means they are integers). This constructor will be used by our Document Class when we create a Baddie so that the Document Class can define the ship's position.
Right now, a Baddie can move down and out of sight, and would then try to destroy itself (destroying the Baddies is a good idea here since otherwise the Baddies off the screen will continue to hang around, taking up memory). When it destroys itself, it just removes its event listener and then removes itself from the scene-graph. Because it has removed all references of itself, the garbage collector will delete it for us, freeing up memory.
Now we need to make it so that Baddie's spawn at the top of the screen. We will also create a MovieClip which all of the Baddie's will be in, as this will help when we want to do collision detection.
/* FlightSim.as */
package
{
	import flash.display.MovieClip;
	import flash.events.Event;

	public class FlightSim extends MovieClip
	{
		private static var instance:FlightSim;
		private var enemyContainer:MovieClip;

		public function FlightSim()
		{
			instance = this;
			enemyContainer = new MovieClip();

			this.addEventListener(Event.ADDED, Init);
			this.addEventListener(Event.ENTER_FRAME, Update);
		}

		public function Init(evt:Event) {
			stage.addChild(enemyContainer);

			this.removeEventListener(Event.ADDED, Init);
		}


		private function Update(evt:Event) {
			if (Math.random() < 0.05) {
				var b:Baddie = new Baddie(Math.random() * stage.stageWidth, -40);
				enemyContainer.addChild(b);
			}
		}

		public function GetEnemyContainer():MovieClip {
			return enemyContainer;
		}

		static public function GetInstance():FlightSim {
			return instance;
		}

	}

}
In the constructor, we save the Document Class to the "instance" variable so that it can be accessed any other class using the static function, "FlightSim.GetInstance()". We also create a new MovieClip which we will add all of our Baddies to, but we delay adding it to the stage using "Event.ADDED" so that the Document Class doesn't try adding it before the document is loaded.
In the "Update()" function we use "Math.random()" to decide if we should add a new Baddie. "Math.random()" returns a number from 0 to 1, so in our code, 5% of the time we will add a new Baddie to the stage.
Run your movie now. You should see Baddies spawning at the top of the stage and moving down. You should also see a nice parallaxed star-field background giving the illusion of movement.
Now, let's add some interactivity. Open up "Player.as", and add this:
/* Player.as */
package
{
	import flash.display.MovieClip;
	import flash.events.MouseEvent;

	public class Player extends MovieClip
	{
		public function Player()
		{
			stage.addEventListener(MouseEvent.MOUSE_MOVE, MouseMoved);
		}

		private function MouseMoved(evt:MouseEvent) {
			this.x = evt.stageX;
			this.y = evt.stageY;
		}
	}

}
With that small amount of code, the player's ship should now follow the mouse.
If we add a little bit more, we can make it so the player can shoot. First, we need to define the "Bullet" class in "Bullet.as":
/* Bullet.as */
package
{
	import flash.display.MovieClip;
	import flash.events.Event;

	public class Bullet extends MovieClip
	{

		public function Bullet(x:Number, y:Number)
		{
			this.x = x;
			this.y = y;
			this.addEventListener(Event.ENTER_FRAME, Update);
		}

		public function Update(evt:Event)
		{
			this.y -= 12;
			if (this.y < 0) {
				Destroy();
			}

		}

		private function Destroy() {
			this.removeEventListener(Event.ENTER_FRAME, Update);
			parent.removeChild(this);
		}

	}

}
That code should look familiar to you. It is very similar to the code for both the Baddies and the Stars! The only difference is that the Bullet goes up while the Baddie goes down. And now, we can add code to "Player.as" to allow the player to shoot:
/* Player.as */
package
{
	import flash.display.MovieClip;
	import flash.events.MouseEvent;

	public class Player extends MovieClip
	{
		public function Player()
		{
			stage.addEventListener(MouseEvent.MOUSE_MOVE, MouseMoved);
			stage.addEventListener(MouseEvent.MOUSE_DOWN, MouseDown);
		}

		private function MouseMoved(evt:MouseEvent) {
			this.x = evt.stageX;
			this.y = evt.stageY;
		}

		private function MouseDown(evt:MouseEvent) {
			var blast:Bullet = new Bullet(this.x - 30, this.y - 25); // this may need adjustment
			root.stage.addChild(blast);

			blast = new Bullet(this.x + 30, this.y - 25); // this may need adjustment
			root.stage.addChild(blast);
		}
	}
}
Now, in the game when you click the mouse button two bullets should appear. You may need to adjust the point at which the bullets are spawned to make it work with your ship. "this.x - 30" means that the bullet will spawn 30 pixels to the left of the player ship's origin. If the bullets are too far to the left, add more to the x position, otherwise, subtract more from it.
The Bullets aren't very exciting right now, though, because the Baddie's are invulnerable!
Let's add some collision detection to allow the Baddies to be hit.
/* Bullet.as */
package
{
	import flash.display.MovieClip;
	import flash.events.Event;

	public class Bullet extends MovieClip
	{
		private var enemyContainer:MovieClip;
		private var enemy:Baddie;

		public function Bullet(x:Number, y:Number)
		{
			this.x = x;
			this.y = y;

			this.addEventListener(Event.ENTER_FRAME, Update);
			enemyContainer = FlightSim.GetInstance().GetEnemyContainer();
		}

		public function Update(evt:Event)
		{
			this.y -= 12;
			if (this.y < 0) {
				Destroy();
				return;
			}

			for (var i:int = 0; i < enemyContainer.numChildren; i++) {
				enemy = (enemyContainer.getChildAt(i) as Baddie);
				if (hitTestObject( enemy )) {
					enemy.Hurt(1);
					Destroy();
					return;
				}
			}
		}

		private function Destroy() {
			this.removeEventListener(Event.ENTER_FRAME, Update);
			parent.removeChild(this);
			stop();
		}

	}

}
Creating member variables for "enemyContainer" and "enemy" are optimizations. By making them member variables the memory for them is only allocated once rather than every time "Update()" is called, which helps keep this speedy. The for loop iterates through all of the Baddies in the "enemyContainer", and checks if the bullet is hitting any of them. If it is, we destroy the bullet and call "return" to escape out of the function.
We need to also add a new function to "Baddie.as" called "Hurt()" which our Bullet calls when it hits a ship.
/* Baddie.as */
package
{

	import flash.display.MovieClip;
	import flash.events.Event;

	public class Baddie extends MovieClip
	{
		private var HP:Number = 3;

		public function Baddie(x:int, y:int)
		{
			stop();

			this.x = x;
			this.y = y;

			this.addEventListener(Event.ENTER_FRAME, Update);
		}

		public function Hurt(dmg:Number) {
			HP --;
			if (HP <= 0) {
				play(); // This causes the animation to play. Remember, there is a call to Destroy() on the last frame.
			}
		}

		public function Update(evt:Event) {
			y += 2;

			if (y > parent.stage.stageHeight + 20)
				Destroy();
		}

		private function Destroy() {
			this.removeEventListener(Event.ENTER_FRAME, Update);
			parent.removeChild(this);
		}

	}

}
Now after you shoot a Baddie three times, it will explode and disappear! Try it. The only thing left to do is to make it so that the player can get points. We need to add a little bit more code to Baddie.as to make this work without any glitches.
/* Baddie.as */
package
{

	import flash.display.MovieClip;
	import flash.events.Event;

	public class Baddie extends MovieClip
	{
		private var HP:Number = 3;
		private var dying:Boolean = false;

		public function Baddie(x:int, y:int)
		{
			stop();

			this.x = x;
			this.y = y;

			this.addEventListener(Event.ENTER_FRAME, Update);
		}

		public function Hurt(dmg:Number) {
			if (!dying) {
				HP --;
				if (HP <= 0) {
					dying = true;
					FlightSim.GetInstance().AddScore(100);
					play();
				}
			}
		}

		public function Update(evt:Event) {
			y += 2;

			if (y > parent.stage.stageHeight + 20)
				Destroy();
		}

		private function Destroy() {
			this.removeEventListener(Event.ENTER_FRAME, Update);
			parent.removeChild(this);
			stop();
		}

	}

}
The naiive approach would have been to just add the call to "AddScore()", but if you don't add the "dying" boolean variable, you can get a glitch where the player keeps getting points for every bullet shot into an exploding Baddie (rather than just once per Baddie). After you add the following code to "FlightSim.as", try it out with and without the boolean test in "Baddie.as" to see what we mean.
/* FlightSim.as */
package
{
	import flash.display.MovieClip;
	import flash.events.Event;

	public class FlightSim extends MovieClip
	{
		private static var instance:FlightSim;
		private var enemyContainer:MovieClip;
		private var score:int = 0;

		public function FlightSim()
		{
			instance = this;
			enemyContainer = new MovieClip();

			this.addEventListener(Event.ADDED, Init);
			this.addEventListener(Event.ENTER_FRAME, Update);
		}

		public function Init(evt:Event) {
			stage.addChild(enemyContainer);

			this.removeEventListener(Event.ADDED, Init);
		}

		public function AddScore(points:int) {
			score += points;

			var scoreText:String = ""+score;
			while (scoreText.length < 13)
				scoreText = "0" + scoreText; // add leading 0's

			PlayerScore.text = scoreText; // Update the textbox with the new score

		}

		private function Update(evt:Event) {
			if (Math.random() < 0.05) {
				var b:Baddie = new Baddie(Math.random() * stage.stageWidth, -40);
				enemyContainer.addChild(b);
			}
		}

		public function GetEnemyContainer():MovieClip {
			return enemyContainer;
		}

		static public function GetInstance():FlightSim {
			return instance;
		}

	}

}
The full game:
You have taken the first steps to becoming a game developer, and have now had a taste of the actual work that goes into game development.
Here are some ways to expand the complexity of this project:
Here is an example of a game with automatic guns: