In this tutorial we will be making the skeleton of a Choose Your Own Adventure game, and, in the process, become familiar with Flash's development environment. Although this tutorial only details how to make the skeleton, after completing this tutorial you will be able to use what you have learned to extend what you produced into a full game, if you so choose.
In this tutorial you will learn how to:
As a look ahead, the game you will make is:
For reference (or if you get stuck), you can download the full project source here. The archived file includes the logo graphic used in this tutorial.
This tutorial assumes some basic computer knowlege and a willingness to learn, though it does not require any specific programming or artistic experience. The tutorial will use ActionScript 3.0 to handle the interactive elements. This tutorial provides the required code and will attempt to explain it as clearly as possible.
First things first — make sure Adobe Flash CS4 is installed on the computer you are to work on (note, CS4 is installed on all the FL222 IMGD Lab machines). Open it up and see if it starts properly.
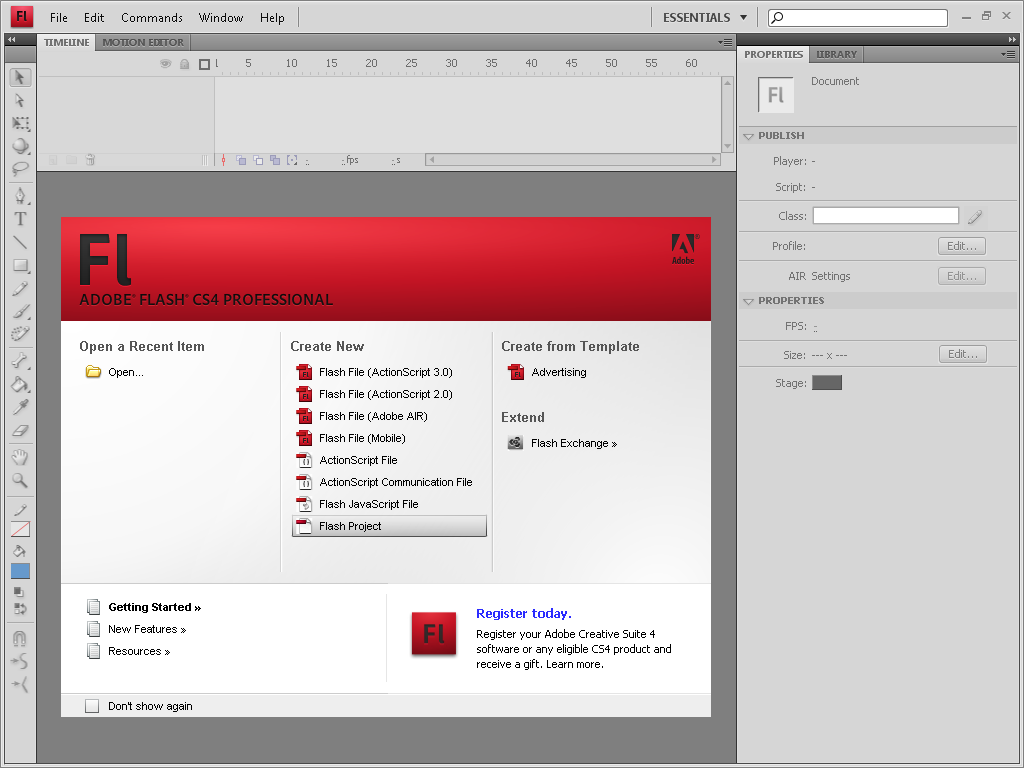
Congratulations! You successfully opened Flash. You can drag around the toolbar items by clicking and dragging from their tab. Try it out to get comfortable with the environment. You can see how we have set up the environment in Figure 1. By default the toolbox was on the right side, but we moved it to the left side so it would be more like Photoshop.
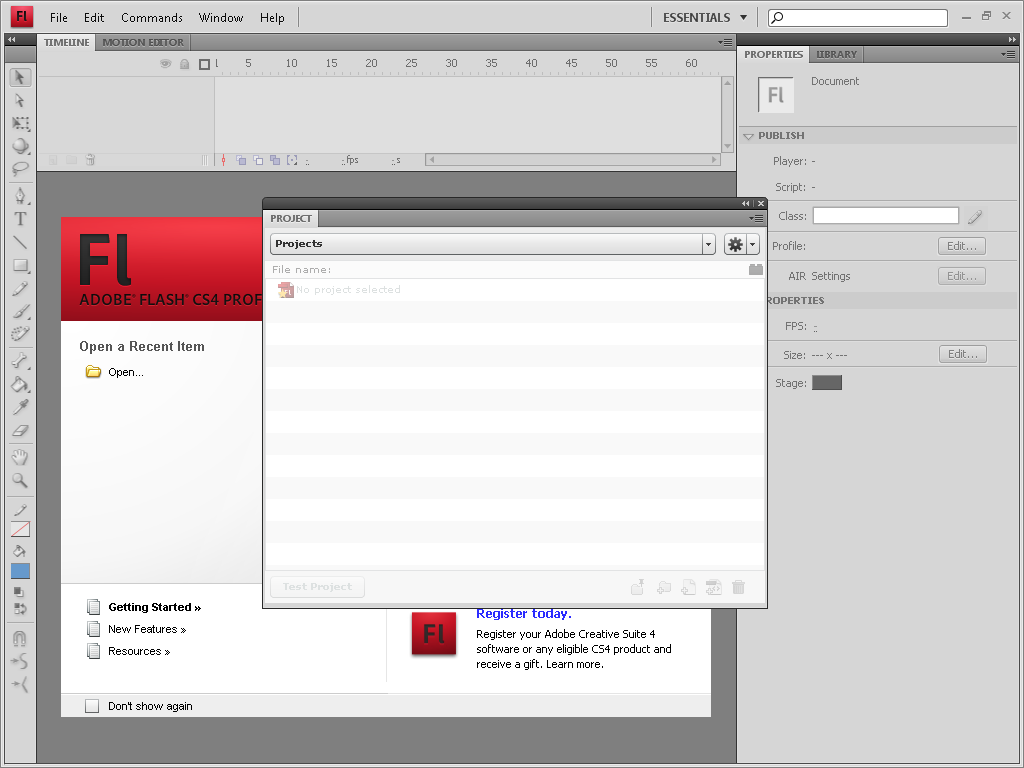
Now it is time to create a project. In the center area of Flash's Window, click "Flash Project" in the column marked "Create New" (Fig. 1). This will open a panel that says "PROJECT" in a tab at the top. This panel is called the project panel (Fig. 2).
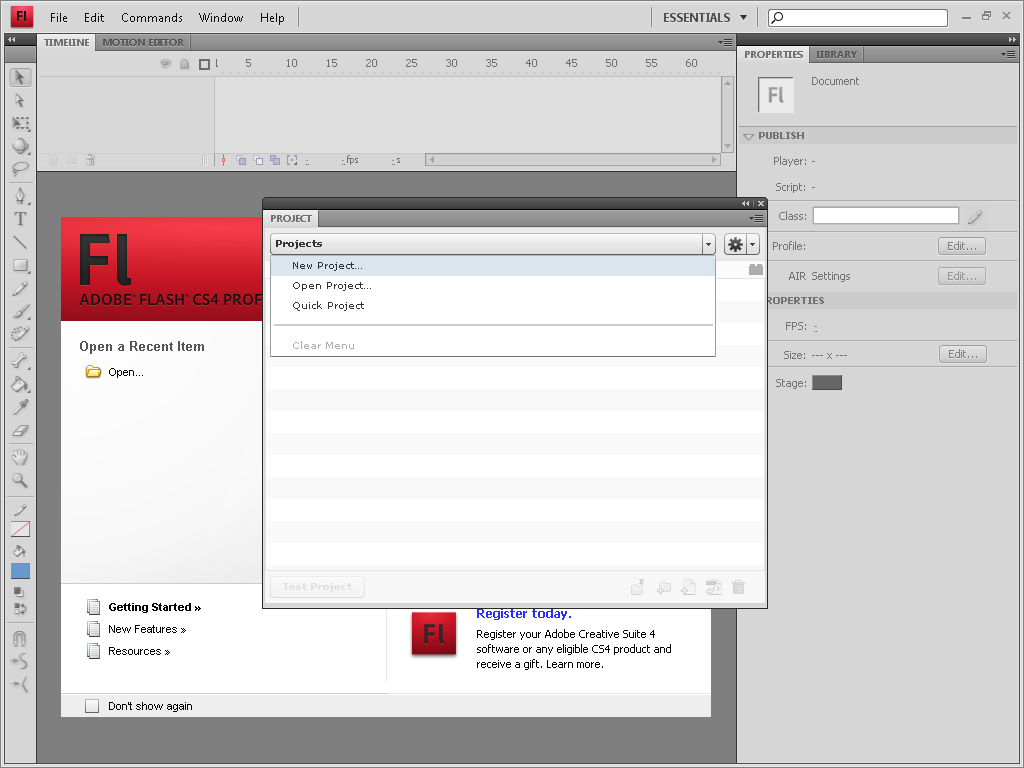
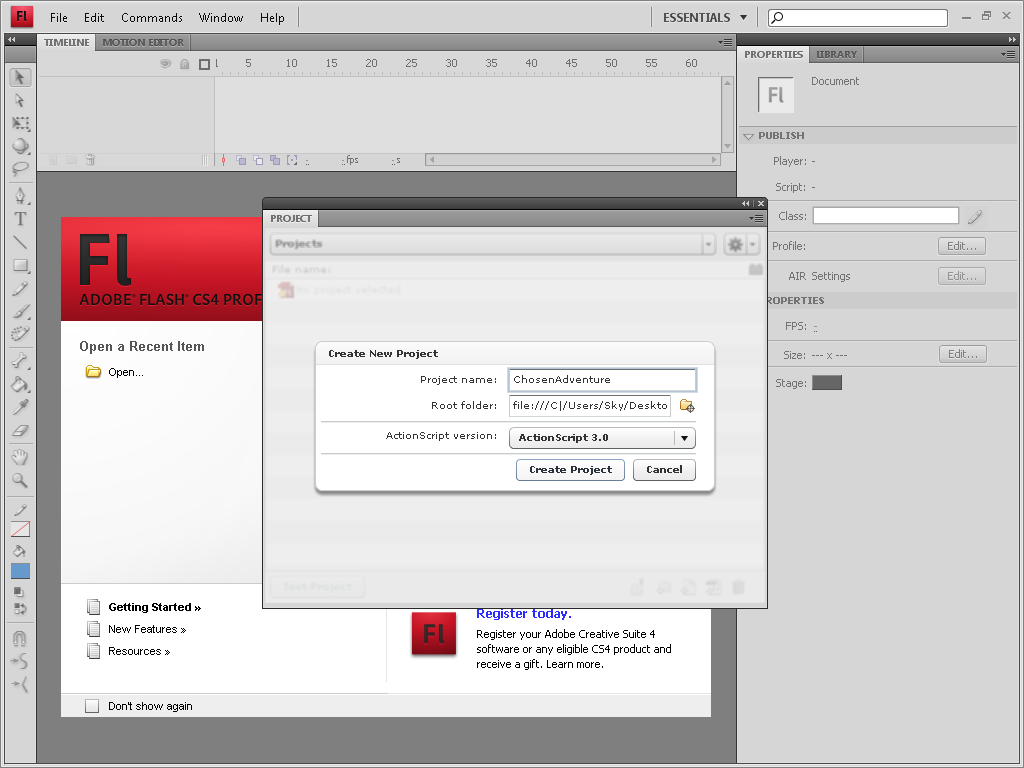
Click on the drop down that says "Projects", and choose "New Project" (Fig. 3). Give your project a name, choose a root folder, and be sure that the ActionScript version is set to 3.0 (Fig. 3).
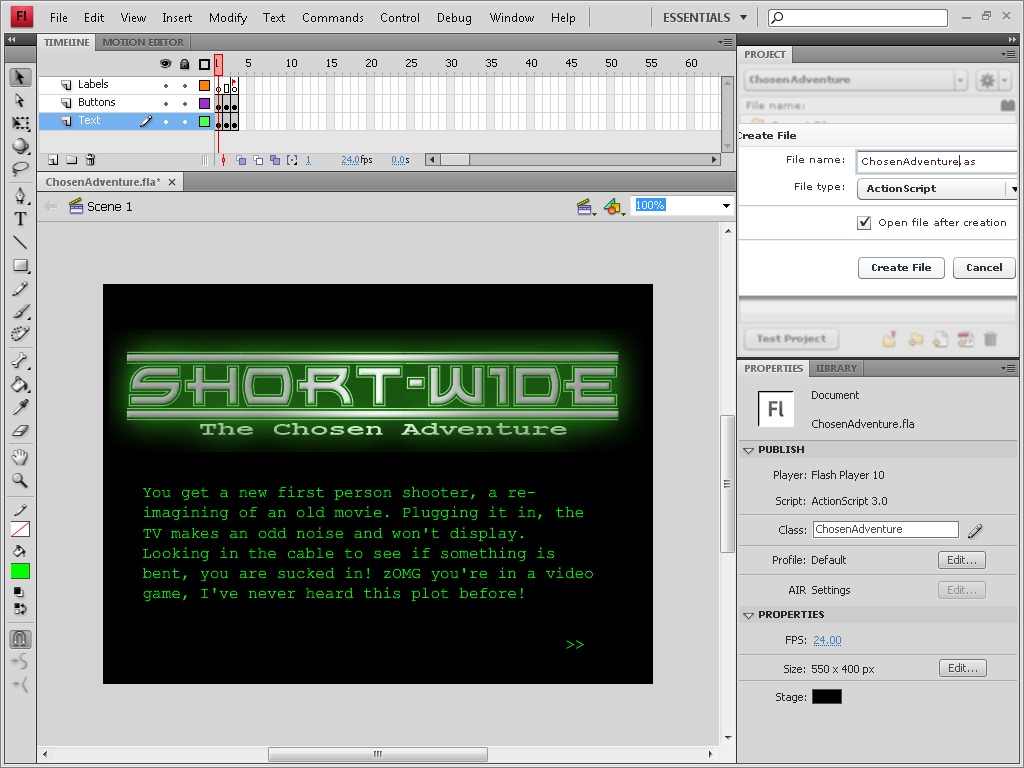
Good, we now have an empty project. It's time to actually put something in it! In the bottom right of the panel there are a few icons which you can hover over with your mouse to cause a tooltip to appear to indicate its purpose. Find the one that creates a "New File" (Fig. 4), and click it. Set the File Type to be a "Flash File", and give it a name. We used "ChosenAdventure.fla", but its name does not matter for the functionality (Fig. 4). We have "Open file after creation" checked, but if you did not, or if you close the file, you can open it later by double clicking it in the project panel.


At this point we moved the Project Panel to the sidebar so that it would be accessible but not in our way, as you will see in future figures.
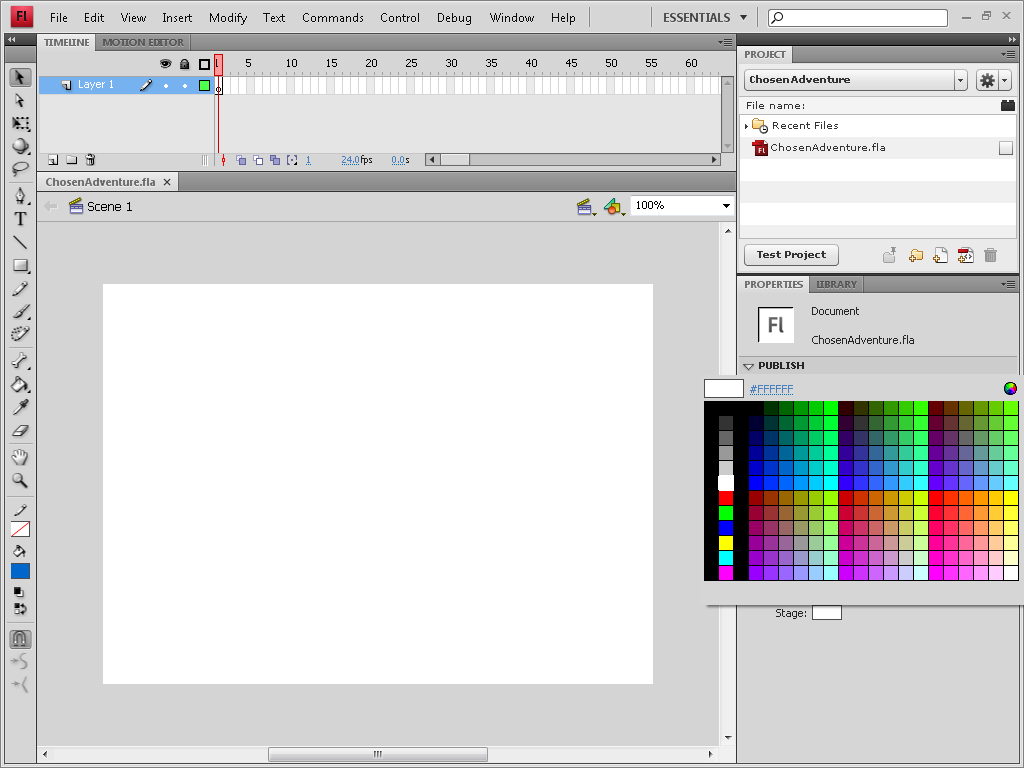
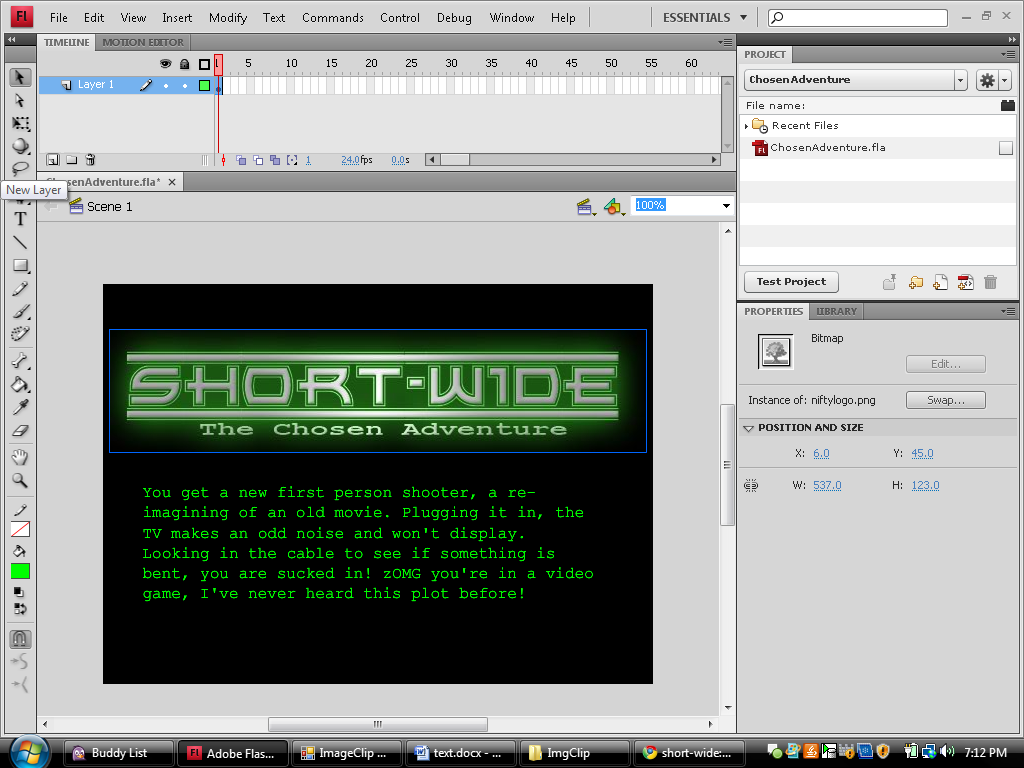
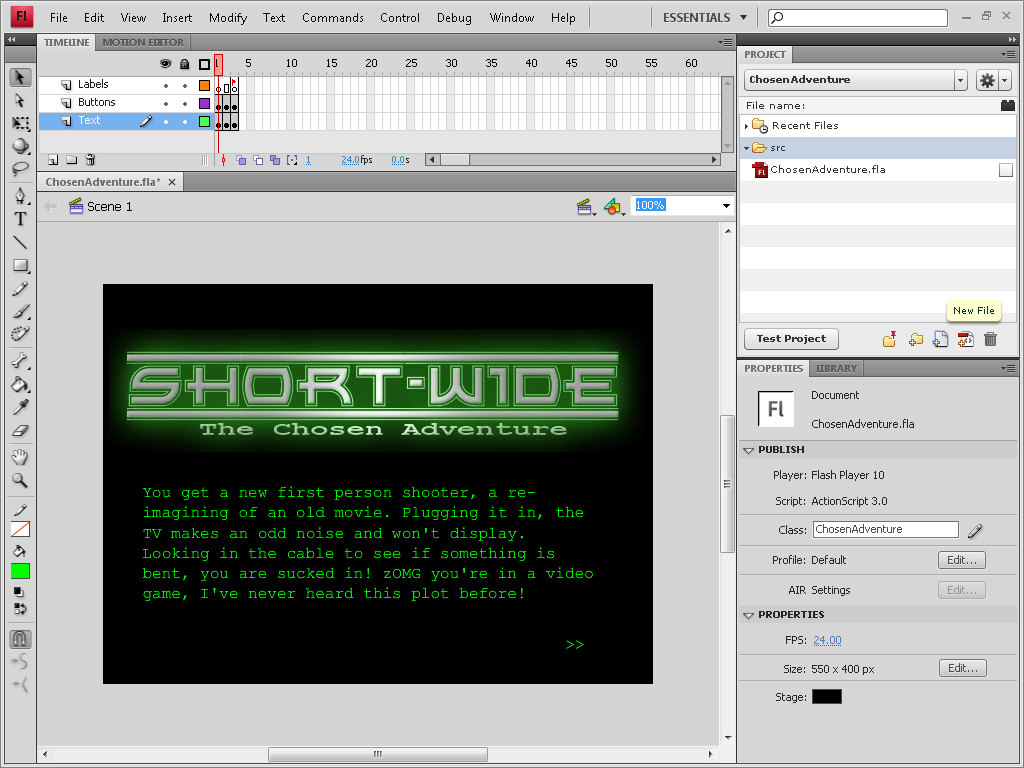
We now have a project setup, and a white stage. The term "stage" refers to the content area of the movie. Everyone knows that a digital "Choose your Own Adventure" book should have a black background and a green pixelated font. So, to change the background color, click on the stage and then use the properties panel to choose your color (click on the box next to "Stage:" to bring up the color selector (Fig. 5).
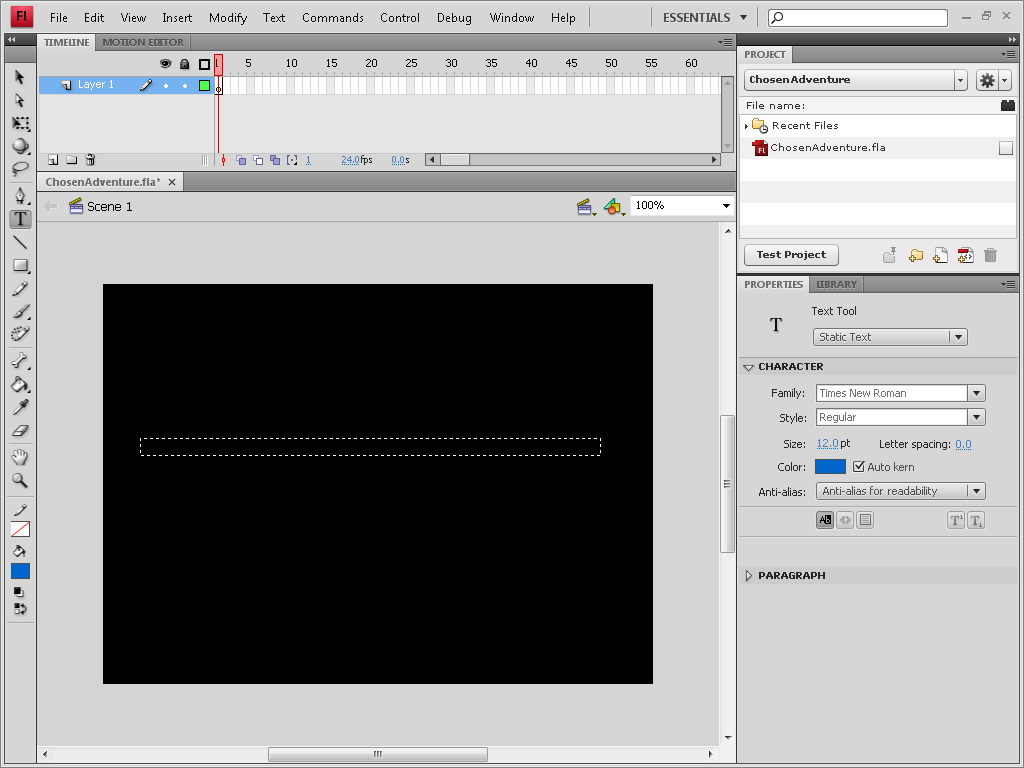
That's looking a little bit better, but we need to add some text. In the toolbox, click the tool that looks like a capital letter 'T'. Click on the spot where you want the text to start and drag across to the point where you want the text to wrap. In the properties panel underneath there should be a "Character" tab. You can use the options in that tab to change the font, size, and color of your text (Fig. 6).
For the text on the first page, we used this:
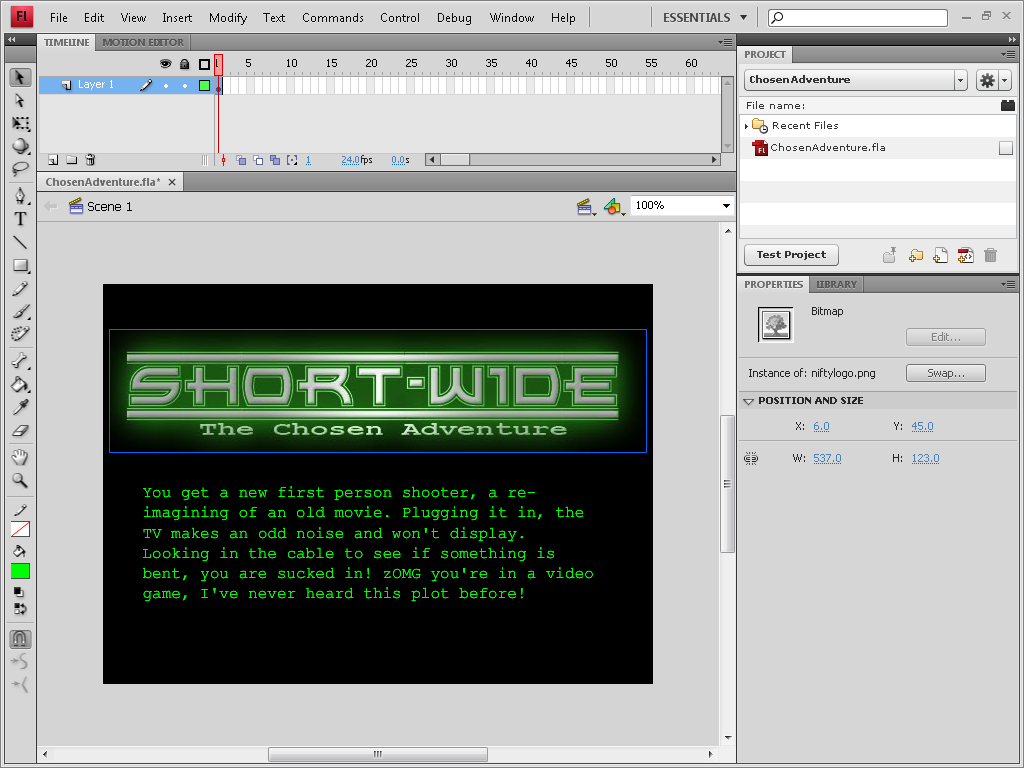
You get a new first person shooter, a re-imagining of an old movie. Plugging it in, the TV makes an odd noise and won't display. Looking in the cable to see if something is bent, you are sucked in! zOMG you're in a video game, and I've never heard of this plot before!
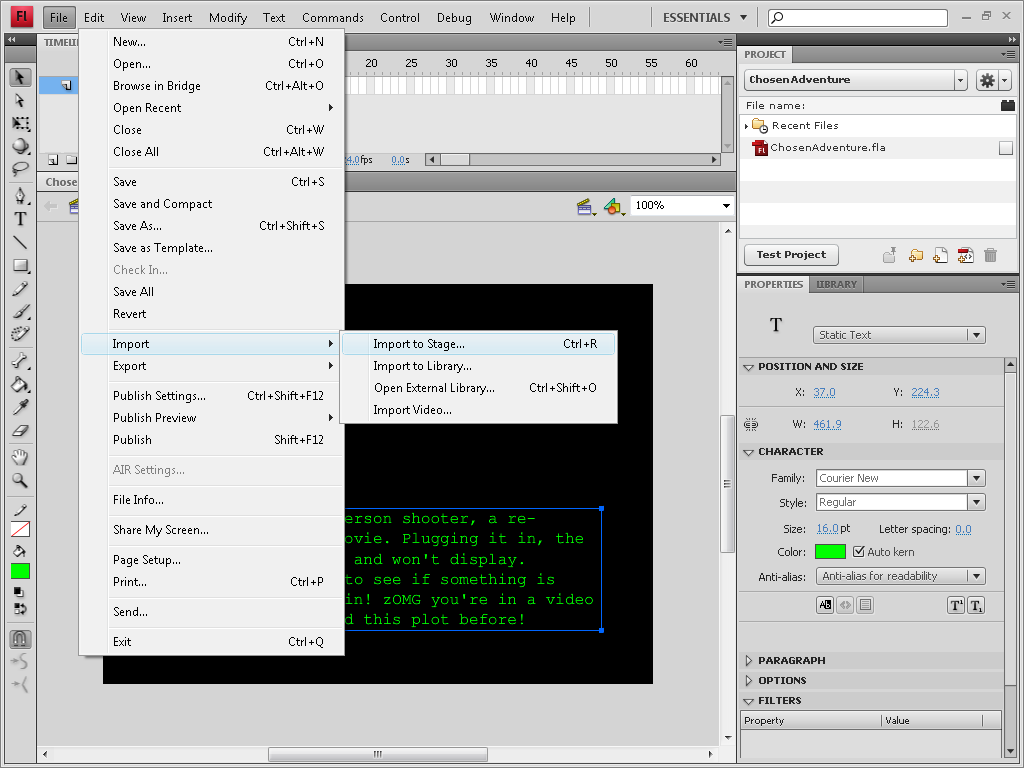
Now, we have some text, but it looks a little bland. What this game needs is a logo! Find or fashion an appropriate logo and save it as an image file on your computer. Then go to "File" -> "Import" - > "Import to Stage"... Find your image and then resize and move as appropriate (with the black cursor arrow tool) (Fig. 7).
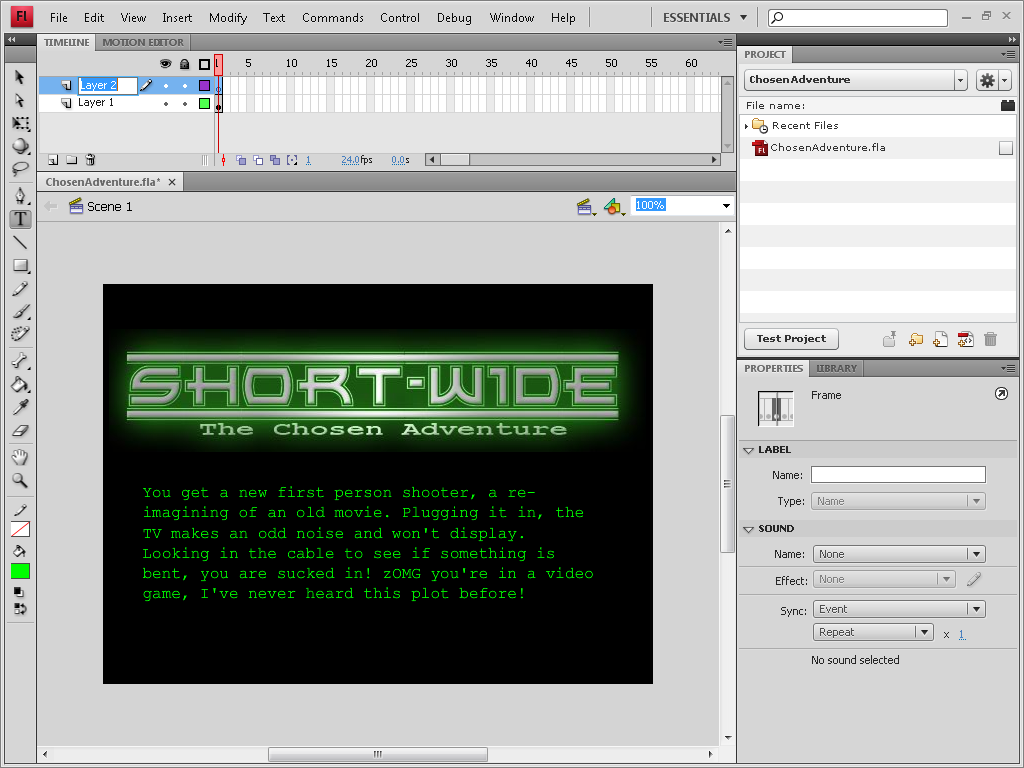
We now have the first page of our story, and it's looking pretty good, but we need to add some navigation so that our players can get to the second page. A next button would be perfect for this situation. To help keep us organized, we are going to add another layer to our movie which we will be putting our button on. To add the layer, find the "New Layer" button in the timeline panel below where it says "Layer 1", and click it. A new layer named "Layer 2" should have appeared. You should rename it "Buttons" because that is what we will be using it for. To do so, double click the name of the layer and write in the new name (Fig. 8). At this time it also might be good to rename "Layer 1" to "Story".
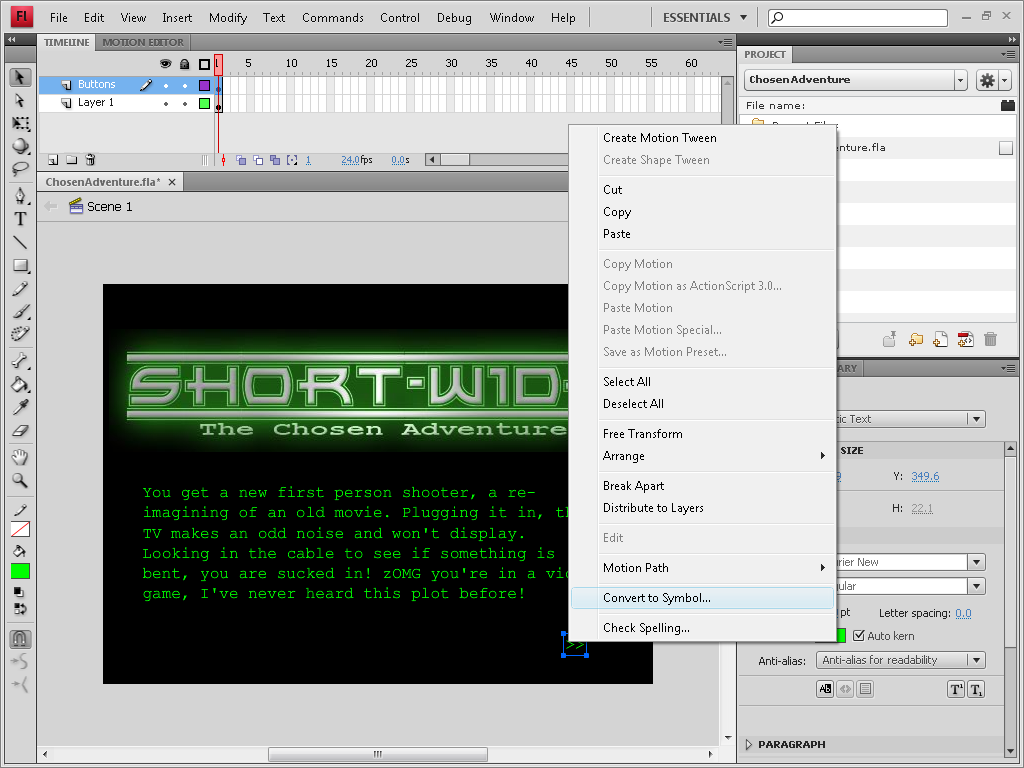
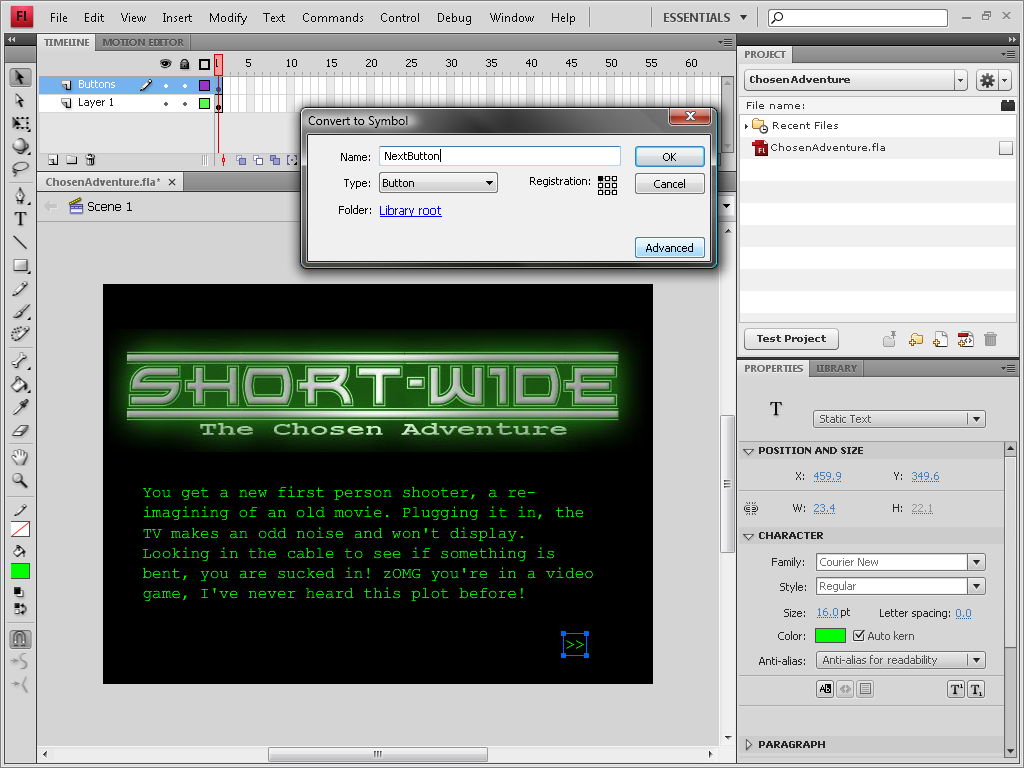
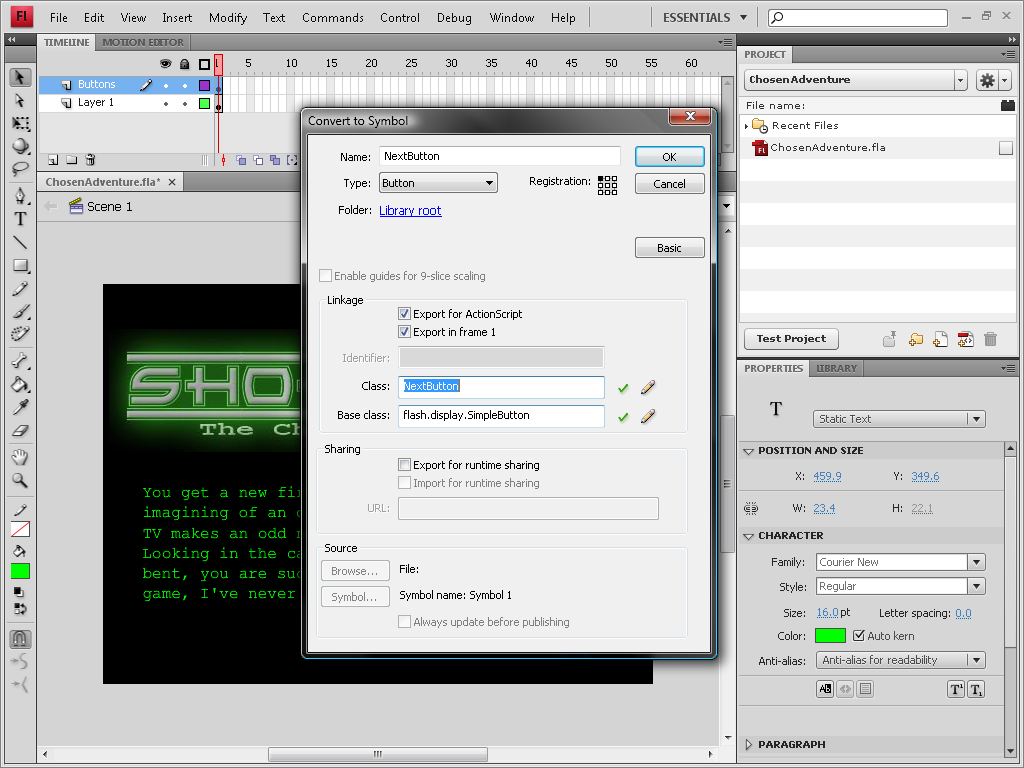
With our new layer, "Buttons", selected, use the text tool to add a double arrow in the corner of the stage. Now, we need to make it into a button. Right click on it, and select "Convert to Symbol". Give it a name of "NextButton" in the dialog that pops up, and ensure that its type is "Button" (Fig. 9). Do not press "OK" yet. By setting it to be a button we can define what it will look like when the mouse is hovering over it or clicking on it. Although we are not going to be using this functionality in this tutorial, we will still use the button type so that if you wanted to you could extend it.
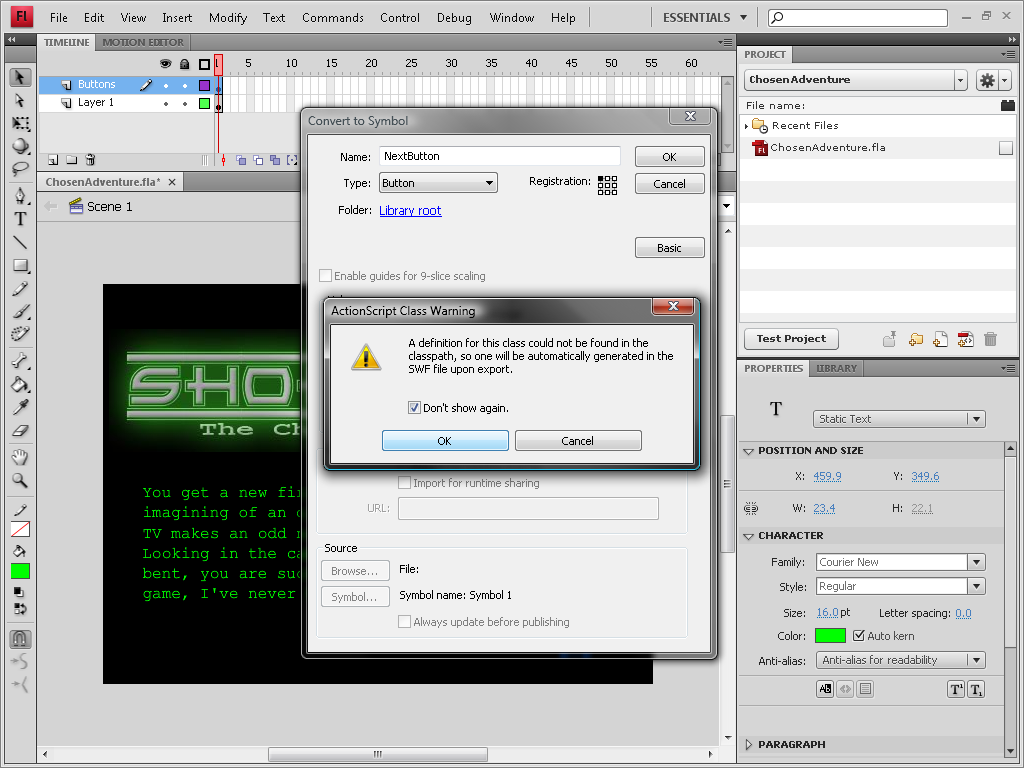
Although we have given it the button type, this will not make it actually do anything as we have not defined its behavior. We need to make it so that we can modify its behavior through scripting. To do this, click the "Advanced" button and then choose "Export for ActionScript". Give it a class name of "NextButton" and click "OK". A warning will come up which says that the class can not be found... which makes sense as we have not yet made it. Choose "Don't show again", and press "OK" (Fig. 10). We will come back to this button later, but first we need to make some additional pages so that we will actually have something to switch to.
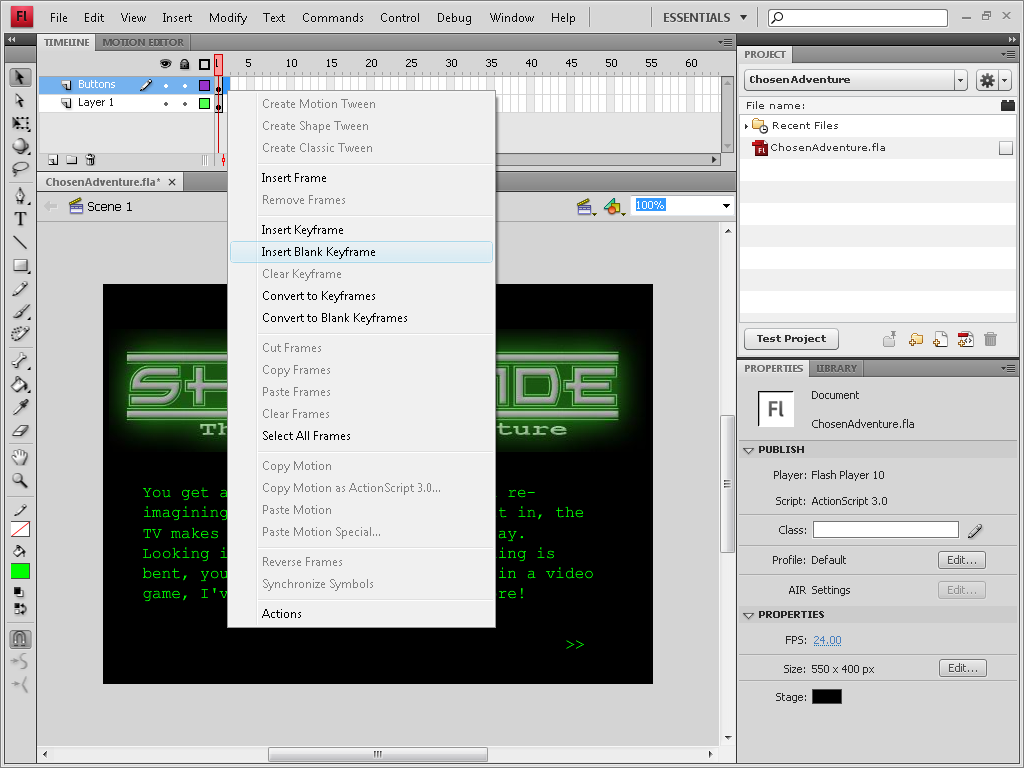
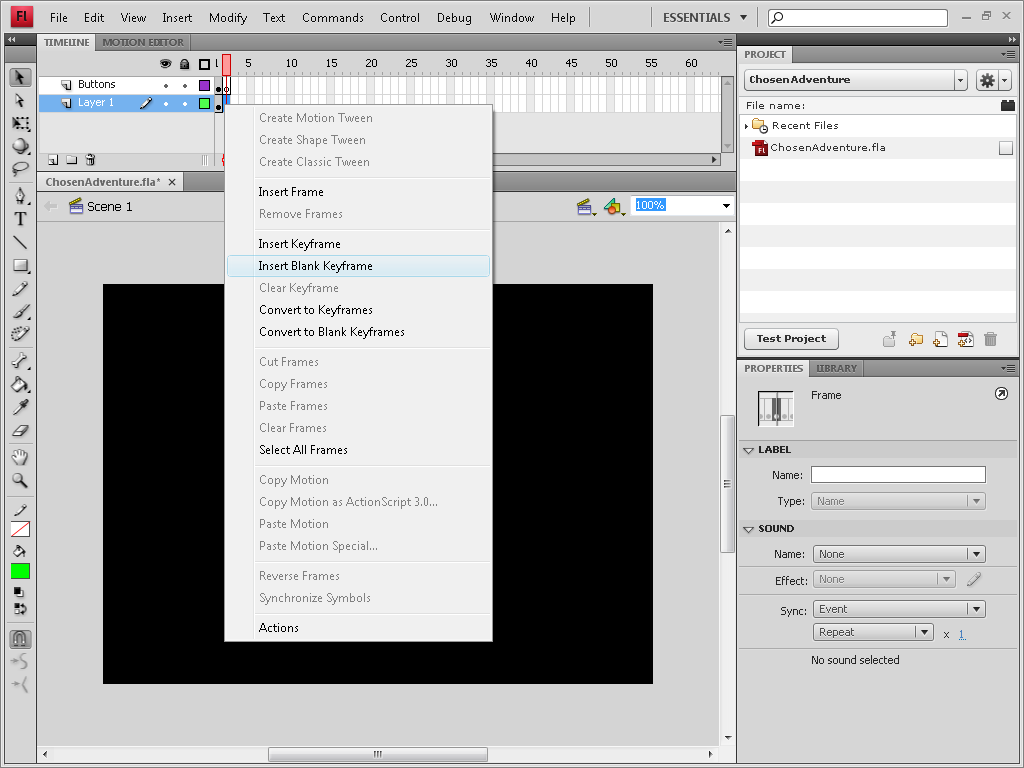
To create a new frame, right click on one of the small boxes in the timeline (underneath the numbers) and choose "Insert Blank Keyframe" (Fig. 11). You need to do this on both layers.
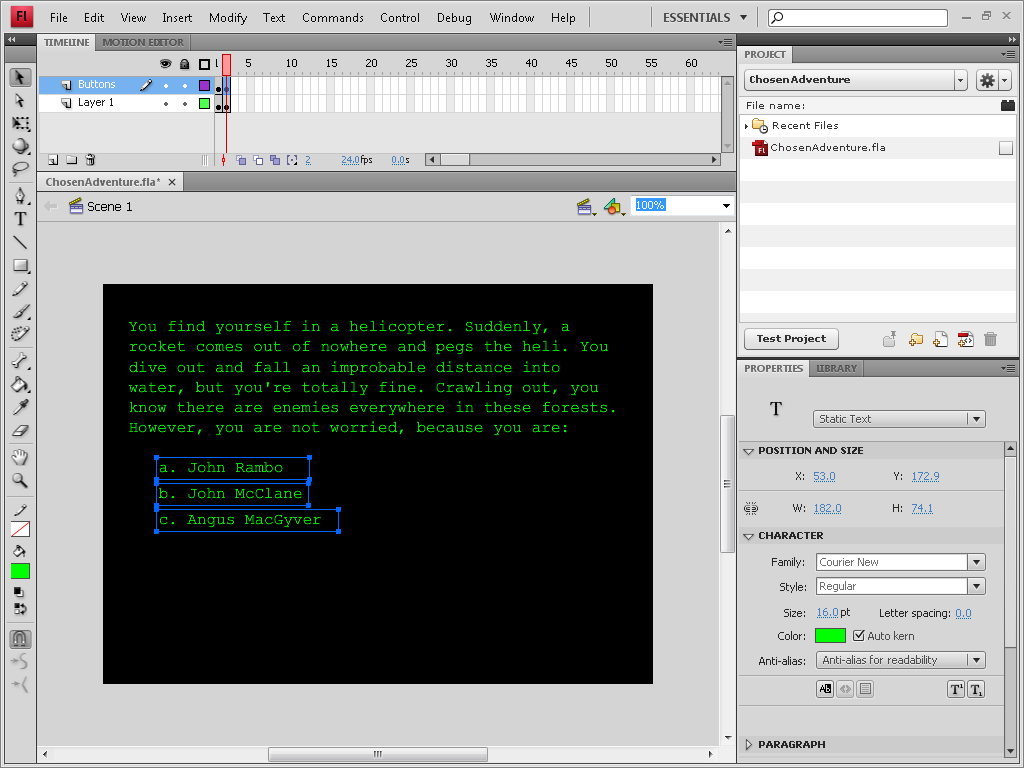
Once again, use the text tool to add in the story text for your second page, and create an additional text box for each choice that the player can make. Here is the text that we used:
You find yourself in a helicopter. Suddenly, a rocket comes out of nowhere and pegs the heli. You dive out and fall an improbable distance into water, but you're totally fine. Crawling out, you know there are enemies everywhere in these forests. However, you are not worried, because you are:
  a. John Rambo
  b. John McClane
  c. Angus MacGyver
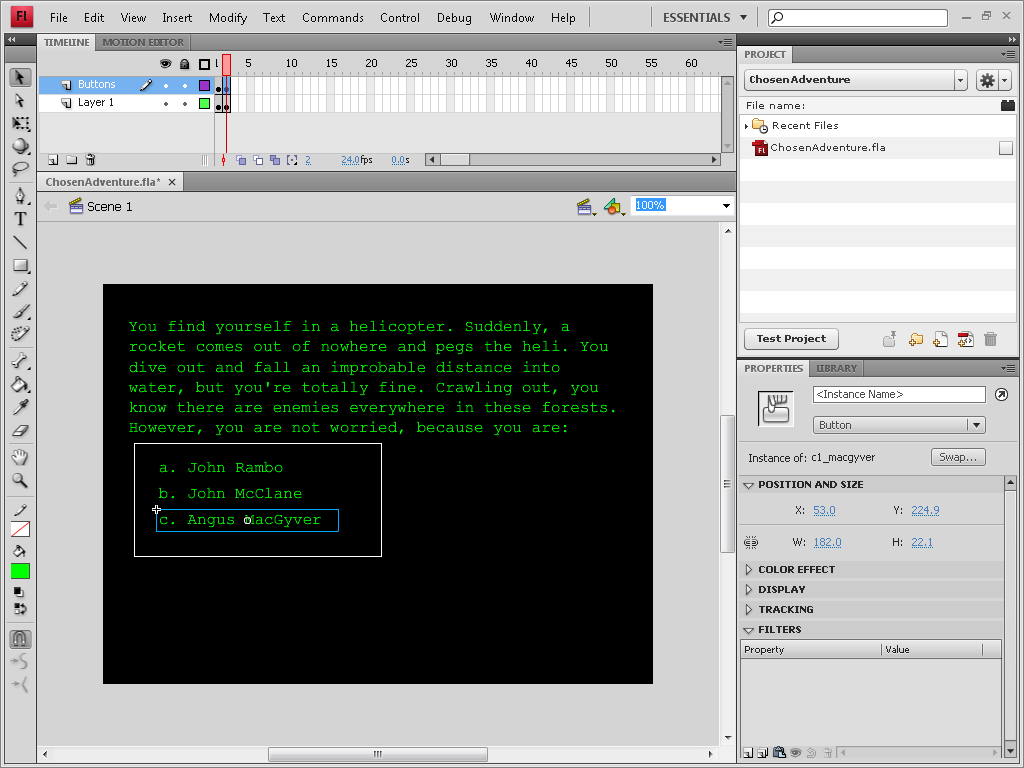
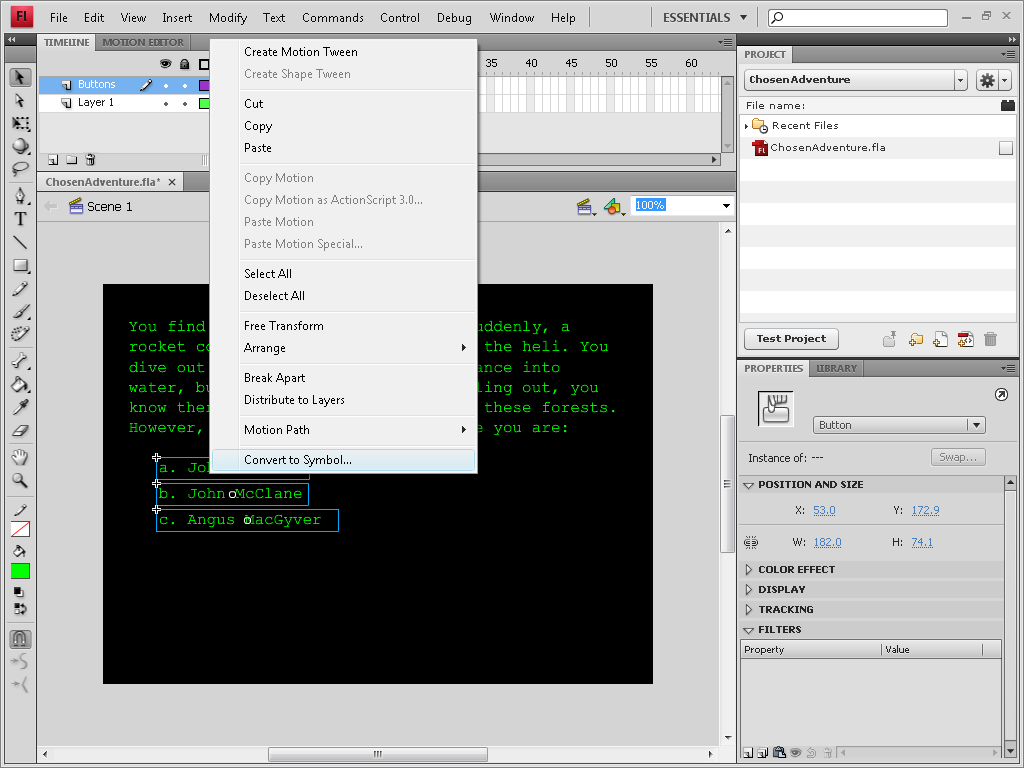
You should now have three separate text boxes in the Buttons layer, one for each option (Fig. 12). Convert each of the choices into a symbol, as you did with the next button. In this case though, we do not want to associate an ActionScript class with it, so uncheck "export for ActionScript". After you turn each textbox into a symbol, use the properties panel to assign an instance name. I called mine "A", "B" and "C". This makes it so that we can address it from within our scripts.
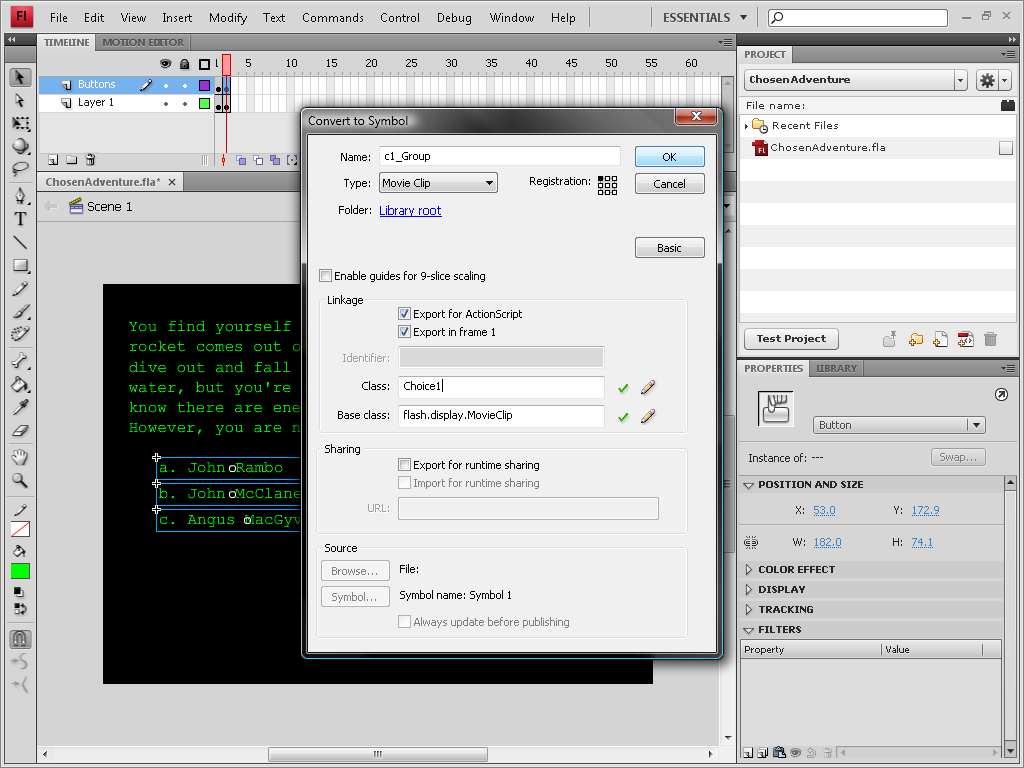
Draw a selection box around all three choices, and convert this group to a symbol. Name it "c1_Group" and this time, set its type as a "Movie Clip". Check "Export for ActionScript" and give it a class name of "Choice_1" (Fig. 13). In doing this we are creating a new symbol which is a container for our three buttons. Although we could put the logic in each choice individually, by grouping them like this we will be able to have fewer files and more easily enable keyboard input for our choices as well as mouse input. While other tutorials may have instructed you to put the ActionScript for a button in the frame itself, but this is considered bad practice since it makes the code more difficult to maintain.

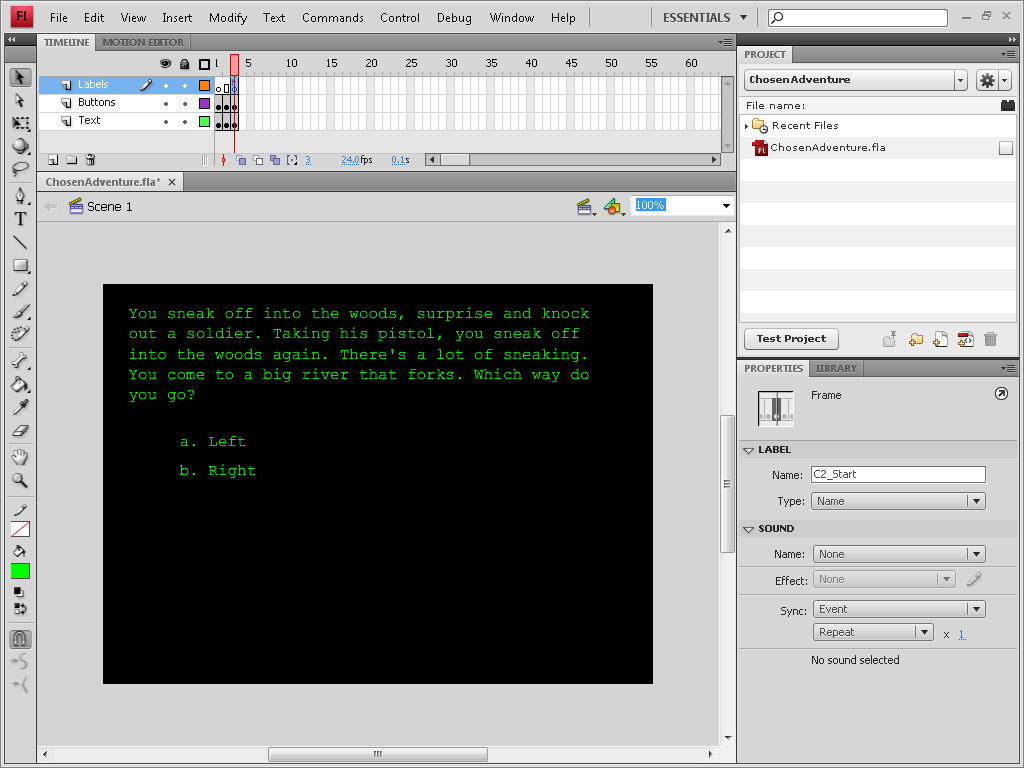
Create one more frame which one of the choices will go to. We will be doing the first page of the second choice, the McClane arc, using the following text:
You sneak off into the woods, surprise and knock out a soldier. Taking his pistol, you sneak off into the woods again. There's a lot of sneaking. You come to a big river that forks. Which way do you go?
  a. Left
  b. Right
Create one more layer, and call it "Labels". Insert a keyframe at this frame in the properties panel and give it a label name of "C2_Start" (Fig. 14). If you do not see this option, click on the frame in the timeline so that you are looking at the properties of the frame. This allows us to specify a frame by its label rather than a number from our code. We could have our code use a specific frame number instead, but by having it use a frame label we can move the frame in our timeline without having to modify our code to point at the new frame number. Again, this is easier to maintain.
Finally, we have three frames, a next button, and a few choices for our player. Though we only have the landing point for one of the choices in our movie right now, the process we followed can be repeated to add the others. Unfortunately, right now our buttons do not do anything at all. It's time to fix that!
Before we start we need to assign a document class. Left click on the stage and in the properties panel give it a class name of "ChosenAdventure" (Fig. 15). This is the main class of our game.

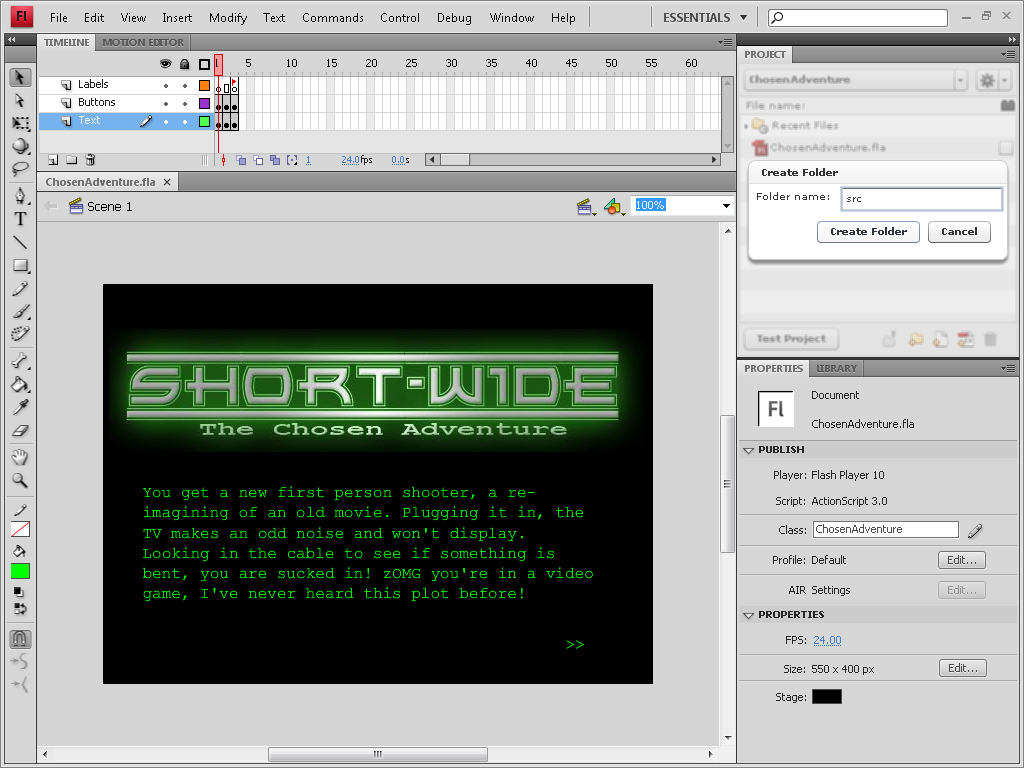
Now we need to create the files to insert the code in. In the project panel add a new folder named "src" (Fig. 16).

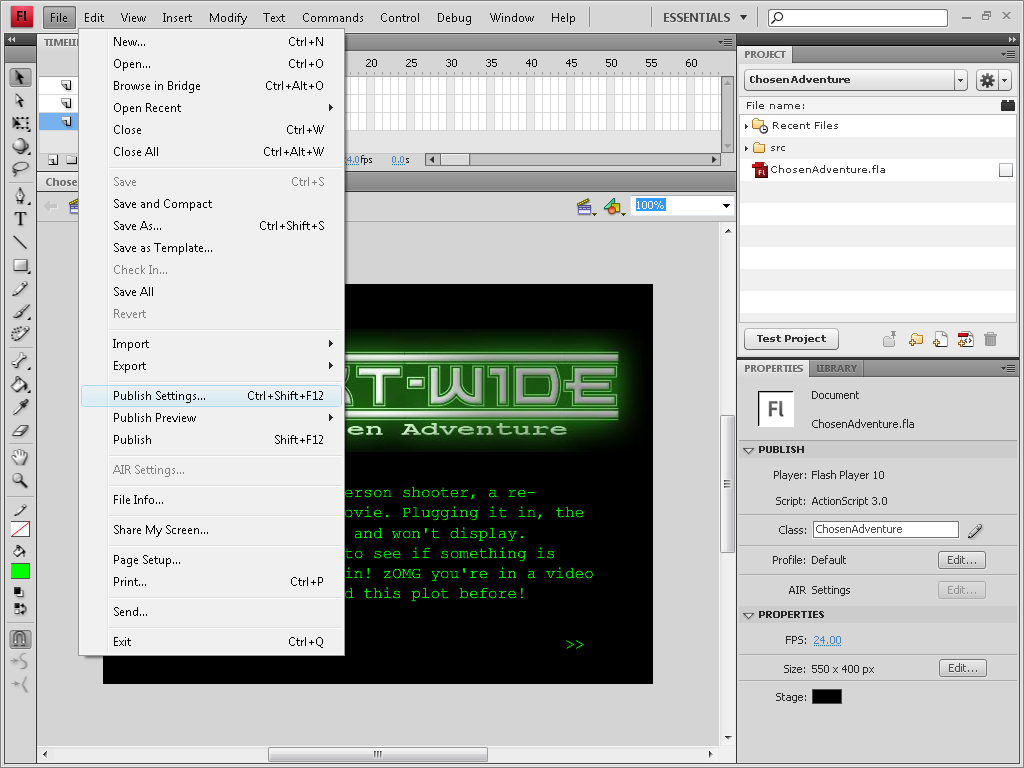
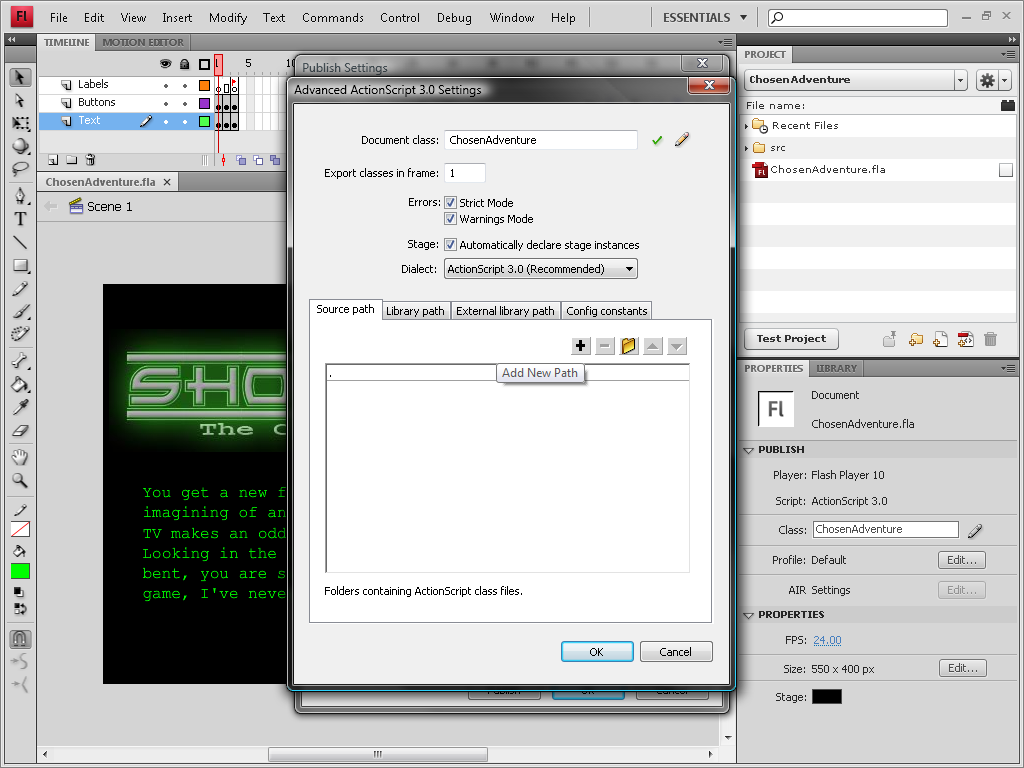
Unfortunately, Flash will not be able to find code in this folder because it does not automatically look down into sub-directories. We need to change one of the project's settings so that Flash knows that we will have our code in the src directory. Go to "File" -> "Publish Settings", and then click on the "Flash" tab. Click on the "Settings" button to the right of the Script version drop-down selector. Finally, in the dialog that comes up, press the "+" button, and add "./src/" as a new source path (Fig. 17).


If you want to try your movie now, you can. With "ChosenAdventure.fla" as the active file, open the menu option "Control" -> "Test Movie". You should get a small window showing your project working. Alternatively, in the PROJECT panel, right click on "ChosenAdventure.fla" and select "Make Default Document". Then, you can click on the the "Test Project" button at the bottom of the panel anytime to test your movie. Note, if you accidentally close the PROJECT panel, you can re-open it via "Window" -> "Other Panels" -> "Project".
If you tried out your movie yet, you may notice that it does not act at all how we want. It just loops around the frames super fast. That's because by default, Flash advances a frame at a specified interval, which can be set through the document's properties panel (accessible by left clicking on the stage). To change this behavior, we are going to add a call to "stop()" in our document class's constructor method. This means that when the document is created, it will immediately stop on the first frame.
Make a new ActionScript file into the src folder named "ChosenAdventure.as" (Fig. 18).
Now, open up "ChosenAdventure.as", insert the following code, and try testing your movie again. It should stop on the first frame, as expected.
package {
	import flash.display.MovieClip;

	public class ChosenAdventure extends MovieClip
	{
		public function ChosenAdventure()
		{
			stop(); // Stop automatic playback.
		}
	}
}
Now we have a new problem - we cannot get to the next frame! It's time to add some behavior to our NextButton. Create another ActionScript file in the src folder, "NextButton.as", and insert the following code:
package
{
	import flash.display.SimpleButton;
	import flash.display.MovieClip;
	import flash.events.MouseEvent;

	public class NextButton extends SimpleButton
	{
		public function NextButton()
		{
			addEventListener(MouseEvent.MOUSE_DOWN,MouseDownHandler);
		}

		function MouseDownHandler(event:MouseEvent):void {
			(parent as MovieClip).nextFrame();
		}

	}
}
Because this is a button rather than a movieclip, our class is going to extend SimpleButton instead of MovieClip. In the constructor (remember, this is what is fired when the object is created), we add an event listener. This particular event listener is setup to call our "MouseDownHandler" function whenever the user presses down on a mouse button. In the called function, we access the button's parent object, and cast it as a MovieClip. The button's parent is the stage, and the document class, which controls the timeline, and is a movieclip. By calling "nextFrame" we cause the timeline to move forward one frame.
Now we need to make the options on the second frame actually work. To do this, we are going to need to create "Choice_1.as":
package {
	import flash.display.MovieClip;
	import flash.events.MouseEvent;
	import flash.events.KeyboardEvent;

	public class Choice_1 extends MovieClip
	{
		public function Choice_1()
		{
			A.addEventListener(MouseEvent.MOUSE_DOWN, MouseChoice);
			B.addEventListener(MouseEvent.MOUSE_DOWN, MouseChoice);
			C.addEventListener(MouseEvent.MOUSE_DOWN, MouseChoice);

			stage.addEventListener(KeyboardEvent.KEY_DOWN, KeybChoice);
		}

		function MouseChoice(evt:MouseEvent) {
			if (evt.currentTarget == B) {
				(parent as MovieClip).gotoAndStop( "C2_Start" );
			}
		}

		function KeybChoice(evt:KeyboardEvent) {
			var key:String = String.fromCharCode( evt.keyCode );
			if (key == 'b' || key == 'B') {
				(parent as MovieClip).gotoAndStop( "C2_Start" );
			}
		}
	}
}
If you remember, Choice_1 is our container for our three choices for the player. The choices each have their own instance name, 'A', 'B', and 'C'. By giving our choices an instance name, we have made it so that we can address each of them individually from Choice_1's constructor. We use this to add a MOUSE_DOWN event listener to each which is set to call MouseChoice whenever we click on one of them. In MouseChoice, we then check to see if the currentTarget (that is, the object that the mouse clicked on) is the second choice. If it is, we tell the document class to gotoAndStop on C2_Start.
We also want to add keyboard input, so that a player can press 'a', 'b', or 'c' to make a selection rather than using the mouse. So, in Choice_1's constructor we add an event listener to its stage which calls KeybChoice on the KEY_DOWN event (we need to add it to the stage rather than the movieclip so that all key events are picked up). In KeybChoice we then figure out what key the user is pressing (by converting the event's keycode into a string), and then we test to see if it is either a lowercase or uppercase B. If it is, we do the same, and tell the document class to gotoAndStop on C2_Start.
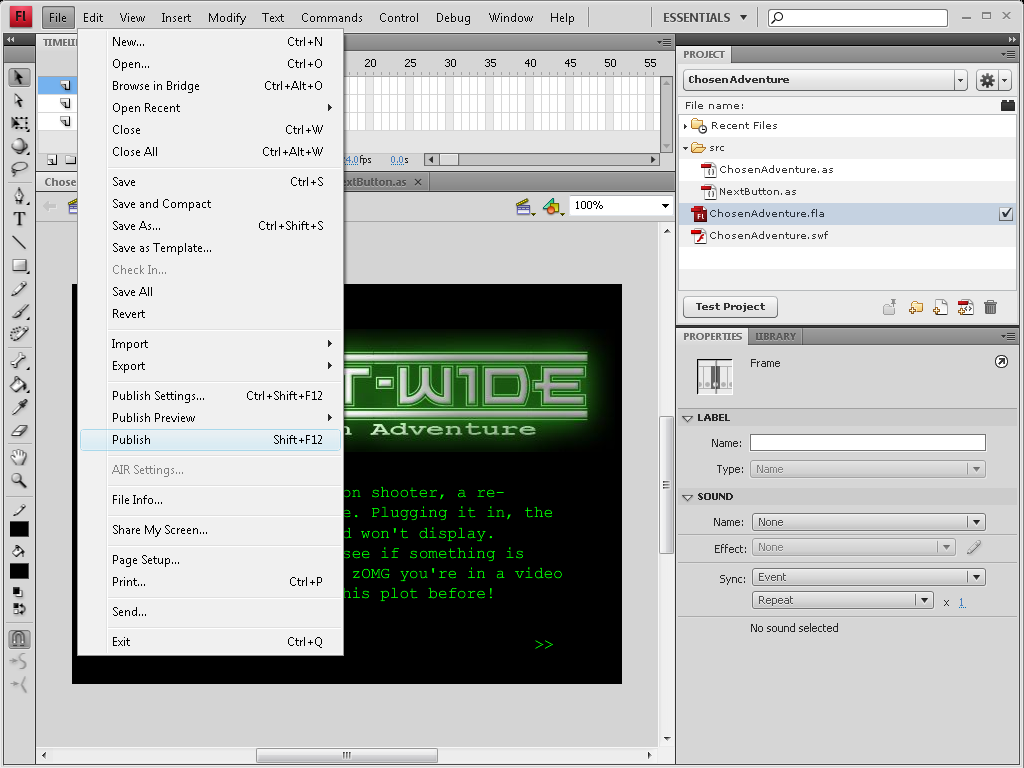
Finally, to publish our game, ensure that the checkbox next to our .fla file is checked, and then go to "File" -> "Publish". "ChosenAdventure.html" and "ChosenAdventure.swf" will be generated in the root directory. Upload these to webhosting site of your choice, and send the URL to someone else to play!
Congratulations, you have learned the building blocks of a choose your own adventure game! You can extend the techinques you have learned to expand this skeleton into a full game.
Here are some ways to expand the complexity of this project: