Here you shall find instructions for preparing an Eclipse environment to be used to develop your group component.
A special repository has been created for you to retrieve the requisite projects. Launch Eclipse Europa 3.3. It is recommended that you create a special workspace within which to do your work, although you may continue to reuse your existing workspace within which you are developing your A1 solitaire implementation. For the rest of these instructions, I refer to WORKSPACE as the workspace within which all of these projects are found.
Open the CVS perspective via Window --> Open Perspective --> Other... and select "CVS Repository Exploring". Within the CVS Repositories tab, right-click to select New --> Repository Location...
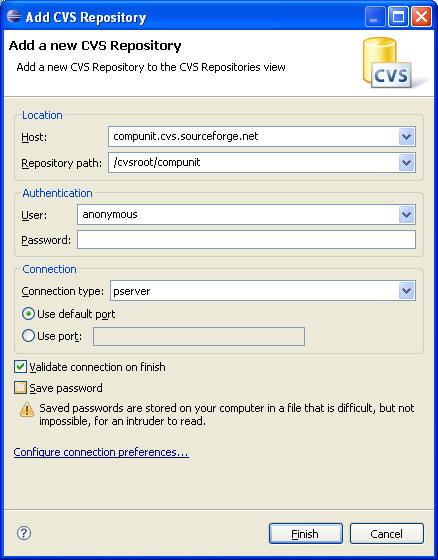
When prompted to "Add CVS Repository" add the information shown below: "compunit.cvs.sourceforge.net" as Host, "/cvsroot/compunit" as Repository path, "anonymous" as the User, and "pserver" as the connection type. Then click "Finish".
You will be able to expand by clicking on the "+" icons until you see the following.
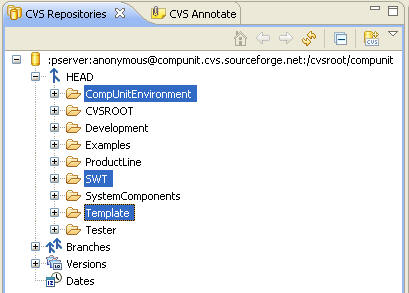
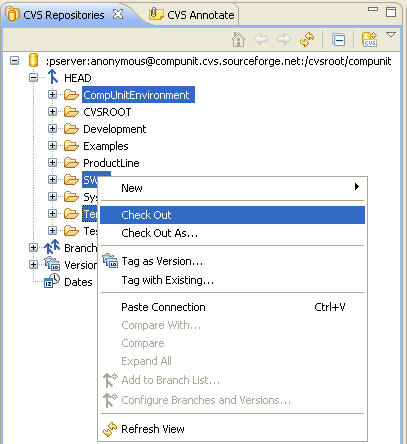
Using the control-key to make multiple selections, select "CompUnitEnvironment", "SWT" and "Template". Then right-click the mouse on one of these selected folders and select entry "Check Out".
This set of projects is the default set that is used for Eclipse development using a Windows PC. If you are instead completing your development on Linux, then you should not check out the SWT project; rather, you should download this ZIP file; if you are developing on Macintosh, then you should not check out the SWT project; rather you should download this ZIP file. Note that both links are mirrored, so you must click on them to visit. Once downloaded, you should create an empty SWT Java project in WORKSPACE and then unzip the contents of these ZIP files into the directory WORKSPACE/SWT. If you have any problems, contact the TAs or the professor.
The "Template" project is a project where you can develop and package your CompUnit components. If you wish to create additional projects, then you must ensure they have the same properties as this "Template" project. To see the properties, select the "Template" project and right-click to select menu item Properties. Select the Java Build Path, click on the "Libraries" tab, and observer that it depends on the JAR file "CompUnitEnvironment/foundation/foundation.jar".
Applications composed from CompUnit components execute within a Container
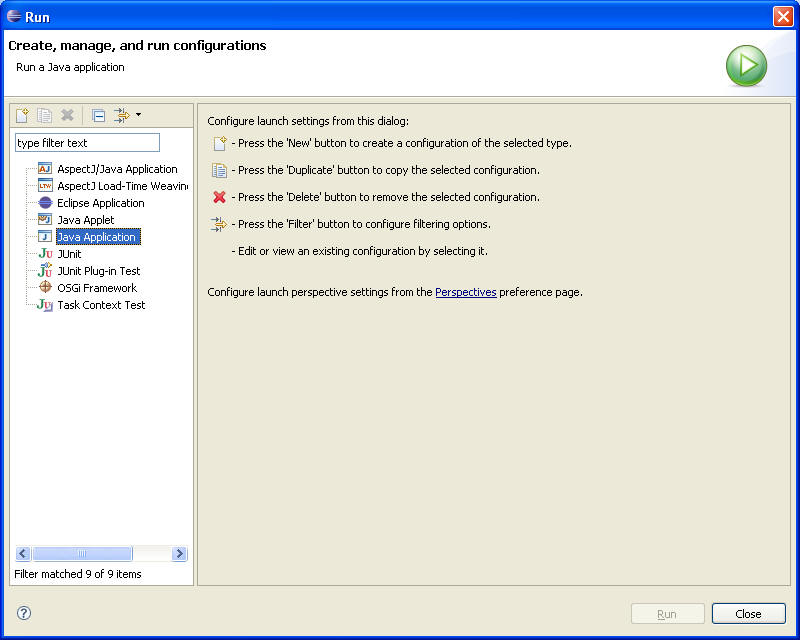
known as Foundation. We must launch the executable as follows. Select Run -->
Open Run Dialog... and select Java Application. Then press 'New'
button  .
.
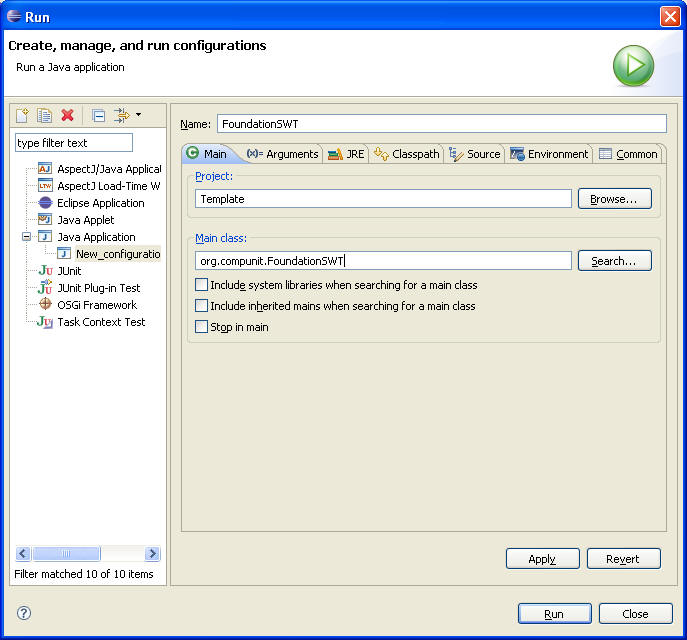
On the ensuing "Main" tab, enter "FoundationSWT" as the Name, "Template" as the Project and "org.compunit.FoundationSWT" as the Main class.
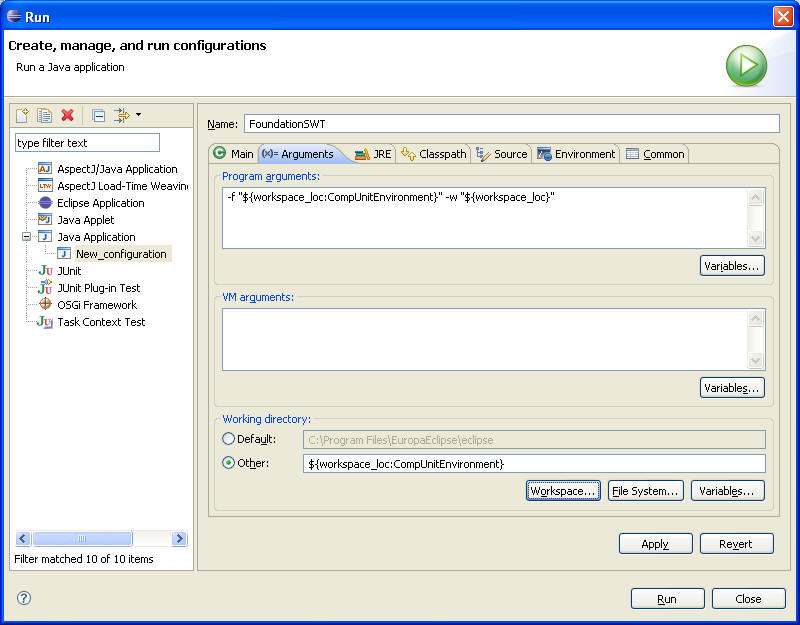
Click on the "Arguments" tab and enter -f "${workspace_loc:CompUnitEnvironment}" -w "${workspace_loc}" as the Program arguments (note the use of quotation marks).
Select "Other" as the Working directory and enter ${workspace_loc:CompUnitEnvironment} as the value.
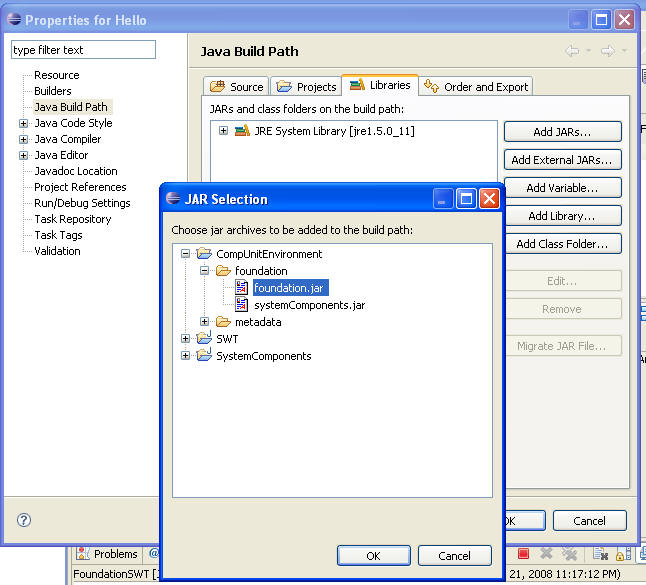
Now click on the "Classpath" tab. Select the "User Entries" line and click on button "Add JARs...". Add the following Jar files: CompUnitEnvironment/foundation/foundation.jar and CompUnitEnvironment/foundation/systemComponents.jar.
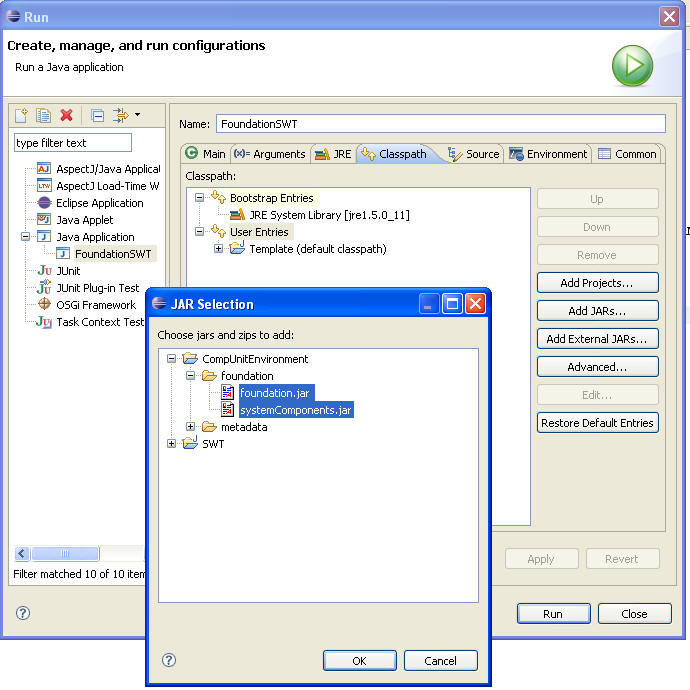
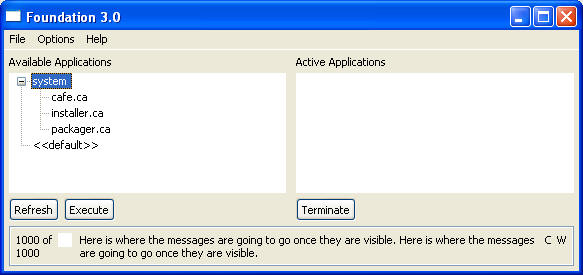
Once all values are set, click on Run. You will see the following window if you are successful.
Read the Word Document found in CompUnitEnvironment/docs/CompUnit.doc for introductory information on the component model that you are going to be using.
Create a new Java project "Hello" in the workspace. You need to connect this project to know of the CompUnit interfaces. This is done by selecting the "Hello" project and viewing its properties (right-click and select menu item Properties). Select the Java Build Path, click on the Libraries tab, and click on the "Add JARs..." button. Browse to the "CompUnitEnvironment/foundation/foundation.jar" entry and select it to be added.
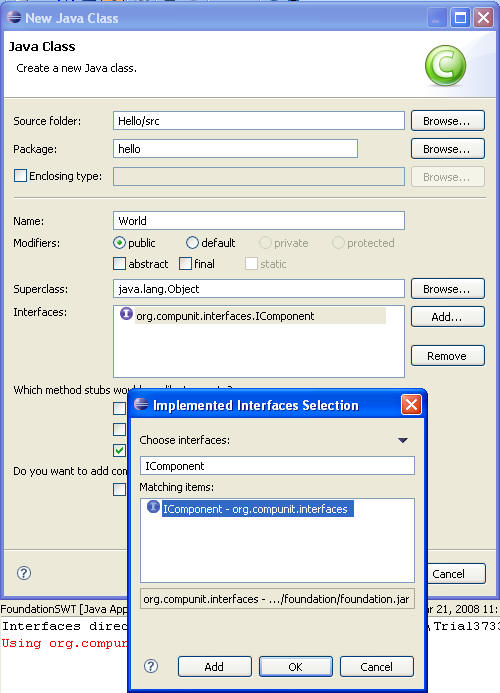
Create the package "hello" and in this package create the class "World" using the New --> Java Class wizard. Click on the "Add..." button to select the implemented interface "org.compunit.interfaces.IComponent" which is defined by the CompUnit standard.
You will see the following default implementation which you will need to modify.
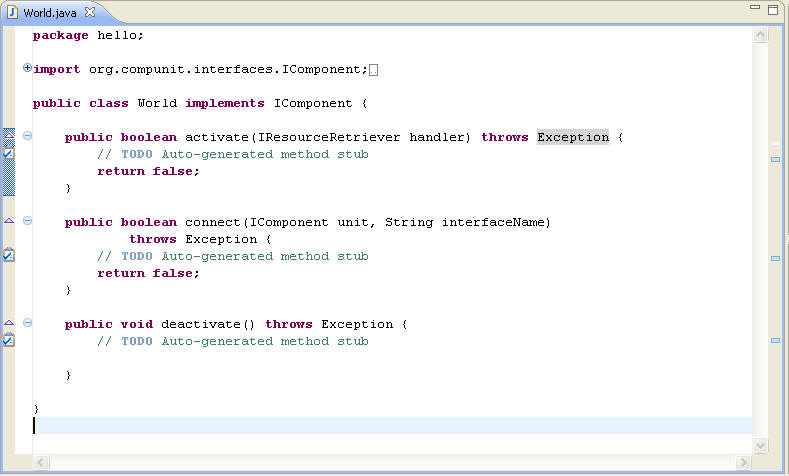
Modify this code as follows
We need to package this component, install it, and construct a component assembly file to execute it.
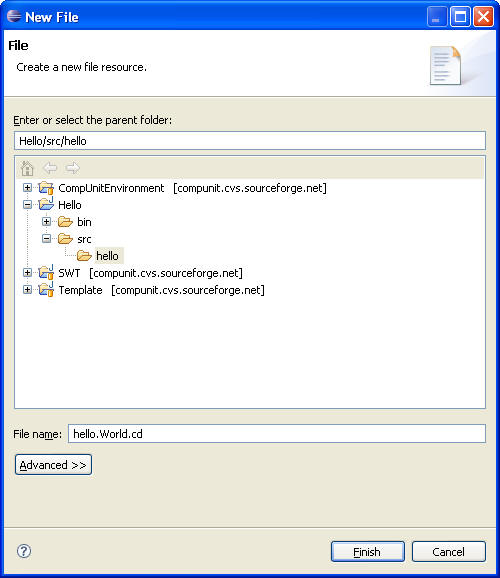
To package the component, you must create a component definition file (.cd) whose name exactly matches the primary class for the component. In this example, hello.World is the primary class. Select the "hello" package, and right-click to pull up the menu item New --> File. Enter the file name "hello.World.cd", as shown below.
Once created, type the following contents:
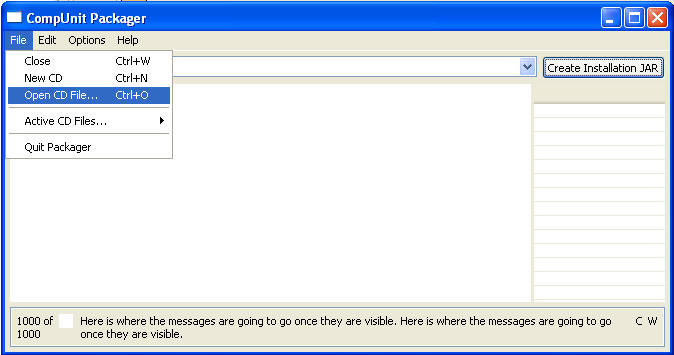
You are now ready to package this component. From within the "Foundation 3.0" window which you launched earlier (relaunch if you have since closed it) select the file system/packager.ca which represents the packager application and click on the Execute button. Select "File --> Open CD File..." and browse to open the WORKSPACE/Hello/src/hello/hello.World.cd file.
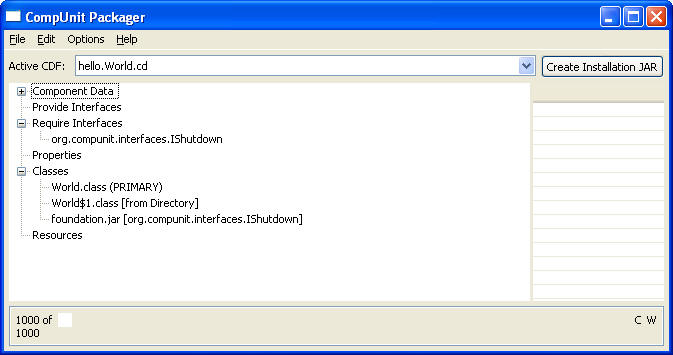
You will see packager load up the following information:
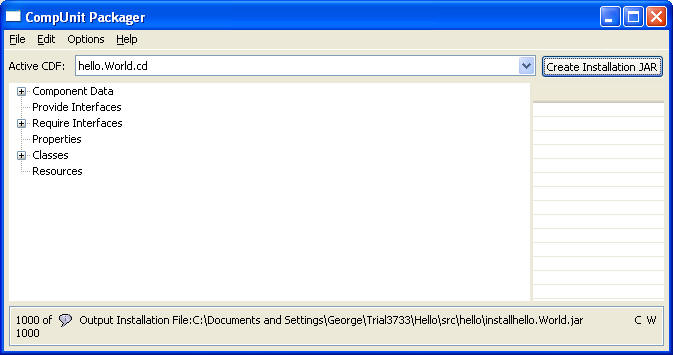
Click on the "Create Installation JAR" button to package the component. You should see:
Now that you have packaged the component, it is time to install it.
Go back to the Foundation 3.0 window and select system/install.ca and click on the execute button. Click on "Browse..." and browse to the file "installhello.World.jar" which was created as part of the final packager step. It is found within the Hello/src/hello directory. You will note that this component is not yet installed. Click on the "Install" button to install it into the CompUnitEnvironment project.
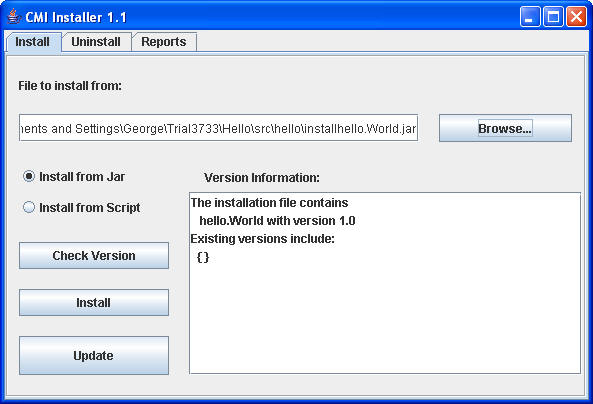
You will see the following successful window, which you must close before continuing.

The Hello World application is assembled from this single component. To complete the application, we use the Component Assembly File Editor (known as Cafe). Within the Foundation 3.0 window, locate system/cafe.ca and click on the Execute button.
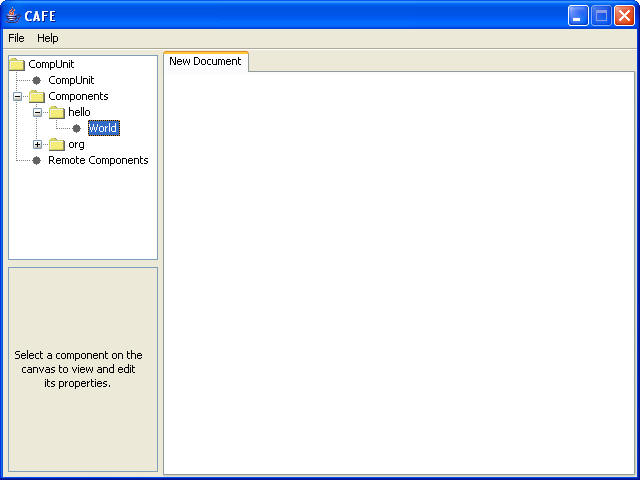
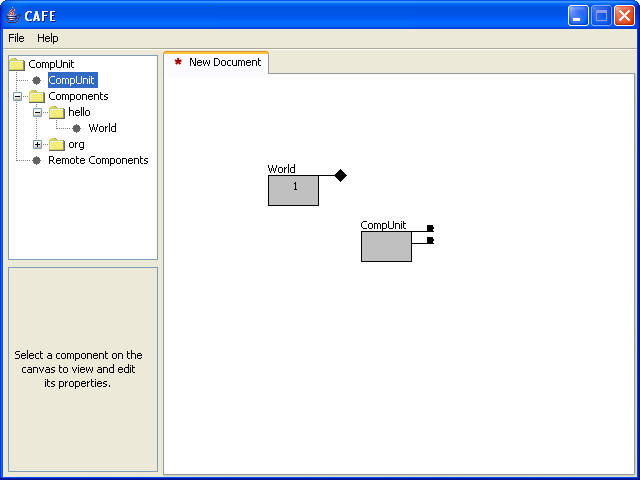
You now can proceed to assemble an application from the installed components. Expand the "+" components folder until you find the hello.World component. Double click on the "World" icon to create a "World" component image in the document area. You will also need to double-click on the "CompUnit" child of the CompUnit folder to gain access to the IShutdown mechanism. Drag both of the images to the center of the "New Document" area for better viewing.
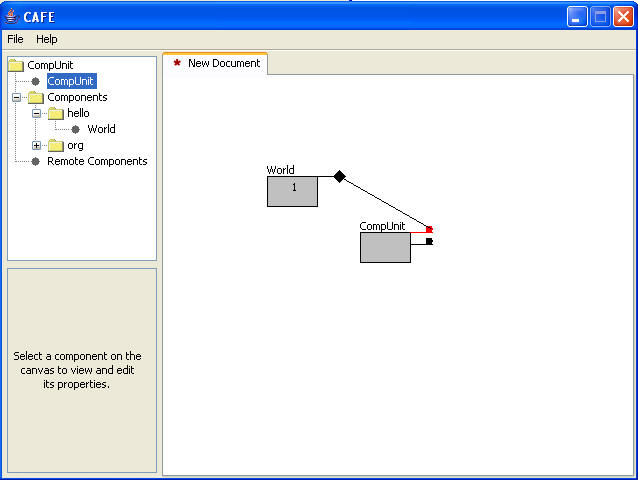
The only capability that component World needs is for someone to provide the IShutdown interface that it needs. To make this happen, click with your left mouse on the diamond emanating from the World component and then drag to the red-hilighted circle emanating from the CompUnit rectangle. When you release the mouse, the connection will be made.
You can now save the application. Select File-->Save and browse to the directory WORKSPACE/CompUnitEnvironment/applications and save as the file "helloWorld.ca".
Go back to the Foundation 3.0 window and click on the "Refresh" button to see the "helloWorld.ca" file which appears underneath the "<<default>>" entry. Select it and click the "Execute" button. You should see the following window appear on the screen:

Amazing. It only took about 1 hour to write the "Hello, World" application. Note if you close the window, you will see that the application still appears within the Foundation 3.0 window. In that window (on the right under Active Applications) select the application and click on the "Terminate" button. Recall that we had configured the button to exit the application, so rerun the application and this time click on the "Hello, World" button. Note that the window disappears and the application is removed from the Active Applications area.
We have really just begun to scratch the surface of the CompUnit technology. This first step will make it possible for you to develop your own CompUnit components which will be assembled to form the class group project.