Description: This tutorial walks you through the process of running Eclipse for the first time.
Launch the Eclipse application. The very first time that you run Eclipse, you will be asked to enter in a repository location. Its default value is within the "C:/Program Files" directory on your PC; I recommend that you change this to be located on your CCC unix account (which can be access by mapping your network drive). On the lab machines, we recommend you map your R: drive to your unix account, since that is how the machines are configured.
Now, the very first time that you run Eclipse, you will be shown a "Splash screen" with several colorful icons. In the upper right corner of the window you should click on the icon that says "Workbench: Go to the Workbench".
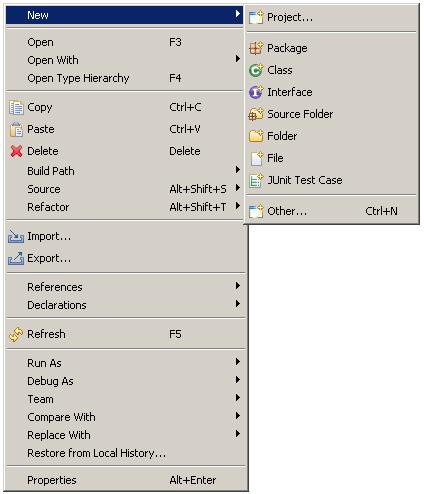
Within the Package Explorer, right click to bring up a menu, and select New-> Project...
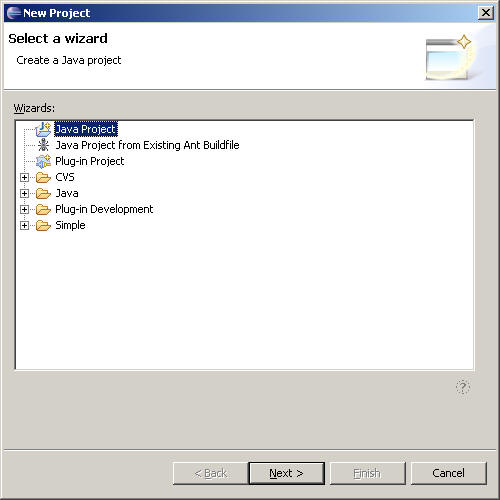
The entry "Java project" should already be selected (if not, select it now). Click on Next.
This brings you to a New Java Project dialog. You should do two things. First, enter in a valid Project Name (in this case I have entered Example). Then under the JDK Compliance sub-panel, select "Use a project specific compliance" radio button, and then select "5.0" from the pull down list. If this entry does not exist, you have to download and install the latest JDK version onto your home computer.

You will now see in the package explorer a new Project (called Example) as follows:

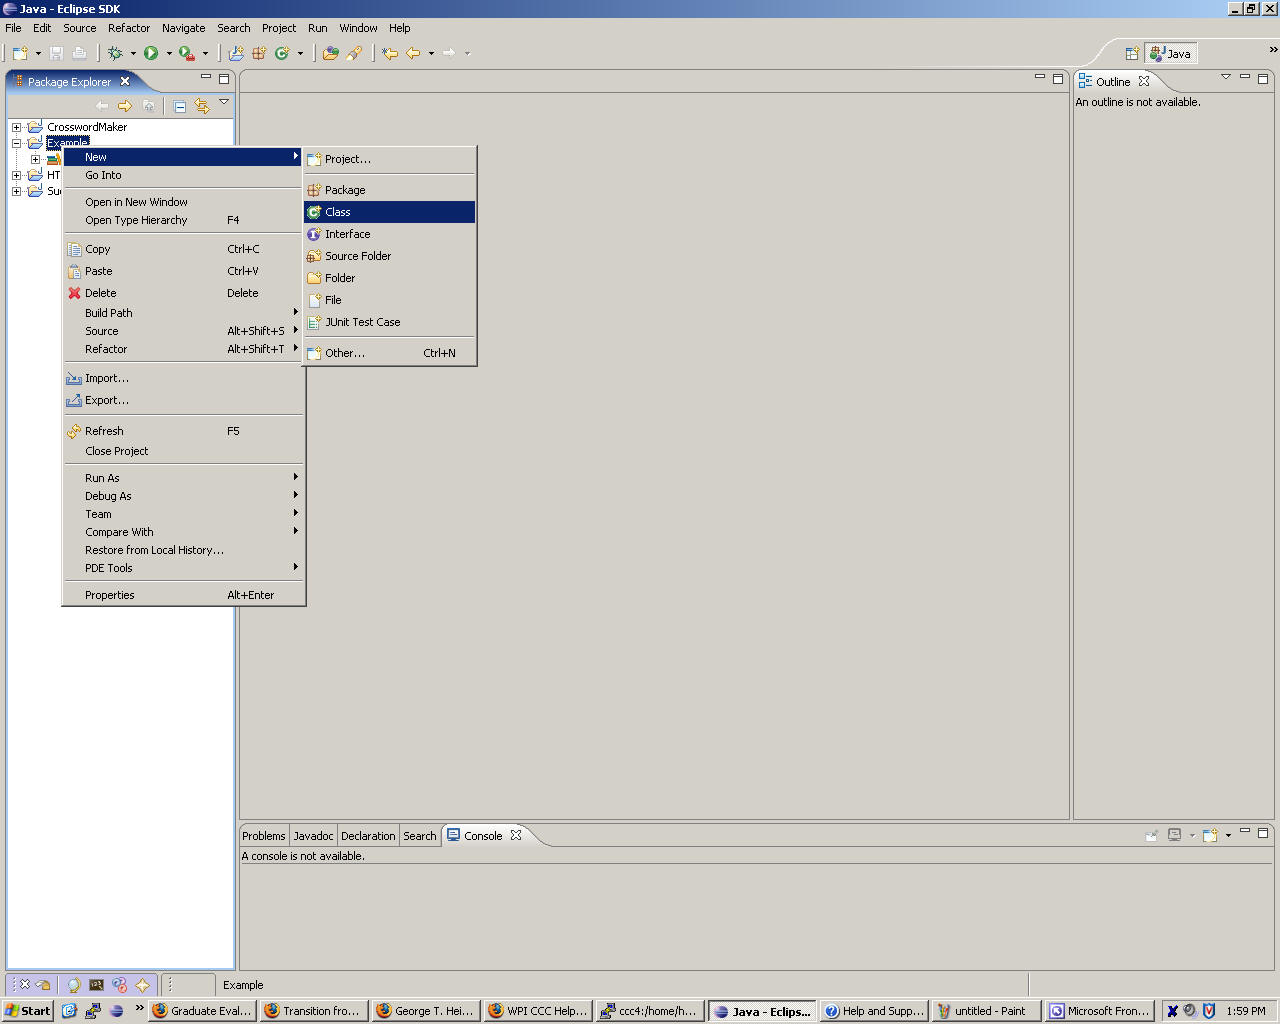
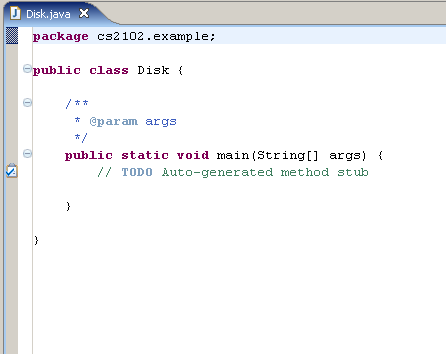
For your first task, you will create a Java program that computes the area of a disk with radius r. You may recall that this was a small program you had designed for CS 1101. To start, we will need to add a Java class to the project. Right-mouse click on the Example project and select menu item New -> Class.
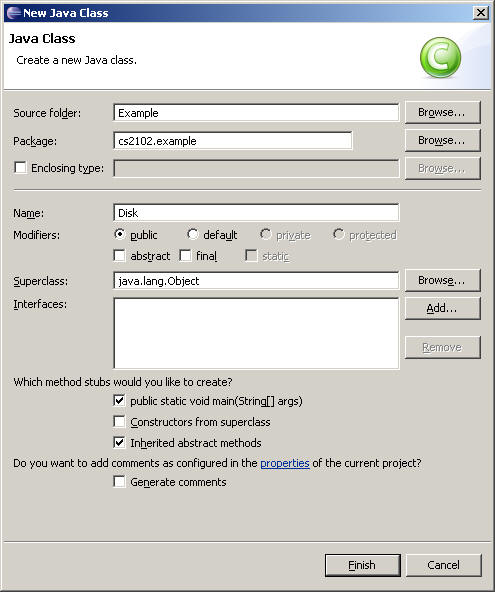
You should now see the "New Java Class" dialog. You need to (a) enter a package name to distinguish this Java class from others you will write. Note how I entered cs2102.example in the text field labeled Package; (b) enter a Name for the class, in this case Disk.
Once you click on Finish, you will see the outline of a class generated for you, as shown below:
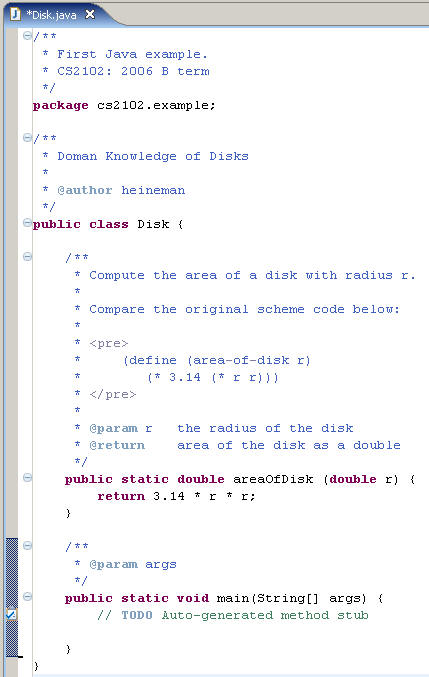
Your first program declares that there is a new class called Disk and that it belongs to the package called cs2102.example. As you will soon realize, the "{" .. "}" curly braces are used to separate different segments of your program. We now move forward to define the desired functionality, namely a function that computes the area of a disk with radius r. Modify the program by inserting text in the Disk.java source file so it looks like this:
As you type the code above, you will notice that Eclipse tries to "help" by watching what you are typing. Don't be alarmed! Over time, you will become very comfortable with this feature (much like the auto-spell feature in Microsoft word detects typos immediately) and you will be more productive because of it.
You will note that this program has an empty main entry point. Modify it now as follows:
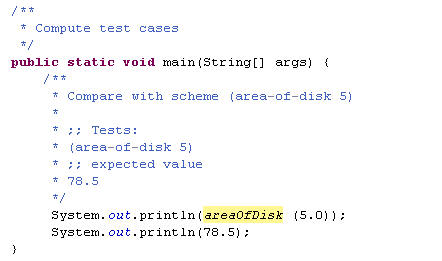
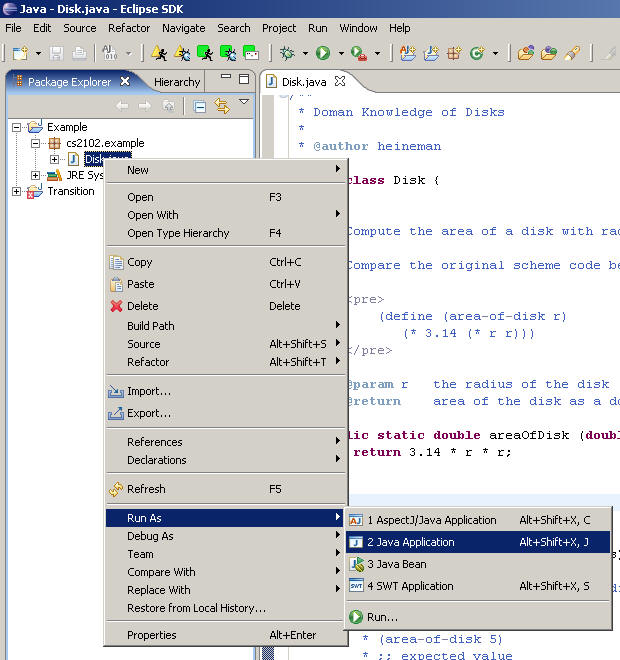
Note how you have created the main entry point and it uses the defined method 'areaOfDisk'. Once you see the code as above (that is, without any syntactic errors) you can execute the code as follows. With the right mouse, click on the "cs2102.example.Disk.java" icon and select the Run As --> Java Application menu item:
In the console window at the bottom of your Eclipse window, you will see the output as:

This shows that the expected output is the same as the actual output.
Throughout CS2102 I will stress the importance of designing test cases incrementally as you design your program. This technique helps you develop more robust code by decomposing the complex process of testing into manageable chunks. Eclipse, once again, can help because it comes pre-packaged with the well-known JUnit testing framework. The essential idea is that each time you add functionality to your program, you also add a test case to determine whether you succeeded in your sub-task. For more information on using JUnit and Eclipse, read here.
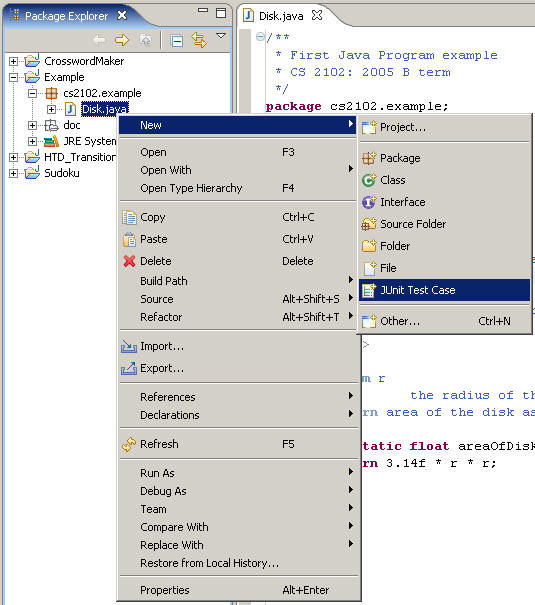
Select the Disk.java source file from the Example project and right click to find the New->JUnit Test Case option.
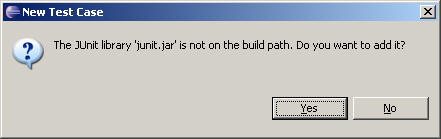
When you exercise this option for the first time, Eclipse will prompt you with a question, to which you answer "Yes".
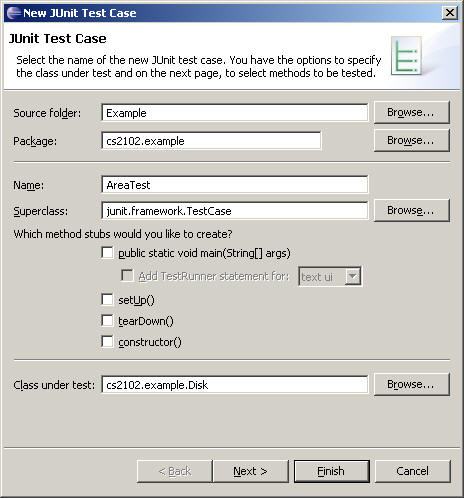
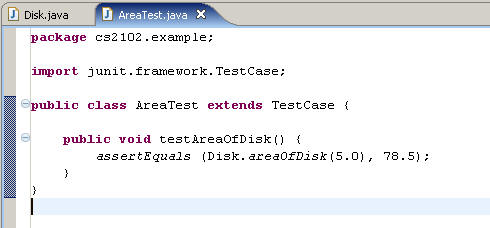
A New JUnit Test Case wizard appears. Change the Name of the test case to "AreaTest" because that is the functionality we intend to test; when done, click on Finish.
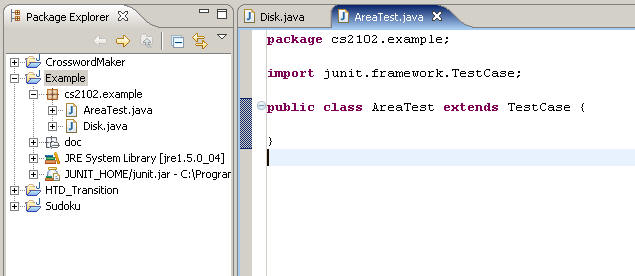
You should now see some added files to your Eclipse project.
We must now construct the details of the test case AreaTest. Change its text to be as shown below. JUnit tries to be as simple and helpful as possible, and we do not need to discuss all of its complex details here. What you need to know is that
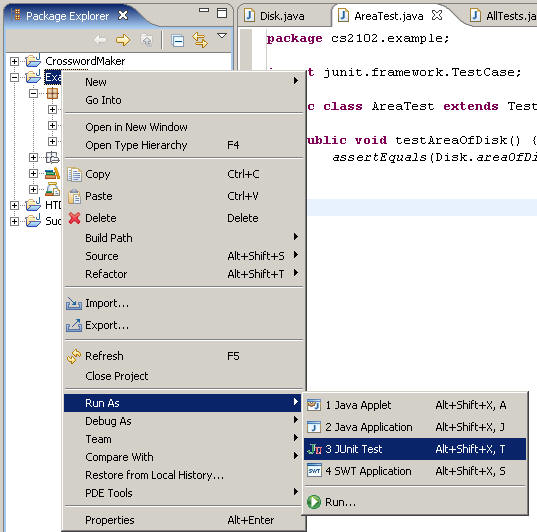
We are ready to test our first application. Right-click on the Example project and select "Run As -> JUnit Test".
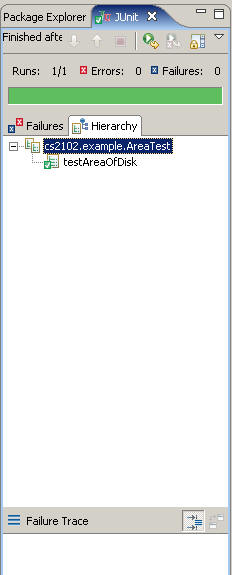
You will see a new tabbed panel appear on the left, containing information about the trace runs.
Are we satisfied that this test is sufficient for the Disk.areaOfDisk method? I know there needs to be more. Try the following set:
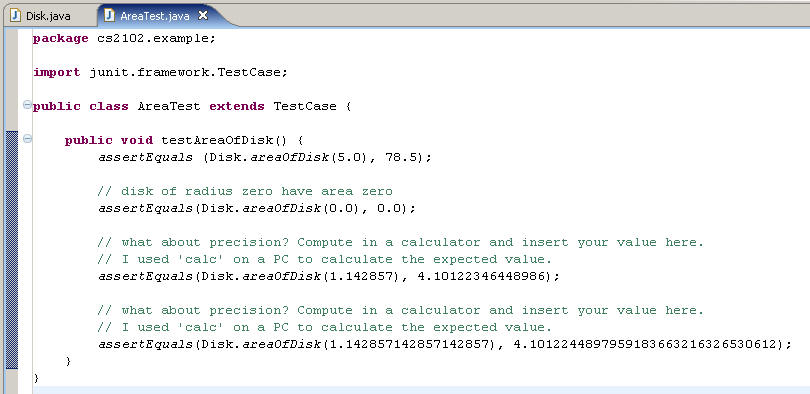
Now when you run the tests, the final one fails. Why is this? Because floating point precision is too imprecise to store the actual value as requested by the user.
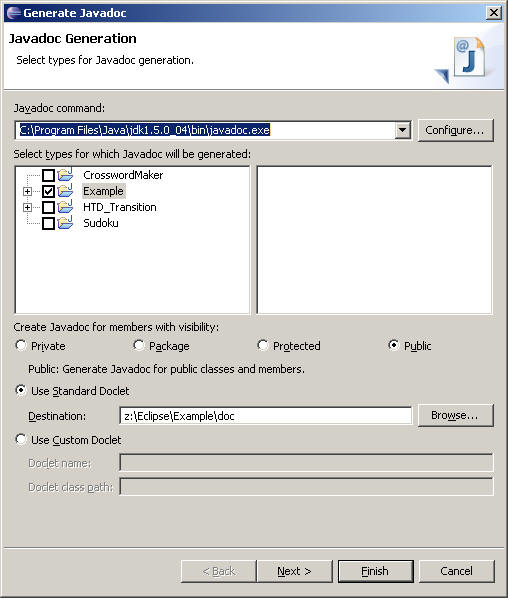
The first time you generate Java documentation, you will need to configure the javadoc wizard.Click on the "Configure..." button and select the location on your PC where the javadoc executable is found (typically $JAVAHOME/bin/javadoc) and then click "Finish". By default, a 'doc' folder will be created within the Example project (you can change if you desire, but I recommend to keep as suggested).

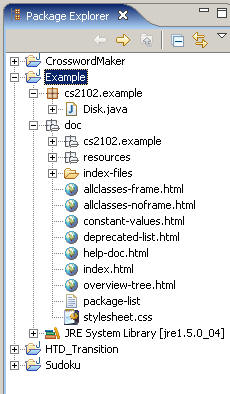
In the console window at the bottom of Eclipse, you will see a report of the progress of Javadoc. once completed, a 'doc' folder will appear within the package explorer on the left side of the screen.
Double click on the "index.html" file to see the auto-generated Javadoc HTML web pages. First you will see a top-level description of the cs2102.example package:
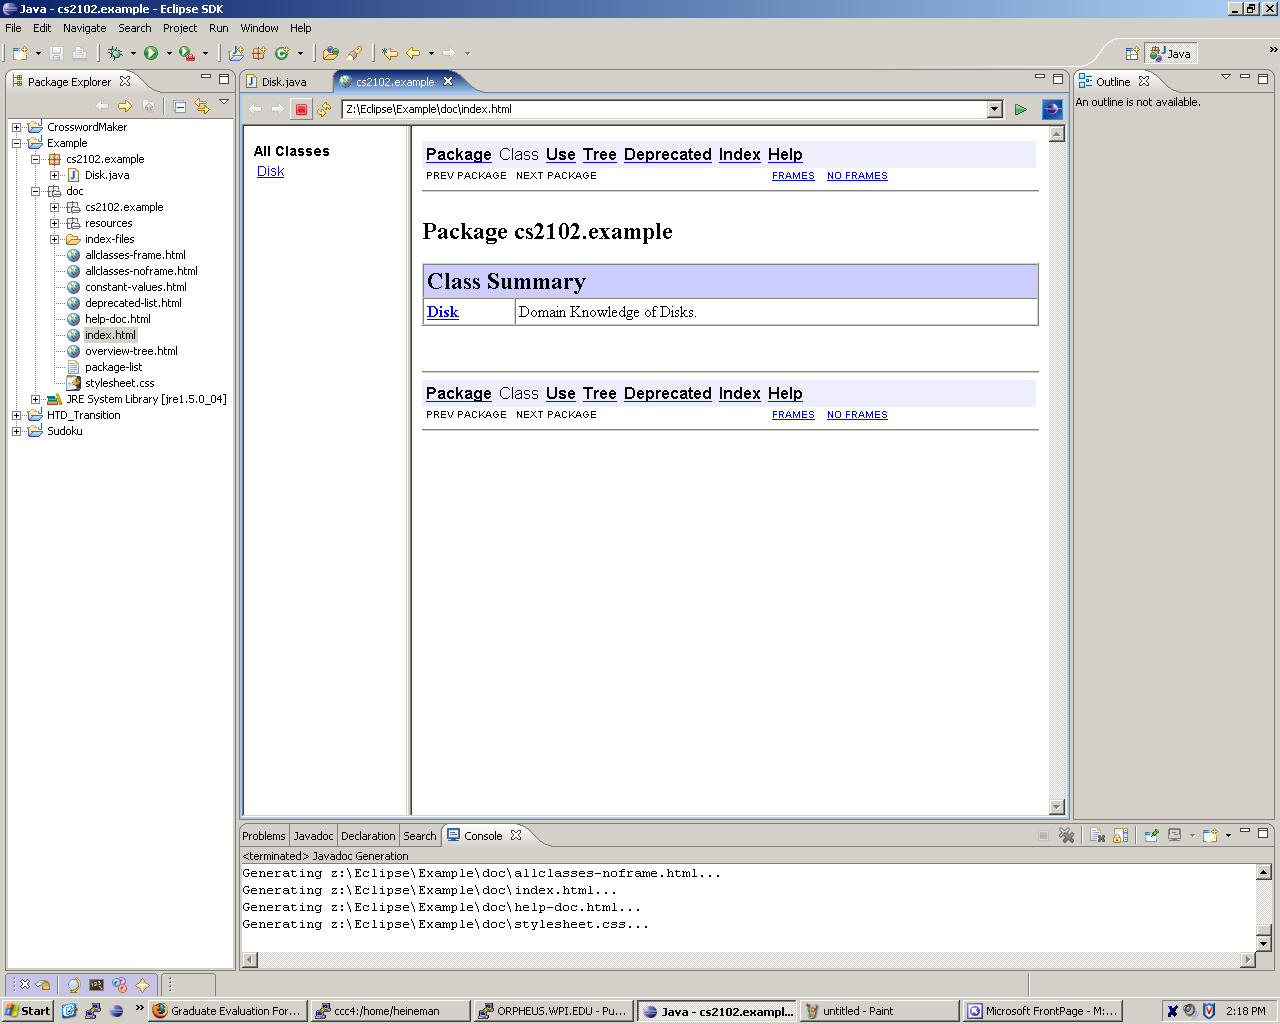
Then click on "Disk" to expose more detail about the Disk class and its methods. Look for the areaOfDisk method to see how javadoc extracts information as contained within the Java comments to be shown "as is" on the HTML web pages.