![]()


The aim of this project is to get you familiar with Android apps
that use the Android Camera and Images. You may complete the
project either in groups of up to 3 students or alone.
You may discuss the projects with other classmates or on myWPI but
each group (or student working alone) will submit their own code for the project.
Complete the following steps and submit the project at the end.
Step 1: Learn how to run your apps on a real phone Thus
far you have run all your programs on the Android Studio Emulator. The
emulator is not able to run programs requiring sensors. So you will
need to run this project on a real phone. A good video to learn
how to connect and use a real smartphone with Android Studio is
located [ HERE ]
Step 2: Download code for Chapters 19 and 20 The following
zip file available [ Here ] contains all the
working programs from the Android Nerd Ranch book. Download it,
unzip it and find the complete solution for Chapters 19 and 20.
Step 3: Convert code for Chapters 19 and 20 to Android Studio
The Android Nerd Ranch code was written using the Eclipse IDE. It's fairly
easy to import Eclipse projects into Android Studio and use them. Here's
a good video on how to import Android Eclipse projects
[ HERE ]
Step 4: Study the code for Chapters 19 and 20 of Android Nerd Ranch
You will be required to extend and modify the code for chapters 19 and 20 for this
project. Read chapters 19 and 20 and also study the complete code. Run the
code for both chapters on your phone and make sure you understand the code.
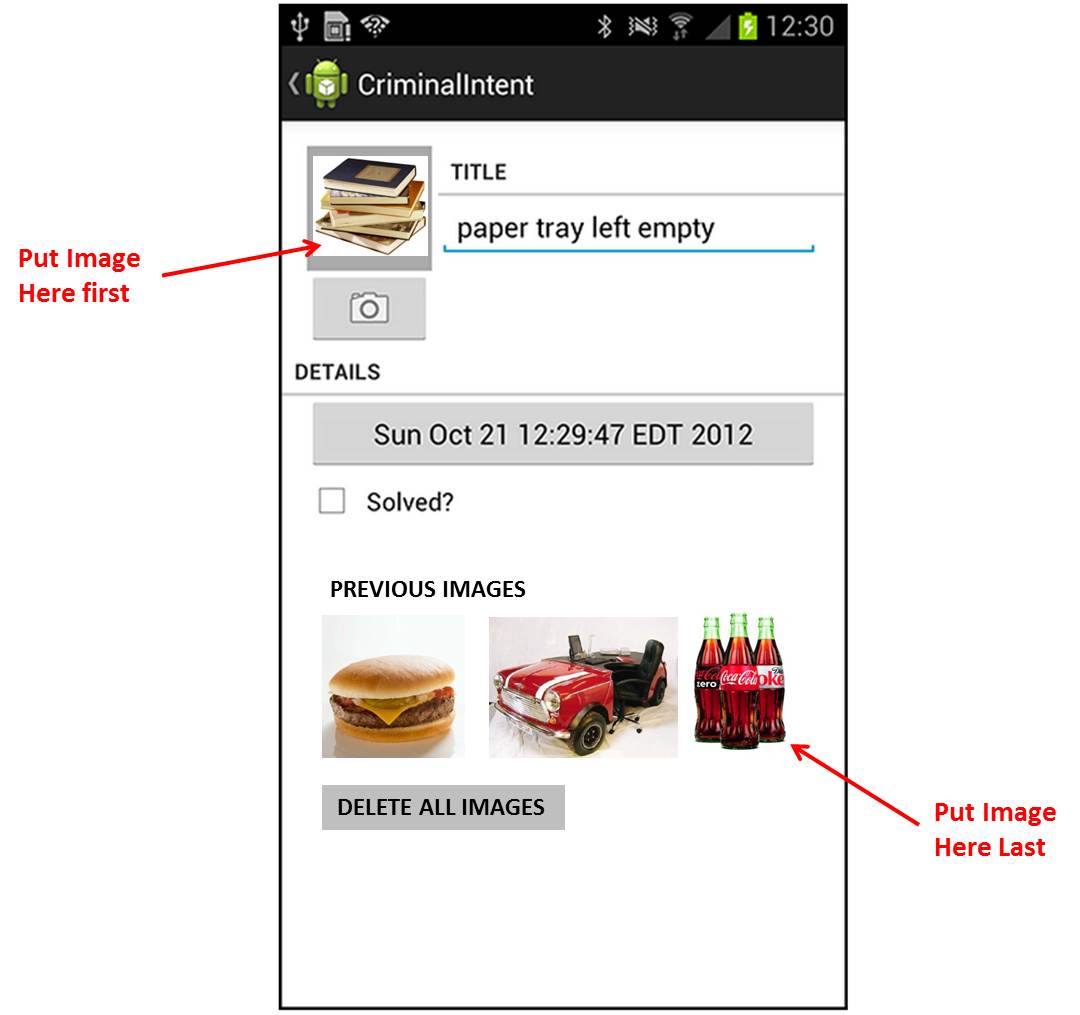
Step 5: Make the following Changes to the code:
Step 6: Record session of running code on real phone
You will submit both your APK (compliled Android program) and a video
of you running the app on your phone. You will need to learn how to
record a session of you running the app on your phone. Here's a
good video on how to do Android screen capture
[ Here ]
![[Return to the WPI Homepage]](../../../../../Emmanuel_files/seal.gif)
![[Return to CS Homepage]](../../../../../Emmanuel_files/new_cs.gif)