|
Lab 5 (10 points) |

Laboratory
Assignment #5 —
More about Using Microsoft Visual Studio
Due: at 11:59 pm on the day of your lab session
Objective
· To increase your familiarity with Microsoft Visual Studio for C++ programs.
Introduction
This week, you will use an on-line Microsoft tutorial to reinforce what you learned last week about Visual Studio. While this tutorial is a little repetitive, it is intended to expose you to more of the introductory features of Visual Studio.
Getting Started
1. Sign the attendance sheet.
2. In a separate window from these instructions, go to the following URL to start this tutorial:–
http://msdn.microsoft.com/en-us/library/bb384847.aspx
This web page is the start of a five-step tutorial with the following elements
· Projects and Solutions (C++)
· Building a Project (C++)
· Testing a Project (C++)
· Debugging a Project (C++)
· Deploying your Program (C++)
You may refer to the notes below as you work on this lab.
3. Go through the five steps. In the first step, when it asks you for a place to store your project files, it might not let you store onto your Toaster drive. In this case, simply save to a folder on your desktop (or in My Documents) and move it later (after finishing this lab)
4. In the fifth step, you will create an installer to install the program you developed in this tutorial. However, you might not be able to install the program on a lab machine. Instead, take the installer files to some other PC where you can install it.
5. When you finished, clean your project and then zip together all of the solution files and submit using the following command on the CCC machines:–
/cs/bin/turnin submit cs2303 LAB5 <your zip file>
Be sure to put your name in a comment at the top of each of your header and code files.
See you next week!
Note: If you are already proficient in Visual Studio, you may earn credit for this lab by submitting a Visual Studio Solution containing a Project called PA4 that implements Programming Assignment #4. Although your PA4 does not yet have to be fully working, it must compile without errors, and it must show the classes, data members, and methods of your PA4 program.
Solution vs. Project
Originally
in Visual Studio, the fundamental unit of work was the Project.
A Project comprises a project
configuration file (which serves the same role as a makefile), a set of header files, a set of source
code files, and possibly a set of resource files. Modern versions of Visual
Studio introduce the concept of Solution, which
is a collection of interrelated projects. In this tutorial, you will construct
a project called Game as part of a Solution of the
same name. In the fifth step of the tutorial, you will construct another
project called Gameinstaller as part of the
same Solution.
Notes on the Tutorial
When you create a new project, you should see a dialog box something like this:–
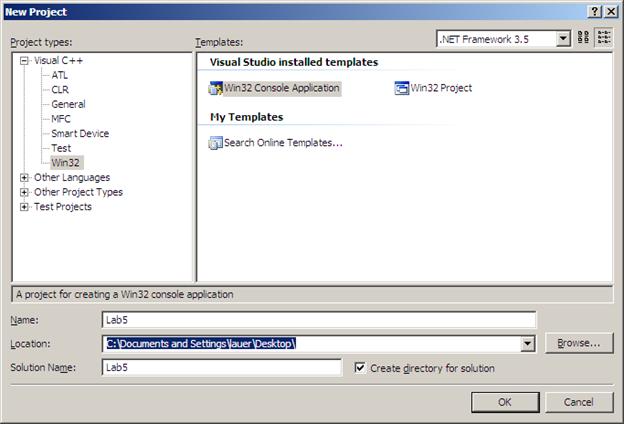
Make the selections as shown.
After you click OK, you will get a dialog box for the Win32 Application Wizard. In the left panel, click Application Settings. This will bring up the following:–
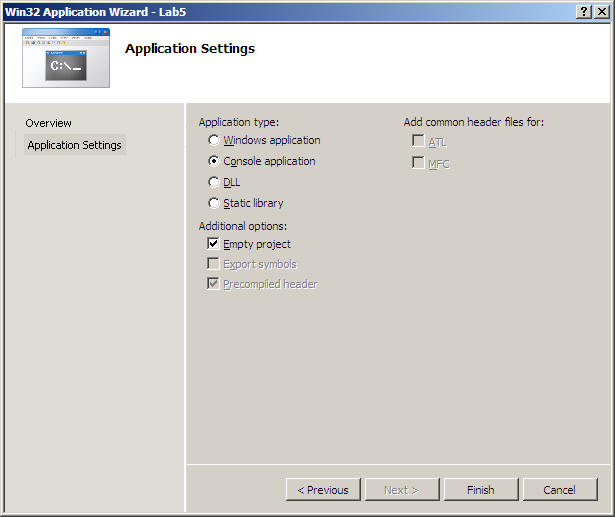
Be sure to check the Empty Project check box, or your will end up with several unexpected files in your project.
If you have done the right thing, you should get a Solution Explorer panel on the left side of your Visual Studio screen. The Solution Explore should contain the following:–
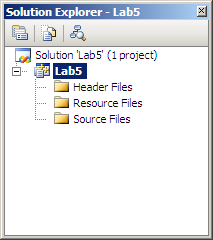
Follow the instructions of the tutorial and create a header file in the Header Files folder of the Solution Explorer and two .cpp files in the Source Files folder.
Once you have created these files, click on the Class View tab at the bottom of the Solution Explorer panel. You now have a view of all of the classes in your program, including their members and methods. This is an extremely useful tool in Visual C++ and resembles the following
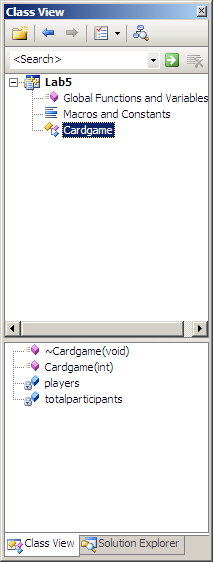
Double-click on each of the members in the bottom half of this panel
Debugging
When you get to the Debugging step of the tutorial, and you are stopped at a breakpoint, look at the bottom of your Visual Studio screen. You should see something like the following at the lower left panel:–
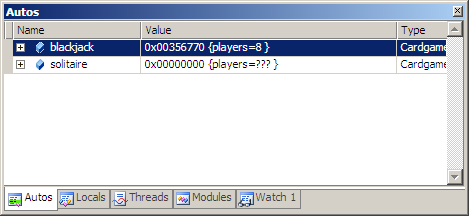
The tabs of this panel give you views into the various parts of your program, including the Watch window that you set up as part of the Debugging step of the tutorial.
Likewise, at the bottom right of your screen, you should see a panel resembling the following:–
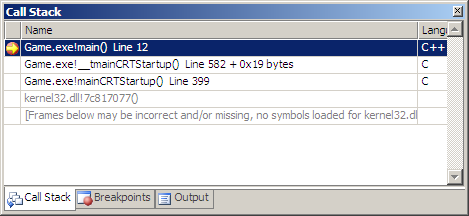
This shows you the call stack of your program where it was stopped at the breakpoint. Another tab lists the breakpoints in your program, so that you can manage them via the graphical interface. The third tab shows the output of the compiler and loader.
Note that the panels at the bottom of the Visual Studio window rearrange themselves depending upon what you are doing — i.e., compiling, debugging, or executing.
Window Arrangement
Any of the panels can be “undocked” and turned into floating windows, thereby allowing you to arrange your graphic display however it suits you. You can also move them in a different configuration. To restore the default arrangement, select Reset Window Layout in the Window menu.
There many more useful features of Visual Studio to help you develop your program or project. Explore them when you have a chance.